
Campfire Cones: A Sweet Treat for Outdoor Adventures

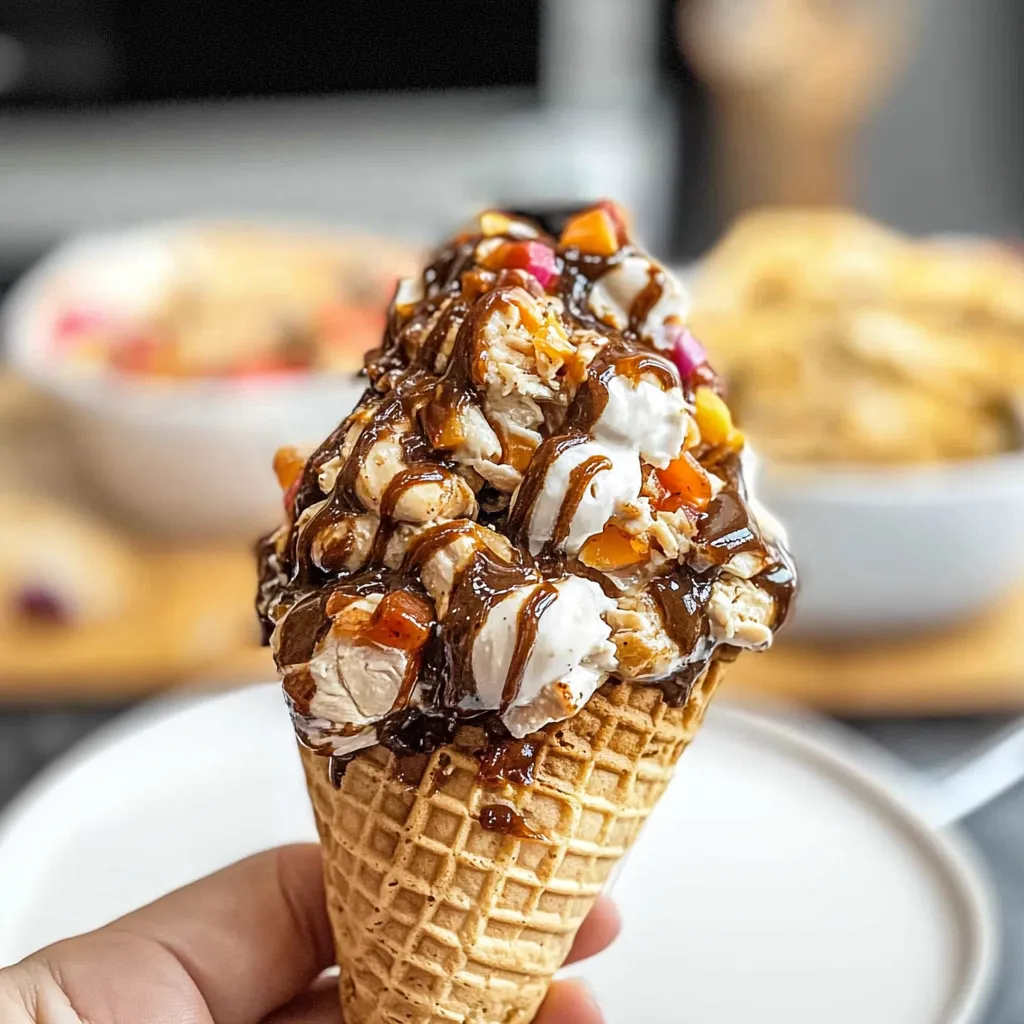
When it comes to outdoor cooking, nothing beats the thrill of gathering around a crackling fire, and Campfire Cones are the perfect treat to elevate any camping experience. Picture this: a delicious ice cream cone filled to the brim with your favorite sweets, wrapped in aluminum foil, and roasted over the flames until gooey perfection is achieved. The melding of warm chocolate, toasted marshmallows, and fresh fruits creates an irresistible explosion of flavor that’s sure to please both kids and adults alike.
The beauty of these cones lies in their versatility. You can customize them with an array of fillings, from peanut butter and banana to Nutella and strawberries, ensuring everyone can find their favorite combination. For the adventurous, consider sprinkling in some crushed graham crackers or a hint of sea salt for that extra crunch. Remember, achieving the ideal result involves carefully monitoring the heat to avoid burning. Get ready to impress friends and family with this simple yet creative campsite dessert that’s destined to become a beloved tradition!
Ingredients for Campfire Cones:
To create scrumptious Campfire Cones that serve 8–10 people, gather the following ingredients. These delightful treats offer a fantastic way to enjoy an outdoor dessert, making use of sweet ingredients that melt perfectly over an open flame.
Main Ingredients:
- 8 large waffle cones
- 2 cups mini marshmallows
- 2 cups semi-sweet chocolate chips
- 1 cup chopped fresh strawberries (or your choice of berries)
- 1 cup sliced bananas
- ½ cup peanut butter (or almond butter, for a nut-free option)
Optional Toppings and Variations:
- ½ cup coconut flakes (sweetened or unsweetened based on preference)
- ½ cup granola for added crunch
- ½ cup crushed graham crackers for a s’mores-inspired twist
- 1 teaspoon cinnamon for a warm flavor enhancement
- ½ cup butterscotch chips for richer sweetness
Additional Fruits and Mix-Ins:
If you want to customize your Campfire Cones, consider these complementary fruits and mix-ins:
- 1 cup diced apples (tossed in a little lemon juice to prevent browning)
- 1 cup blueberries for a burst of flavor and color
- ½ cup raisins or dried cranberries for chewier texture
Serving Essentials:
- Aluminum foil (sufficient for wrapping the cones)
- Skewers or long sticks for roasting over the fire
- Napkins for drips and sticky fingers while enjoying your treat!
When preparing these delightful Campfire Cones, you have the freedom to mix and match your favorite ingredients to suit your taste buds. Feel free to get creative with the fillings for a unique dessert experience under the stars.
How to prepare Campfire Cones:
Follow these clear steps to make delicious campfire cones that everyone will love!
Gather Your Ingredients and Tools
Start by collecting all the ingredients you will need for your campfire cones. Make sure you have waffle cones, mini marshmallows, chocolate chips, and fruit like strawberries or bananas.
You’ll also need aluminum foil, a skewer or stick, and a campfire or grill for cooking.
Prepare the Waffle Cones
Take a waffle cone in your hand and gently open the top for filling. Be careful not to break the cone.
Once opened, it’s time to layer your ingredients. Begin by adding a handful of mini marshmallows inside the cone.
Add the Chocolate and Fruit
Add a generous amount of chocolate chips next. Feel free to mix in some fruit, like diced strawberries or banana slices, for added flavor.
Ensure you pack the ingredients well, but leave some space at the top to prevent spilling.
Wrap Each Cone in Foil
Next, take a sheet of aluminum foil and lay it flat on a surface. Place the filled cone in the center of the foil.
Carefully fold the foil around the cone, ensuring it is tightly sealed. This helps trap heat and melt your ingredients evenly.
Prepare the Campfire or Grill
If you are using a campfire, guide some seasoned firewood into a crisscross pattern. Allow the wood to burn and create a nice bed of hot coals.
If utilizing a grill, preheat it to a medium temperature to create optimal cooking conditions.
Cook Your Campfire Cones
Once your fire or grill is ready, place your wrapped cones on the hot coals or grill grates. Cook them for about 5-10 minutes.
Turn the cones occasionally to ensure even heating. Wait for the ingredients to melt and become deliciously gooey.
Serve and Enjoy
After cooking, carefully unwrap the foil and enjoy your campfire cones while they are warm. Add toppings like whipped cream or sprinkles for extra flair!
Tips for the Perfect Campfire Cones
Maintain the Right Temperature
To achieve the best campfire cones, temperature control is key. Start by building a good base of hot coals rather than flames. This guarantees even and consistent heat. Position the cones at a safe distance from the coals, about 12 inches away. Rotate them occasionally to avoid burning one side. If they start to char, move them further away from the heat. This gentle cooking method allows the ingredients to melt and meld beautifully without burning.
Use Quality Ingredients
The ingredients you choose play a significant role in the final outcome. Opt for high-quality ice cream cones, preferably those that are sturdy enough to hold the filling. The chocolate and marshmallows should also be of good quality; they melt better and provide richer flavors. Fresh fruits will enhance the taste and add texture. Overall, investing in quality ingredients results in a delicious treat that everyone will love.
Substitution Ideas for Dietary Restrictions
When making these tasty cones, consider dietary needs. For a gluten-free option, use gluten-free cones or even fruit cups as a base. If you’re keeping it dairy-free, choose non-dairy chocolate and marshmallow alternatives. Plant-based ice creams work well too. Don’t shy away from customizing your toppings based on preferences. Vegan options are plentiful and delicious!
Creative Variations for Customization
The beauty of these cones is their versatility. You can mix and match fillings based on taste and availability. Consider adding Nutella or peanut butter for extra flavor. You can also include flavored syrups or whipped cream on top. Dried fruits or granola can provide added crunch. Tailor your toppings to suit any palate, ensuring every cone is a tasty adventure!
Embrace the Outdoor Experience
Enjoying the process of making these treats around a campfire adds to the fun. Get everyone involved in filling and cooking the cones. It’s a chance to bond and create lasting memories. Plus, working together encourages creativity as each person can experiment with their own combination of flavors and fillings. Enjoy the cookout while savoring each delicious bite!
Storage Tips for Campfire Cones:
Keeping your campfire cones fresh and delicious requires some attention to storage details. Follow these tips to extend their shelf life and maintain quality.
Optimal Storage Conditions
Store your cones in a cool, dry place. High temperatures and humidity can make ingredients soggy and cause them to spoil quickly. Use airtight containers or resealable bags to protect against moisture and air exposure.
Refrigerating Ingredients
If you prepare your cones in advance, consider refrigerating the filling ingredients. Fruits like bananas and strawberries can brown quicker when exposed to air, so keep them airtight in the fridge until you are ready to assemble the cones. Marshmallows and chocolate chips can also benefit from refrigeration in a cool place, ensuring they stay fresh.
Freezing Campfire Cones
You can freeze assembled cones for long-term storage. Wrap each cone tightly in plastic wrap and place them in a freezer-safe bag. This method helps preserve their texture and flavor for up to two months. When you’re ready to enjoy them, allow the cones to thaw in the refrigerator or at room temperature before warming.
Shelf Life of Ingredients
Understanding the shelf life of each ingredient helps in managing your cones better. For example, chocolate chips can last up to a year if stored away from heat and light, while marshmallows typically last about three months. Fresh fruits may only stay good for a week or so, depending on the type. Keep an eye on their expiry dates.
Assembling Before Serving
Assemble your campfire cones just before serving. This method keeps all the ingredients fresh, crunchy, and flavorful. If you prepare everything in advance, keep the fillings separate and combine them only when you’re ready to roast. This maintains the perfect texture and taste.
Avoiding Common Mistakes
Do not leave campfire cones out at room temperature for long periods, especially if they contain perishable items. Discard any cones showing signs of spoilage, such as an off smell or unusual texture. Always prioritize safety over saving food, especially when serving to family and friends.
By following these tips, you can ensure your campfire cones stay fresh and enjoyable for your next outdoor adventure!
Related Recipes to Campfire Cones
If you enjoy making Campfire Cones, you will likely appreciate these similar treats that also bring fun and flavor to outdoor gatherings. Each of these recipes captures the spirit of campfire cooking with a twist, making them perfect for your next get-together.
First, consider S’mores Skewers. They combine the classic ingredients of graham crackers, marshmallows, and chocolate, but on a stick for easy roasting. This recipe allows for creative variations, like adding fruits or different types of chocolate. The simple act of roasting over an open flame brings that delightful charred flavor, similar to Campfire Cones.
Next up are Grilled Fruit Kabobs. These colorful treats showcase seasonal fruits, such as peaches, pineapples, and strawberries. Simply skewering the fruit and grilling enhances their natural sweetness. Just like with the cones, you can personalize the flavors by adding spices or drizzling honey on top.
You might also enjoy Chocolate Banana Boats. This recipe involves slicing open a banana and stuffing it with chocolate and marshmallows, followed by wrapping it in foil. When placed on the campfire coals, the chocolate melts perfectly with the banana’s warmth, mirroring the gooey goodness found in Campfire Cones. It’s easy to make and offers a fun, interactive dessert option.
Try these recipes for an exciting outdoor experience, as they all bring a satisfying blend of warmth, sweetness, and creativity, much like the original treat. Enjoy exploring these delightful alternatives!
Frequently Asked Questions:
What are Campfire Cones?
Campfire Cones are a delightful and versatile treat typically made by filling a waffle cone with a variety of sweet ingredients. This cone is then wrapped in foil and heated over a campfire or grill, allowing the filling to melt and blend deliciously with the cone. Common fillings include chocolate chips, mini marshmallows, fruit, and peanut butter, creating a gooey, mouthwatering dessert that’s perfect for outdoor gatherings.
How do you make Campfire Cones?
To create these scrumptious cones, start by gathering waffle cones and your choice of fillings. Popular options include chocolate squares, berries, or nuts. After filling the cones, wrap them tightly in aluminum foil and place them over medium heat on a campfire grate or grill. Allow them to cook for about 5-10 minutes, checking occasionally until the fillings are melty and the cone is warmed through.
Can you make these cones indoors?
Yes! While traditionally enjoyed around a campfire, you can easily prepare these tasty cones indoors using an oven or a stovetop grill. Preheat your oven to 350°F (180°C) and place the filled and wrapped cones on a baking tray. Bake for approximately 10 minutes, or until the ingredients are melted and the cone is crispy.
What are some popular filling combinations for Campfire Cones?
The beauty of these cones lies in their versatility. Some popular combinations include chocolate and banana, strawberry and Nutella, or even s’mores-style with graham cracker crumbs, chocolate, and a marshmallow. Feel free to experiment with a mix of your favorite ingredients to create your own unique flavor profiles.
Are there any alternatives for those with dietary restrictions?
Absolutely! For a gluten-free option, use gluten-free cones and ensure that your fillings are also safe for those with dietary restrictions. Additionally, vegan chocolate and dairy-free fillings can be utilized to accommodate plant-based diets. Always check labels to ensure that all ingredients align with dietary needs.
How can I serve Campfire Cones at a gathering?
Serving these delightful cones at a gathering is simple. Set up a filling station where guests can customize their own cones with a variety of ingredients. After the cones are filled, wrap them in foil and provide a heated source like a grill or campfire. Guests can then enjoy their own personalized, warm treat fresh off the grill, making it interactive and fun!
Conclusion:
Campfire Cones truly embody the essence of outdoor cooking—simplicity, flexibility, and delightful customization. With an easy-to-follow process, you can create a memorable treat that suits any palate. Whether you prefer classic chocolate and marshmallow or fresh fruits and nut butter, the combinations are virtually limitless. This recipe allows for creativity, encouraging you to mix and match your favorite ingredients while enjoying the fun of assembling your cones. Additionally, Campfire Cones are perfect for gatherings; everyone can personalize their own dessert, ensuring satisfaction for all. So, the next time you’re camping or hosting a backyard fire, remember this charming dessert option that brings people together around the flame. Its simplicity makes it an accessible choice for cooks of all ages, while its endless possibilities inspire culinary adventure around the campfire.
Print
Campfire Cones: A Sweet Treat for Outdoor Adventures
- Total Time: 17 minutes
- Yield: 4 cones
- Diet: Vegetarian
Description
Campfire Cones are a fun and easy dessert you can make over the fire or grill. Filled with marshmallows, chocolate, and your favorite toppings, these handheld treats are perfect for camping or backyard cookouts.
Ingredients
Sugar cones (1 per person)
Mini marshmallows
Milk or dark chocolate chips
Peanut butter chips (optional)
Banana slices
Strawberry slices
Crushed graham crackers
Mini candies (like M&Ms)
Aluminum foil
Instructions
1. Fill each cone with your choice of marshmallows, chocolate chips, fruit slices, and other toppings.
2. Wrap each filled cone tightly in aluminum foil.
3. Place wrapped cones over a campfire grate, on hot coals, or a grill for 5–7 minutes, turning occasionally.
4. Carefully remove from heat and let cool slightly before unwrapping.
5. Serve warm and enjoy right out of the cone.
Notes
Let kids build their own with toppings they love.
Use heatproof gloves when handling hot foil.
Add crushed cookies or nuts for extra crunch.
- Prep Time: 10 minutes
- Cook Time: 7 minutes
- Category: Dessert
- Method: Campfire or Grill
- Cuisine: American
Nutrition
- Serving Size: 1 cone
- Calories: 280
- Sugar: 22g
- Sodium: 90mg
- Fat: 12g
- Saturated Fat: 6g
- Unsaturated Fat: 5g
- Trans Fat: 0g
- Carbohydrates: 36g
- Fiber: 2g
- Protein: 3g
- Cholesterol: 5mg
Keywords: campfire cones, s'mores cones, camping dessert, kids campfire treat