
Cheeseburger Pockets: Delicious Handheld Treats
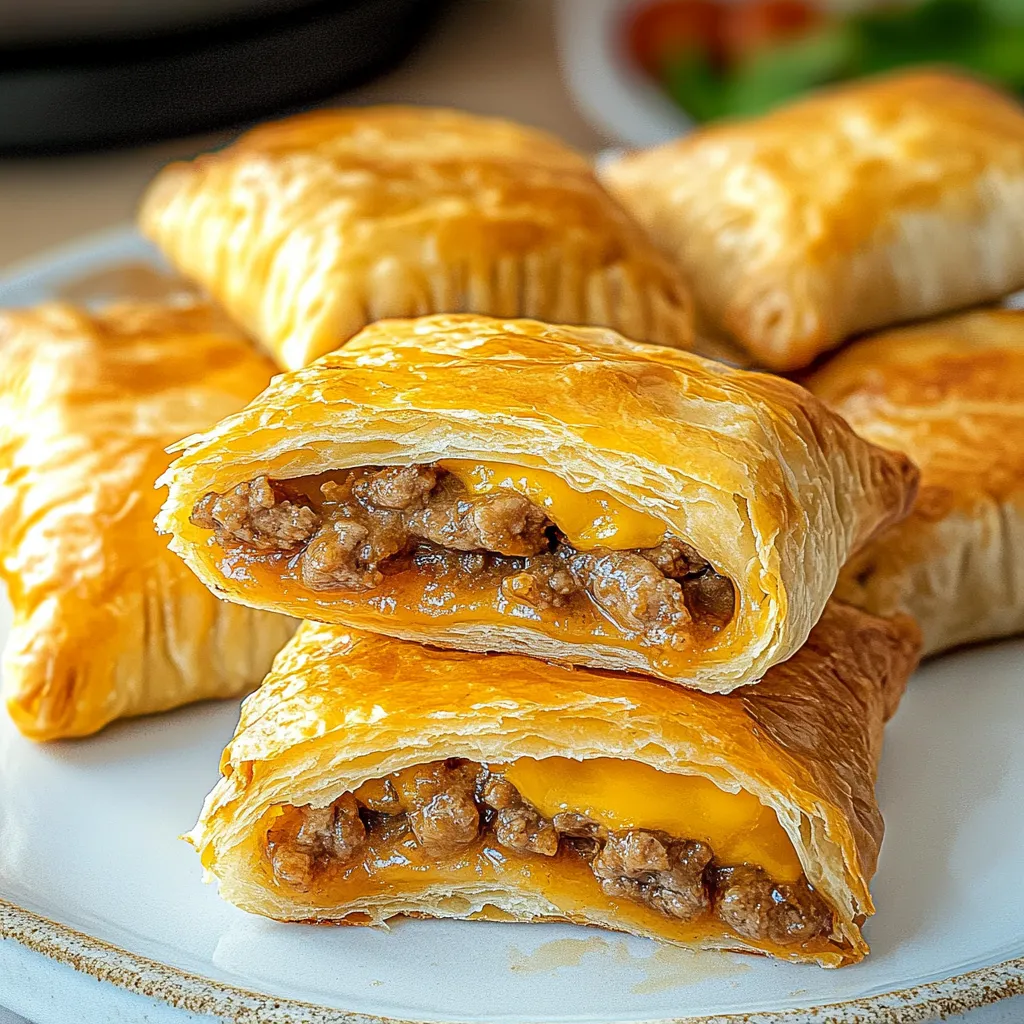
Who doesn’t love the irresistible combination of juicy beef, melty cheese, and a touch of savory goodness? Cheeseburger Pockets offer the ultimate convenience, wrapping the classic flavors of a cheeseburger in a delightful handheld package that’s perfect for any occasion. Whether you’re whipping them up for a weeknight dinner, packing them for a picnic, or serving them at a game day gathering, these tasty pockets are sure to please every crowd.
You can easily customize the filling to suit your taste, incorporating everything from crispy bacon and fresh vegetables to zesty sauces. For those seeking lighter options, swap in ground turkey or plant-based alternatives without compromising flavor. Tips like using pre-made dough or experimenting with different cheeses can elevate your creation to new heights. Get ready to dive into an exciting culinary adventure—let’s explore the world of Cheeseburger Pockets!
Ingredients for Cheeseburger Pockets:
For the Dough:
- 3 ½ cups all-purpose flour
- 1 packet (2 ¼ teaspoons) active dry yeast
- 1 teaspoon granulated sugar
- 1 teaspoon salt
- 1 ½ cups warm water (about 110°F or 43°C)
- 2 tablespoons olive oil
For the Filling:
- 1 pound ground beef (80/20 for best flavor)
- 1 small onion, finely chopped
- 2 cloves garlic, minced
- 1 teaspoon Worcestershire sauce
- ½ teaspoon black pepper
- ½ teaspoon salt (adjust to taste)
- 1 cup shredded cheddar cheese (or a blend of cheeses for variety)
For Assembly:
- 1 egg, beaten (for egg wash)
- Sesame seeds (optional, for sprinkling on top)
Optional Variations:
- For a spicy kick, add 1 jalapeño pepper, finely diced, to the meat mixture.
- Consider using ground turkey or ground chicken for a leaner option.
- Feel free to substitute with different cheeses, such as pepper jack or gouda, for a unique flavor.
- For a vegetarian version, replace the meat with sautéed mushrooms and spinach, along with your favorite cheese.
- Incorporate additional seasonings, such as paprika, onion powder, or even barbecue sauce for a BBQ-style pocket.
Serving Suggestions:
- Pair the cheeseburger pockets with dipping sauces like ketchup, mustard, or a spicy aioli for added flavor.
- Serve with a side of crispy fries or a fresh salad to create a full meal that everyone will enjoy.
This delicious twist on a classic recipe allows for endless personalization, keeping your gatherings exciting and tasty. Enjoy making your cheeseburger pockets unique!

How to prepare Cheeseburger Pockets:
Creating delicious cheeseburger pockets is a straightforward process that results in a satisfying meal. Follow these steps for the best results.
Gather Your Ingredients
Start by gathering all necessary ingredients. You will need 1 pound of ground beef, 1 cup of shredded cheddar cheese, 1 cup of diced onion, 1 tablespoon of ketchup, 1 tablespoon of mustard, salt and pepper to taste, and 1 package of refrigerated crescent roll dough.
Preheat Your Oven
Preheat your oven to 375°F (190°C). This ensures that the cheeseburger pockets cook evenly and achieve a golden-brown finish.
Cook the Ground Beef
In a large skillet, add the ground beef over medium heat. Break it up as it cooks, allowing it to brown evenly. This should take about 5-7 minutes.
Add Onions and Season
Once the beef is browned, add the diced onion to the skillet. Cook for an additional 3-4 minutes until the onion becomes translucent.
Mix in Condiments
Stir in the ketchup and mustard, mixing thoroughly. Season the mixture with salt and pepper according to your taste. Let it cook for another minute.
Combine with Cheese
Remove the skillet from the heat and sprinkle the shredded cheddar cheese over the meat mixture. Stir to combine, allowing the residual heat to melt the cheese slightly.
Prepare Crescent Roll Dough
Open the package of crescent roll dough and carefully unroll it on a clean surface. You will see perforations; that’s where you’ll separate the dough.
Shape Your Pockets
Divide the crescent dough into triangles. Place about 2 tablespoons of the cheeseburger mixture onto the wide end of each triangle.
Seal the Edges
Fold the pointed end of the triangle over the filling and roll it up towards the point. Pinch the edges to seal the pockets securely.
Bake the Pockets
Arrange the filled pockets on a baking sheet lined with parchment paper. Bake in the preheated oven for 12-15 minutes, or until golden brown.
Serve and Enjoy
Remove the cheeseburger pockets from the oven and let them cool slightly before serving. Enjoy these delightful pockets with your favorite dipping sauces!
Tips for the Perfect Cheeseburger Pockets
Maintain the Right Temperature
To achieve a perfectly cooked filling and crust, keep the cooking temperature around 375°F (190°C). Preheating your oven is essential to ensure even cooking. If you are deep-frying your pockets, the oil should be heated to approximately 350°F (175°C). This ensures that the outside crisps up quickly while the inside warms thoroughly. Always use a food thermometer to check meat doneness, aiming for an internal temperature of 160°F (70°C) for ground beef.
Use Quality Ingredients
The flavor of your pockets largely depends on the ingredients you choose. Opt for fresh ground beef with a higher fat content, like 80/20, for a juicier filling. If you prefer a leaner option, ground turkey or chicken can work as substitutes. Use fresh toppings—like dill pickles, onions, and cheddar cheese—that you might find in traditional cheeseburgers. Quality spices and seasonings elevate the flavors, so don’t skimp on adding salt, pepper, and a bit of garlic powder to the meat.
Suitability for Dietary Restrictions
You can easily customize the filling for various diets. For a gluten-free option, swap traditional dough with gluten-free pastry or pizza dough. If you want to make the dish vegetarian, consider using plant-based meat alternatives or a hearty mix of vegetables like mushrooms, bell peppers, and zucchini. Cheese lovers might enjoy using a blend of mozzarella and sharp cheddar for a distinct flavor. Always read ingredient labels to ensure compliance with dietary needs.
Variations to Try
Experiment with different flavors by incorporating various seasonings, herbs, or sauces. Adding BBQ sauce or mustard to the meat mixture can create a tangy twist. For an Italian flair, include marinara sauce and mozzarella cheese, and serve with a side of marinara for dipping. If you enjoy a spicy kick, add jalapeños or hot sauce to the filling for an exciting variation.
By following these tips and being open to experimenting with fillings and techniques, you can create perfectly delicious handheld treats that everyone will love.
Storage Tips for Cheeseburger Pockets:
To keep your cheeseburger pockets fresh and tasty, it’s essential to store them properly. Following these storage tips will help maintain their deliciousness.
Room Temperature Storage
If you plan to eat your cheeseburger pockets within a few hours, you can keep them at room temperature. Place them in a breathable container or on a plate covered with a clean kitchen towel. Avoid stacking them, as this can cause them to become soggy.
Refrigeration for Longer Freshness
When storing cheeseburger pockets for more than a few hours, refrigeration is key. Let the pockets cool down completely before placing them in an airtight container. This prevents condensation from making them mushy. Make sure to consume the refrigerated pockets within three to four days for the best flavor and texture.
Freezing for Extended Storage
If you want to keep cheeseburger pockets for a longer period, freezing is your best option. Wrap each pocket individually in plastic wrap or aluminum foil. Then, place them in a freezer-safe bag or container. Label the container with the date to keep track of their storage time. These pockets can last up to three months in the freezer. When you’re ready to enjoy, thaw them overnight in the refrigerator.
Reheating Safely
Reheating your cheeseburger pockets is easy. For the best texture, avoid using the microwave alone, as this can make them soggy. Instead, preheat your oven to 350°F (175°C) and place the pockets on a baking sheet. Heat them for about 10-15 minutes or until warmed through. For a quicker option, you can reheat them in the microwave for 1-2 minutes, but follow up with a brief time in a preheated skillet to crisp them up.
By following these storage tips, you can enjoy your cheeseburger pockets at their best. Maintaining the right conditions will ensure every bite is as delightful as the first.
Related Recipes to Try with Cheeseburger Pockets
If you love the savory goodness of cheeseburger pockets, you might enjoy these related recipes. Each one shares key ingredients or preparation styles, making them perfect companions for your meal planning.
Firstly, consider making Stuffed Bell Peppers. Similar to cheeseburger pockets, these peppers offer a filling that combines ground meat, cheese, and spices. The vibrant colors of the peppers make for an appealing dish, while the same burger flavors shine through. Both recipes allow you to use ground beef, and you can easily switch up the fillings based on your taste preferences.
Another great option is Homemade Sliders. These mini burgers serve the same classic flavors in a smaller, fun format. Sliders are perfect for parties or casual family meals. The method of using a bun and filling them with delicious ingredients ties them closely to cheeseburger pockets, making them easy to transition between recipes.
Lastly, you can’t go wrong with Pizza Rolls. Like cheeseburger pockets, these rolls are packed with flavor and can be customized to suit your family’s needs. You can fill them with pepperoni, cheese, or vegetables. The crispy exterior and tasty filling will satisfy any craving, much like their cheeseburger counterpart.
Incorporating these related recipes into your meal rotation will add variety while keeping the delightful flavors you love. Enjoy experimenting with different styles and fillings for a dynamic dining experience!
Frequently Asked Questions:
What are Cheeseburger Pockets?
Cheeseburger Pockets are delicious handheld treats filled with seasoned ground beef, cheese, and savory toppings, all encased in a flaky pastry. They are perfect for a quick meal or snack on the go, bringing the beloved flavors of a classic cheeseburger into a convenient, portable form. This dish can be customized with various ingredients to suit your taste preferences.
Can I make Cheeseburger Pockets ahead of time?
Absolutely! These delightful pockets can be prepared in advance. Simply assemble them, then freeze before baking. When you’re ready to enjoy, bake them directly from frozen, adding a few extra minutes to the cooking time. This makes them an ideal option for meal prep or last-minute gatherings.
What can I use instead of ground beef in Cheeseburger Pockets?
If you prefer a meatless option or want to use something other than ground beef, there are numerous alternatives. Ground turkey, chicken, or plant-based meat substitutes work well. You might also consider beans or lentils for a vegetarian take. Be sure to season your filling well to enhance the flavors!
What cheese is best for these pockets?
While classic cheeseburger recipes often utilize cheddar cheese, any melting variety will work well in cheeseburger pockets. Try mozzarella for a gooey texture, gouda for a unique flavor, or pepper jack for a spicy kick. Feel free to combine different cheeses for an extra cheesy experience.
How do I store leftover Cheeseburger Pockets?
To store any remaining pockets, allow them to cool completely, then place them in an airtight container in the refrigerator. They will stay fresh for up to three days. To reheat, simply bake them in a preheated oven until hot, ensuring a nice, crispy texture.
Can I use store-bought dough for Cheeseburger Pockets?
Yes, using store-bought dough can save time and simplify the process. Puff pastry or refrigerated biscuit dough works great as the base for your pockets. By using pre-made dough, you can focus more on creating a flavorful filling while still enjoying the homemade taste of these tasty snacks.
Conclusion:
Cheeseburger Pockets are the perfect solution for a quick and delicious meal that the whole family will love. This recipe stands out for its simplicity, requiring minimal ingredients while delivering maximum flavor. You can easily customize these pockets by swapping the ground beef for turkey, chicken, or even plant-based alternatives, accommodating various dietary preferences. Additionally, don’t hesitate to experiment with different cheeses and toppings; the versatility of cheeseburger pockets allows you to make them uniquely your own. Whether for a busy weeknight dinner, a fun lunch, or a lively gathering, these handheld delights are sure to impress. By following the straightforward steps outlined in the recipe, you can elevate your cooking game and bring joy to the dinner table. Enjoy the process and the creative possibilities that come with crafting your cheeseburger pockets, resulting in a satisfying meal every time.
Print
Cheeseburger Pockets: Delicious Handheld Treats
- Total Time: 33 minutes
- Yield: 8 pockets 1x
Description
Enjoy all the classic flavors of a cheeseburger wrapped in golden, flaky dough! These handheld pockets are fun to make, family-friendly, and great for on-the-go meals.
Ingredients
-
1 lb ground beef
-
1/2 onion, finely chopped
-
1/2 tsp salt and pepper
-
1 cup shredded cheddar cheese
-
1 tbsp ketchup (optional)
-
1 tbsp mustard (optional)
-
1 tube refrigerated biscuit dough or pizza dough
-
1 egg (for egg wash)
Instructions
-
Cook filling: In a skillet, sauté onion, add ground beef, salt, and pepper. Cook until browned. Stir in cheese, ketchup, and mustard.
-
Prepare dough: Flatten dough pieces into circles or rectangles. Spoon filling onto the center of each and fold over to seal.
-
Bake: Place on a baking sheet, brush with egg wash, and bake at 375°F (190°C) for 15–18 minutes until golden.
-
Serve: Let cool slightly and enjoy warm!
Notes
-
Add pickles or bacon bits for extra flavor.
-
Great for freezing — reheat in the oven or air fryer.
-
Use puff pastry for a flakier version.
- Prep Time: 15 minutes
- Cook Time: 18 minutes
Nutrition
- Calories: 290 kcal
- Sugar: 2g
- Sodium: Moderate
- Fat: 17g
- Carbohydrates: 22g
- Protein: 14g