
Cheesy Garlic Breadsticks: A Perfect Snack Recipe
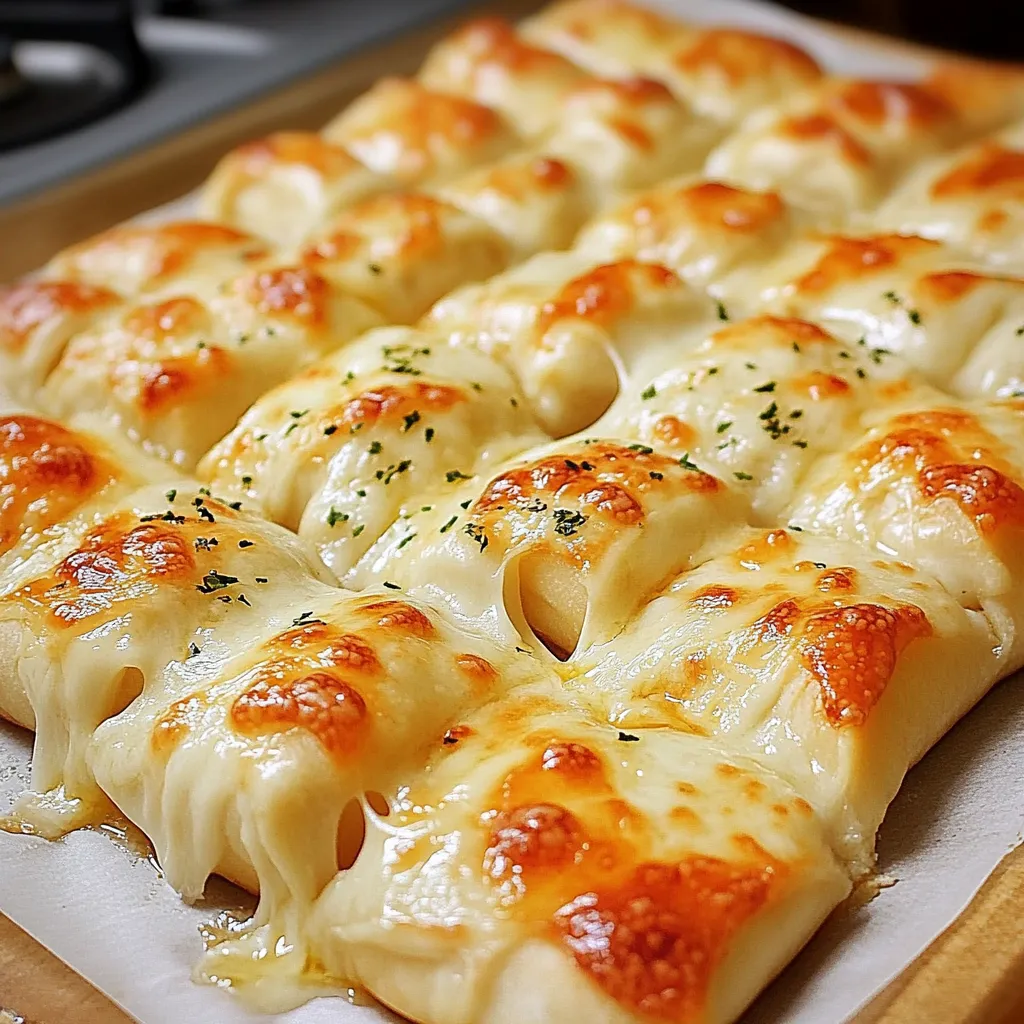
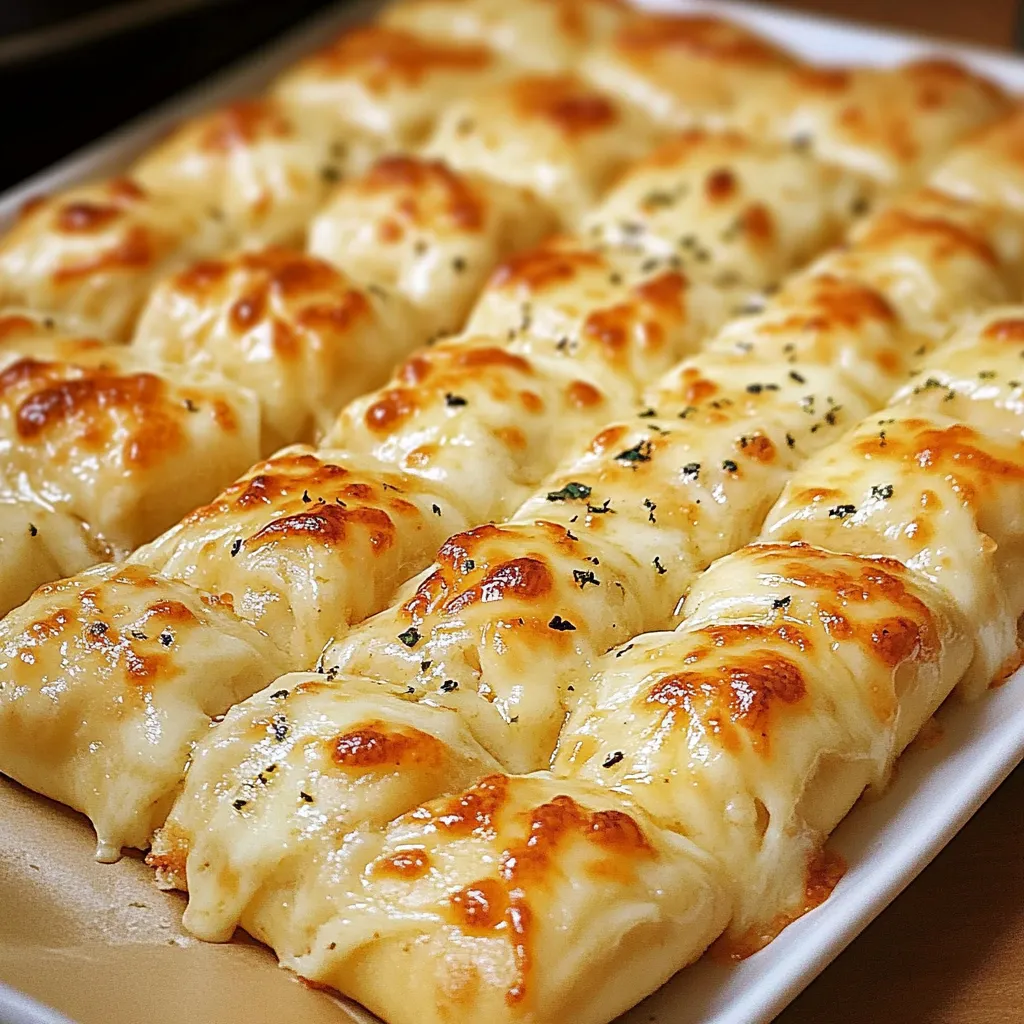
There’s nothing quite like sinking your teeth into warm, golden-brown Cheesy Garlic Breadsticks fresh from the oven. Their buttery, garlicky aroma fills the air, creating an irresistible invitation for family and friends to gather around the table. Whether served as a perfect appetizer, a side for pasta, or a delightful snack during movie nights, these breadsticks bring comfort and satisfaction in every bite.
The beauty of this recipe lies not only in its simplicity but also in the countless variations you can explore. Consider adding herbs like oregano or parsley for an extra flavor boost, or experiment with different cheeses to create your signature version. Don’t forget to try a drizzle of chili oil or a sprinkle of crushed red pepper for a spicy kick!
Achieving the ideal texture is key—golden on the outside and soft within. With just a few expert tips on dough preparation and baking techniques, you’ll be able to whip up these delectable breadsticks in no time. Get ready to impress your loved ones with this fan-favorite treat!
Ingredients for Cheesy Garlic Breadsticks:
This recipe for cheesy garlic breadsticks yields a delicious batch that serves 8 to 10 people. Gather the following ingredients to create a delectable treat perfect as an appetizer or snack!
Dough Ingredients:
- 3 ½ cups all-purpose flour
- 1 packet (2 ¼ teaspoons) active dry yeast
- 1 teaspoon sugar
- 1 teaspoon salt
- 1 cup warm water (about 110°F or 43°C)
- 2 tablespoons olive oil
Garlic Butter Topping:
- ½ cup unsalted butter, melted
- 4 cloves garlic, minced (or about 4 teaspoons pre-minced garlic)
- 2 tablespoons fresh parsley, chopped (or 1 tablespoon dried parsley for convenience)
- ½ teaspoon salt
- ¼ teaspoon black pepper
Cheese Blend:
- 2 cups shredded mozzarella cheese
- 1 cup shredded Parmesan cheese
Optional Seasonings and Variations:
- 1 teaspoon red pepper flakes for a spicy kick
- 1 teaspoon Italian seasoning for added flavor depth
- Substitute mozzarella with provolone or a blend of Italian cheeses for a different taste
- For a twist, try adding a sprinkle of sesame seeds or poppy seeds on top before baking
It’s important to use high-quality ingredients for the best flavor and texture in your cheesy garlic breadsticks. Additionally, feel free to experiment with the cheese blends or enhance with your favorite herbs or spices. This versatility allows you to customize the breadsticks to your liking!
With these ingredients in hand, you’re on your way to making a mouth-watering snack that’s sure to please any crowd. Happy baking!
How to prepare Cheesy Garlic Breadsticks:
Creating this delicious appetizer involves several simple steps. Follow these instructions carefully to craft perfect cheesy garlic breadsticks.
Step 1: Gather Your Ingredients
Start by assembling all necessary ingredients. You will need pizza dough, shredded mozzarella cheese, garlic powder, butter, fresh parsley, and salt. Ensure you have everything ready for a smooth preparing experience.
Step 2: Preheat the Oven
Preheat your oven to 400°F (200°C). A hot oven is crucial for achieving that golden-brown texture on your breadsticks.
Step 3: Roll Out the Pizza Dough
Take your pizza dough and place it on a lightly floured surface. Use a rolling pin to stretch the dough into a rectangular shape, about ½ inch thick. This thickness ensures a soft, chewy interior with a crispy exterior.
Step 4: Prepare the Garlic Butter
In a small bowl, melt 4 tablespoons of unsalted butter. Once melted, mix in 1 teaspoon of garlic powder. You can adjust the garlic powder according to your preference for a stronger flavor.
Step 5: Brush the Dough with Garlic Butter
Use a brush to evenly coat the rolled-out pizza dough with the prepared garlic butter. Make sure to cover every corner for full flavor.
Step 6: Add Cheese and Seasoning
Sprinkle a generous amount of shredded mozzarella cheese over the brushed dough. Leave a little space at the edges to create a crust. For added flavor, sprinkle a pinch of salt and chopped fresh parsley over the cheese.
Step 7: Cut the Dough into Strips
Using a sharp knife or pizza cutter, cut the dough into strips about 1 inch wide. This will create individual breadsticks, perfect for dipping.
Step 8: Bake the Breadsticks
Transfer the cut strips onto a baking sheet lined with parchment paper. Bake in the preheated oven for 12-15 minutes or until the breadsticks are golden brown and the cheese is bubbly.
Step 9: Let Them Cool
Once baked, remove the breadsticks from the oven and let them cool slightly on the baking sheet. This ensures they set properly.
Step 10: Serve and Enjoy
Serve your cheesy garlic breadsticks warm, perhaps with a side of marinara sauce for dipping. Enjoy the delightful combination of flavors!
Tips for the Perfect Cheesy Garlic Breadsticks
Achieving the ultimate cheesy garlic delight involves a few key strategies. Follow these tips to create mouthwatering breadsticks that everyone will love.
Temperature Matters
For the best results, make sure your dough rises at the right temperature. A warm, draft-free area helps the yeast activate, leading to a fluffy texture. If your kitchen is chilly, try placing the dough in the oven with the light on. This provides a gentle heat source. Remember, activating the yeast properly is crucial for a light and airy final product.
Quality Ingredients Make a Difference
Using high-quality ingredients elevates your dish. Opt for fresh garlic instead of jarred or powdered garlic for a more vibrant flavor. Freshly grated cheese, like mozzarella or a blend of Italian cheeses, adds creaminess and richness. Flour is also essential; consider using bread flour for an extra-chewy texture. Look for brands with high protein content for optimal results.
Substitutions for Dietary Restrictions
Making breadsticks that cater to various diets is easier than you think. For gluten-free options, use a gluten-free flour blend. Ensure it contains xanthan gum for better structure. If you prefer plant-based alternatives, substitute butter with olive oil or a vegan butter Spread, and replace cheese with a dairy-free cheese option. Nutritional yeast can also add a cheesy flavor without dairy.
Flavor Variations
Enjoy experimenting with different flavors. Add herbs such as oregano or basil directly into the dough for an aromatic twist. For more spice, sprinkle red pepper flakes over the cheese before baking. You can also try mixing in sun-dried tomatoes, olives, or caramelized onions for a gourmet touch. The possibilities are endless!
Perfectly Baked Breadsticks
Ensure that you preheat your oven to a high temperature, typically around 450°F (232°C) before baking. This helps the cheese melt beautifully without overbaking the dough. Keep an eye on your breadsticks as they bake, as ovens can vary. Aim for a golden-brown crust while ensuring the cheese is bubbly and slightly browned.
By following these tips, you’ll have perfectly cheesy, aromatic sticks that are a hit at any gathering. Enjoy your culinary creation with friends and family!
Storage Tips for Cheesy Garlic Breadsticks:
To maintain the freshness of your cheesy garlic breadsticks, proper storage is essential. Follow these practical tips to keep them delicious for as long as possible.
Cooling Down Before Storing
First, allow your cheesy garlic breadsticks to cool down completely. Storing them while still warm can create moisture, leading to a soggy texture. Place them on a wire rack for effective cooling, ensuring air circulation around all sides.
Best Storage Conditions
Once your breadsticks have cooled, choose the right packaging for storage. You can use an airtight container or a resealable plastic bag. If you opt for a container, line it with parchment paper to absorb excess moisture. This prevents the breadsticks from becoming too soft and helps maintain flavor.
Refrigeration Options
If you do not plan to consume the breadsticks within a couple of days, refrigerate them. They can last in the fridge for up to three days. Wrap them tightly in foil or plastic wrap to shield them from any strong odors or flavors in the fridge. Remember to mark the date of storage to keep track of freshness.
Freezing for Longer Shelf Life
For longer-term storage, freezing is an excellent option. Wrap each breadstick in plastic wrap, then put them in a heavy-duty freezer bag. Label the bag with the current date. In the freezer, your cheesy garlic breadsticks can remain good for up to three months. When ready to eat, thaw them in the refrigerator overnight or reheat directly from frozen.
Reheating Tips
When it’s time to enjoy your breadsticks again, reheating is simple. You can warm them up in the oven at 350°F (175°C) for about 10-15 minutes. Cover them with foil to keep them from drying out. Alternatively, you can use a microwave for a quicker option, but keep in mind that the oven yields a better texture.
These storage tips help you enjoy your cheesy garlic breadsticks at their best. Following these suggestions ensures that each bite remains flavorful and satisfying long after baking.
Related Recipes to Enhance Your Cheesy Garlic Breadsticks Experience
If you love cheesy garlic breadsticks, you will appreciate these similar recipes. They share common ingredients and flavors, making them perfect companions for your cheesy treat.
- Margherita Pizza: This classic pizza pairs beautifully with breadsticks. The fresh basil and tomatoes bring a bright flavor that complements the rich, cheesy garlic taste. Both dishes share a love for garlic and cheese, making them a harmonious duo.
- Pasta Primavera: For a light and colorful meal, try pasta primavera. It features seasonal vegetables sautéed in garlic, which matches well with the flavor profile of cheesy garlic breadsticks. The herbs in the pasta dish enhance the garlic while maintaining a refreshing balance.
- Spinach and Artichoke Dip: A creamy, cheesy dip served warm, spinach and artichoke dip is perfect alongside your breadsticks. Both recipes emphasize cheesy goodness and can be used for dipping, making them a fun and interactive snack for gatherings.
- Bruschetta: This Italian appetizer consists of toasted bread topped with a mix of diced tomatoes, garlic, and basil. The similar garlic kick and crispy bread texture make bruschetta an excellent match for cheesy garlic breadsticks. Serve them together for a delightful starter platter.
Experimenting with these related recipes can enhance your meal, bringing new textures and flavors while maintaining that comforting cheesy, garlicky essence that you love.
Frequently Asked Questions:
What ingredients are needed to make cheesy garlic breadsticks?
To create delicious cheesy breadsticks, you’ll need a handful of basic ingredients. Essential items include pizza dough or bread dough, minced garlic, butter or olive oil, mozzarella cheese, and Italian seasoning. Optional ingredients like Parmesan cheese, fresh parsley, or crushed red pepper can elevate the flavor profile of your dish, providing that extra kick and aroma that’s so irresistible.
Can I use store-bought dough for my cheesy garlic breadsticks?
Absolutely! If you’re pressed for time or not keen on making dough from scratch, store-bought pizza dough or bread dough works just as well. These convenient options can save you time in the kitchen while still yielding scrumptious results. Just follow the instructions on the packaging for the best outcomes.
How do I achieve the perfect golden-brown crust?
To achieve that enticing golden-brown crust on your cheesy garlic breadsticks, it’s important to preheat your oven properly and use the right temperature, typically around 400°F (200°C). Brush the dough with melted butter or oil before baking, as this will aid in browning while also enhancing the flavor. Keep an eye on them towards the end of cooking to prevent burning.
What should I serve with cheesy garlic breadsticks?
These delightful breadsticks pair excellently with a variety of dishes. Perfect accompaniments include marinara sauce for dipping, salads for a fresh balance, or even pasta dishes for a hearty meal. They also make a fantastic appetizer or snack at gatherings, complementing a wide range of cuisines.
How can I store leftovers of cheesy garlic breadsticks?
To keep your cheesy delights fresh, allow the breadsticks to cool completely, then store them in an airtight container at room temperature for up to two days. If you want them to last longer, consider freezing them. Wrap individual breadsticks in plastic wrap and place them in a freezer bag. They can be enjoyed straight from the freezer or reheated in the oven when you’re ready to indulge again.
Can I make cheesy garlic breadsticks in advance?
Yes, you can certainly prepare these cheesy delights ahead of time! Prepare the dough and toppings, assemble your breadsticks, and then cover and refrigerate them for a few hours or overnight. When you’re ready to bake, simply pop them into the oven, adjusting the cooking time as needed. This is a great way to save time, especially for parties or busy weeknights.
Conclusion:
In summary, making cheesy garlic breadsticks is a delightful and straightforward process that can elevate any meal. This recipe’s simplicity allows even novice cooks to whip up a delicious appetizer or side dish in no time. The flexibility of the ingredients means you can easily customize the flavors and levels of cheesiness to suit your taste preferences. Whether you choose to experiment with herbs, spices, or different cheese blends, the possibilities are endless. Additionally, these breadsticks can adapt beautifully to various dietary needs, ensuring everyone at your table enjoys them. By following this guide, you can create a crowd-pleasing dish that combines the irresistible flavors of garlic and cheese, perfect for gatherings or family dinners. Enjoy your cooking adventure and revel in the deliciousness of homemade cheesy garlic breadsticks!
Print
Cheesy Garlic Breadsticks: A Perfect Snack Recipe
- Total Time: 20 minutes
- Yield: About 12 breadsticks 1x
Description
Golden, cheesy, and bursting with garlicky goodness—these breadsticks are an easy, irresistible snack that everyone will love!
Ingredients
-
1 tube refrigerated pizza dough
-
2 cups shredded mozzarella cheese
-
3 tbsp butter, melted
-
3 cloves garlic, minced
-
1 tsp dried parsley (optional)
-
Salt, to taste
Instructions
-
Preheat oven to 400°F (200°C).
-
Roll out pizza dough into a rectangle on a baking sheet.
-
Mix melted butter and garlic, then brush over the dough.
-
Sprinkle mozzarella evenly on top.
-
Cut dough into strips (about 1 inch wide).
-
Bake for 12–15 minutes until golden and cheese is bubbly.
-
Sprinkle parsley and a pinch of salt before serving.
Notes
-
Add red pepper flakes for a spicy kick.
-
Serve with marinara or ranch for dipping.
-
Can use pre-made garlic butter for extra flavor.
- Prep Time: 5 minutes
- Cook Time: 15 minutes
Nutrition
- Calories: 150 kcal
- Sodium: 220mg
- Fat: 7g
- Saturated Fat: 4g
- Carbohydrates: 18 g
- Fiber: 1g
- Protein: 6g