
Cheesy Garlic Breadsticks: Irresistibly Delicious Recipe
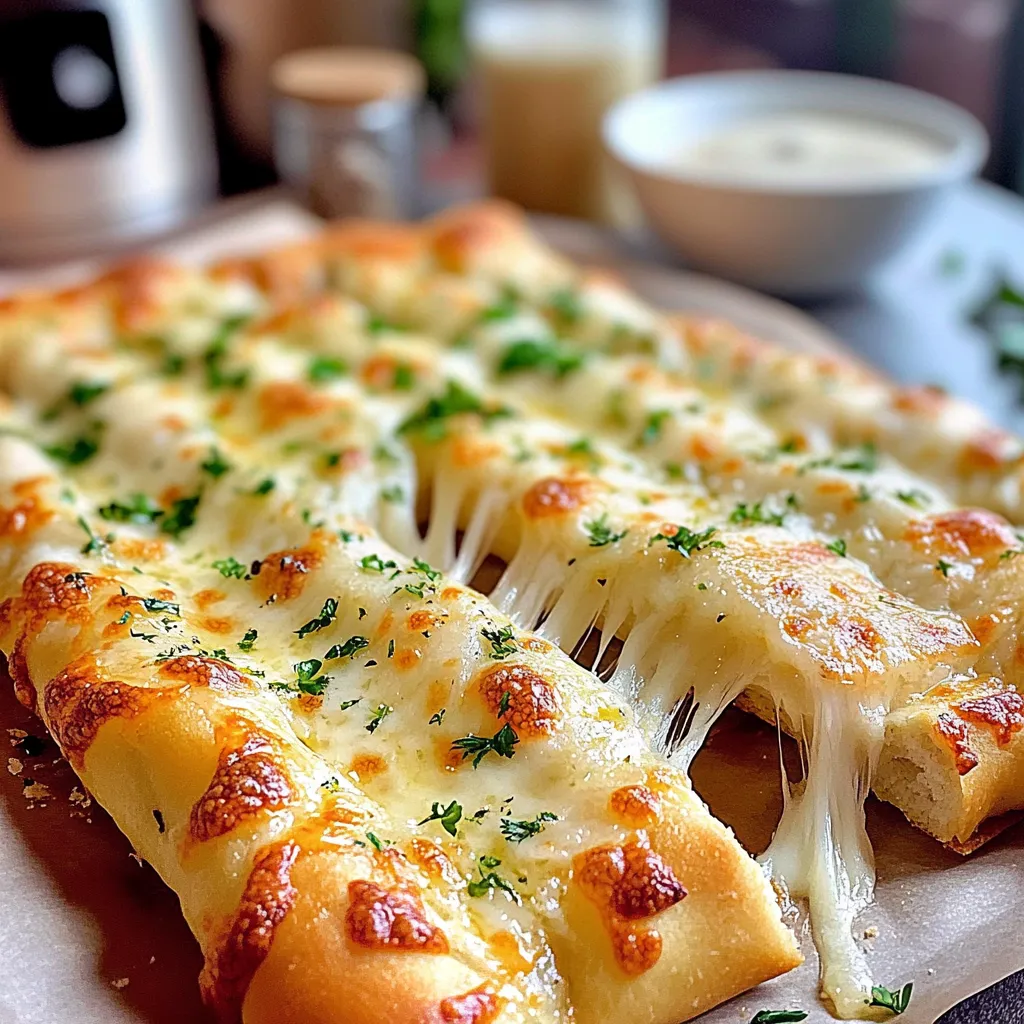
There’s nothing quite like the aroma of warm, buttery bread infused with the rich, savory scent of garlic wafting through your kitchen. Cheesy garlic breadsticks are the perfect companion to any Italian meal, a simple appetizer, or a delightful snack for movie nights. Their crispy edge and soft, cheesy center create the ultimate comfort food experience that brings smiles around the table.
Feel free to get creative with your toppings—consider sprinkling fresh herbs, adding a sprinkle of chili flakes for heat, or even swapping out traditional mozzarella for a zesty gouda or pepper jack cheese. For those aiming to elevate the flavor, try using roasted garlic instead of raw for a sweeter, more complex taste.
To ensure you achieve the ideal texture, remember to let your dough rise adequately and bake until golden for that irresistible crunch. Once you master these cheesy, garlicky delights, you’ll find them sneaking onto your dinner table more often!
Ingredients for Cheesy Garlic Breadsticks:
This delicious cheesy garlic breadsticks recipe is sure to be a hit, serving 8-10 people with an irresistible blend of flavors. Gather the following ingredients to whip up this delightful treat:
Dough Components:
- 2 cups all-purpose flour – For the perfect texture, use high-quality flour to create a light and chewy breadstick.
- 1 packet (2 ¼ teaspoons) active dry yeast – This helps the dough to rise, giving the breadsticks their fluffy interior.
- ¾ cup warm water (about 110°F/43°C) – Activate the yeast by using water that is warm but not too hot.
- 1 tablespoon sugar – This will nourish the yeast and help it to bloom.
- 1 teaspoon salt – Enhances the flavor of the breadstick dough.
- 2 tablespoons olive oil – Used to enrich the dough; can substitute with melted butter for a richer flavor.
Garlic Butter Topping:
- 4 tablespoons unsalted butter, softened – The base of the garlic topping; helps achieve a perfectly smooth spread.
- 4 cloves garlic, minced – Fresh garlic gives the best flavor, but you can substitute with garlic powder if needed.
- 1 teaspoon dried Italian seasoning – Adds an aromatic, herbaceous note to the garlic butter.
- 1 teaspoon minced fresh parsley (optional) – For a touch of color and freshness, sprinkle on top before baking.
Cheesy Goodness:
- 1 ½ cups shredded mozzarella cheese – The star ingredient; mozzarella is ideal for its meltiness and stretchiness.
- ½ cup grated Parmesan cheese – Offers a sharp and nutty flavor that complements the mozzarella.
Variations:
For an extra burst of flavor, consider these variations:
- Spicy Kick: Add red pepper flakes to the garlic butter for a bit of heat.
- Herb Blend: Incorporate different herbs such as rosemary or thyme into the butter mixture for unique flavors.
- Cheese Medley: Mix in other cheeses like cheddar or gouda for a different cheesy profile.

How to prepare Cheesy Garlic Breadsticks:
Follow these simple steps to create delicious cheesy garlic breadsticks. Start by gathering all ingredients to ensure a smooth cooking process.
Step 1: Gather Ingredients
Collect the following ingredients: pizza dough, unsalted butter, minced garlic, shredded mozzarella cheese, Italian seasoning, and salt. Ensure everything is fresh for optimal flavor.
Step 2: Preheat Oven
Preheat your oven to 375°F (190°C). This temperature is perfect for achieving crispy edges while keeping the center soft.
Step 3: Prepare the Baking Sheet
Line a baking sheet with parchment paper. This prevents the breadsticks from sticking and makes for easy clean-up.
Step 4: Roll Out the Dough
Dust a clean surface with flour. Take your pizza dough and roll it out into a rectangle about ½ inch thick. Try to maintain an even thickness for uniform baking.
Step 5: Cut the Dough
Using a sharp knife or pizza cutter, slice the dough into strips approximately 1 inch wide. Make sure to cut all the way through to form individual breadsticks.
Step 6: Melt the Butter
In a small saucepan, melt 4 tablespoons of unsalted butter over low heat. Stir in 2-3 cloves of minced garlic for that rich aroma.
Step 7: Brush the Garlic Butter
Once melted, remove the butter from heat. Using a pastry brush, generously coat the top of each breadstick with the garlic butter mixture. Allow some butter to pool in the grooves for extra flavor.
Step 8: Add Cheese and Seasoning
Sprinkle shredded mozzarella cheese evenly over the tops of the breadsticks. Follow this with a light sprinkle of Italian seasoning and a pinch of salt to enhance the flavor.
Step 9: Bake the Breadsticks
Place the prepared baking sheet in the preheated oven. Bake for 12-15 minutes or until the breadsticks turn golden brown and the cheese melts bubbly.
Step 10: Cool and Serve
Remove the breadsticks from the oven and let them cool for a few minutes. Serve warm, perfect for dipping in marinara sauce or enjoying on their own.
Tips for the Perfect Cheesy Garlic Breadsticks
Creating delightful cheesy garlic breadsticks requires careful attention to detail. By following these tips, you can ensure that your breadsticks turn out golden, cheesy, and full of flavor.
Maintain the Right Temperature
Start by preheating your oven to the correct temperature. Most recipes call for a range between 400°F and 425°F. An oven that is too hot can lead to burnt edges, while one that is too cool can leave you with soggy breadsticks. Use an oven thermometer to check if your oven is accurate. This small step can profoundly affect the final result.
Use Quality Ingredients
The flavor of your breadsticks significantly depends on the ingredients you choose. Opt for fresh garlic instead of garlic powder for a robust taste. Select high-quality cheese, such as mozzarella or provolone, for that gooey, melty texture. Fresh herbs can also enhance flavor, so consider adding chopped parsley or basil to the topping mix.
Explore Suitable Substitutions
If you’re catering to dietary restrictions, you can easily adapt your recipe. For gluten-free options, use a gluten-free flour blend for the dough. To make it vegan, substitute dairy cheese with a plant-based alternative and use a vegan butter spread for brushing. This way, everyone can enjoy their own version of delicious breadsticks.
Perfect Your Dough Consistency
The dough should feel soft but not sticky. If you find your dough overly wet, add a bit more flour. On the other hand, too much flour can lead to dense breadsticks. Aim for a balance that gives you a smooth, elastic dough. Knead for about 5 to 7 minutes until it becomes consistent.
Don’t Skip the Toppings
The topping is where the magic happens! Brush the dough with melted butter before adding toppings. This enhances the flavor and creates a crispy crust. You can also sprinkle some Italian seasoning or chili flakes for added flavor. Make sure you distribute the toppings evenly for consistent taste in every bite.
Experiment with Additional Flavors
If you want to elevate your cheesy garlic breadsticks further, experiment with different ingredients. Try adding sundried tomatoes or olives for a Mediterranean twist. You can also include chopped jalapeños or different cheese blends for a spicy variation. The possibilities are endless!
With these tips, your cheesy garlic breadsticks will be a hit every time. Enjoy the baking process and savor the delicious results!
Storage Tips for Cheesy Garlic Breadsticks:
Storing cheesy garlic breadsticks properly ensures they maintain their delicious flavor and texture. Follow these guidelines to keep your breadsticks fresh and tasty.
Optimal Storage Conditions
When it comes to storing cheesy garlic breadsticks, the first step is cooling them completely. Hot breadsticks tend to create steam within storage containers, leading to sogginess. Place them on a wire rack to help them cool evenly. Once cooled, you can store them.
Wrap each breadstick in plastic wrap or aluminum foil. This prevents them from drying out and protects them from freezer odors if you opt for freezing. For short-term storage at room temperature, place them in an airtight container. Ensure the container is kept in a cool, dry place, away from direct sunlight and heat sources.
Refrigeration and Freezing
If you plan to keep the breadsticks for more than a few days, refrigeration is a wise choice. Place wrapped breadsticks in the refrigerator. They stay fresh for about 5 to 7 days. However, the texture may change slightly due to the moisture in the fridge.
For longer storage, freezing is your best bet. Place wrapped breadsticks in a freezer-safe bag, squeezing out as much air as possible. Label the bag with the date for easy tracking. Frozen breadsticks maintain quality for up to 3 months. Remember, thawing them gradually in the refrigerator helps preserve their texture and flavor.
Reheating for Best Results
Once you’re ready to enjoy the cheesy garlic breadsticks again, reheating them correctly enhances their taste. Preheat your oven to 350°F (175°C). Unwrap the breadsticks and place them on a baking sheet. Cover them loosely with aluminum foil to prevent over-browning. Heat for about 10-15 minutes, or until warmed through. This method revives their crispy exterior and fluffy interior, making them a delightful treat once more.
By following these storage tips, you ensure that cheesy garlic breadsticks stay delicious for as long as possible. Enjoy every bite of your savory snack, knowing it has been preserved properly!
Related Recipes to Cheesy Garlic Breadsticks
If you love the irresistible flavors of cheesy garlic breadsticks, you’ll enjoy these related recipes that complement their taste and texture. Each recipe adds a unique twist while keeping the comforting theme of baked bread paired with delicious toppings or dips.
- Garlic Parmesan Knots: These soft, buttery knots are infused with garlic and topped with a sprinkle of Parmesan. Their doughy texture and savory flavor make them a perfect side for any Italian dish or as a snack to enjoy on their own.
- Spinach and Artichoke Dip: Pair this creamy and cheesy dip with your breadsticks for a delightful experience. The freshness of spinach and the tanginess from artichokes provide a vibrant contrast to the garlic and cheese, making it a winning combination for gatherings or family dinners.
- Caprese Salad: A refreshing caprese salad made with ripe tomatoes, fresh mozzarella, and basil offers a light and zesty accompaniment. The bright flavors of this salad balance the richness of the breadsticks, creating a well-rounded meal.
- Stuffed Mushrooms: These bite-sized delights are filled with a mixture of cheeses, herbs, and breadcrumbs. They make for a great appetizer or snack alongside cheesy garlic breadsticks, as both share a similar cheesy essence and are perfect for sharing.
- Homemade Marinara Sauce: Dipping your breadsticks into a rich marinara elevates their flavor. The tangy tomato sauce complements the cheesy, garlicky taste and adds an extra layer of enjoyment to your eating experience.
Try these complimentary recipes to enhance your meal. With their similar flavors and textures, they create a dining experience everyone will love.
Frequently Asked Questions:
What are Cheesy Garlic Breadsticks made of?
Cheesy garlic breadsticks are typically made from a dough that includes flour, yeast, water, and salt, combined with melted cheese and minced garlic. The dough is often seasoned with herbs, such as Italian seasoning or parsley, to enhance the flavor profile. Once baked, these breadsticks become golden and cheesy, making them a tasty side dish or snack.
How can I store leftover cheesy breadsticks?
To store leftover cheesy breadsticks effectively, allow them to cool completely before wrapping them in cling film or aluminum foil. Place them in an airtight container for optimal freshness and keep them in the refrigerator for up to three days. For longer storage, consider freezing them. Wrap each breadstick individually and place them in a freezer bag for up to three months.
Can I make breadsticks ahead of time?
Yes, you can prepare cheesy garlic breadsticks in advance. Knead and shape the dough, then immediately freeze the prepared sticks on a baking sheet. Once frozen, transfer them to an airtight container and keep them in the freezer. When you’re ready to bake, just allow them to thaw and rise before baking for a hot and cheesy treat.
What can I serve with cheesy garlic breadsticks?
These delightful snacks pair superbly with various dishes. They are perfect as a companion to a fresh garden salad or a warm bowl of marinara sauce for dipping. Additionally, they can enhance Italian meals, burgers, or even a casual movie night with friends, transforming any mealtime into a culinary delight.
Are there any variations to this recipe?
Absolutely! There are countless variations to the traditional cheesy garlic breadsticks. You can try adding toppings like crushed red pepper flakes, a sprinkle of Parmesan cheese, or even a layer of spinach and artichokes to create a delicious twist. Additionally, using different cheese blends, like mozzarella and cheddar, can result in a unique flavor while maintaining that gooey texture.
Can I use store-bought dough for cheesy garlic breadsticks?
Certainly! If you’re pressed for time, using store-bought pizza dough or crescent roll dough can be a great time-saver. Just roll it out, spread the garlic butter and cheese mixture, and bake as per the instructions. This shortcut guarantees deliciousness without the hassle of preparing the dough from scratch.
Conclusion:
In summary, making your own cheesy garlic breadsticks is an effortless way to elevate any meal or enjoy as a snack. This recipe emphasizes simplicity and flexibility, allowing you to incorporate your favorite cheeses or herbs to personalize your breadsticks. Whether you use store-bought pizza dough or make your own from scratch, you can easily adapt the recipe to suit your taste preferences. Additionally, these breadsticks can be paired with a variety of dipping sauces, enhancing their deliciousness. The key takeaway is that creativity is encouraged—feel free to experiment with different toppings or flavor combinations. With their irresistible garlic aroma and cheesy goodness, these delightful treats are sure to impress family and friends alike. Enjoy the process and tailor each batch to your liking for a truly customized culinary experience!
Print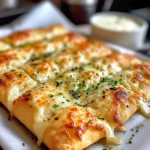
Cheesy Garlic Breadsticks: Irresistibly Delicious Recipe
- Total Time: 30 minutes
- Yield: 8 breadsticks 1x
Description
Golden, soft, and loaded with gooey cheese and garlic butter—these breadsticks are the perfect savory snack or side for any meal.
Ingredients
-
2 ¼ cups all-purpose flour
-
1 packet (2 ¼ tsp) active dry yeast
-
1 cup warm water
-
1 tsp sugar
-
1 tsp salt
-
2 tbsp olive oil
-
3 tbsp unsalted butter, melted
-
3 cloves garlic, minced
-
1 ½ cups shredded mozzarella cheese
-
1 tsp dried Italian herbs (optional)
Instructions
-
Make dough: In a bowl, dissolve yeast and sugar in warm water. Let sit 5 minutes. Add flour, salt, and olive oil. Knead until smooth. Let rise 1 hour or until doubled.
-
Shape breadsticks: Roll dough into a rectangle, brush with melted butter and garlic, sprinkle cheese evenly, and roll into a log. Slice into 8 sticks.
-
Bake: Place on a greased baking sheet, brush with remaining garlic butter, sprinkle herbs if using. Bake at 400°F (200°C) for 15 minutes until golden and cheese is bubbly.
Notes
-
Swap mozzarella for cheddar or a mix for different flavors.
-
Add a pinch of crushed red pepper flakes for a spicy kick.
-
Serve warm with marinara or ranch dip.
- Prep Time: 15 minutes (plus rising time)
- Cook Time: 15 minutes
Nutrition
- Calories: 220kal
- Sugar: 2g
- Sodium: 350mg
- Fat: 9g
- Carbohydrates: 25g
- Protein: 8g