
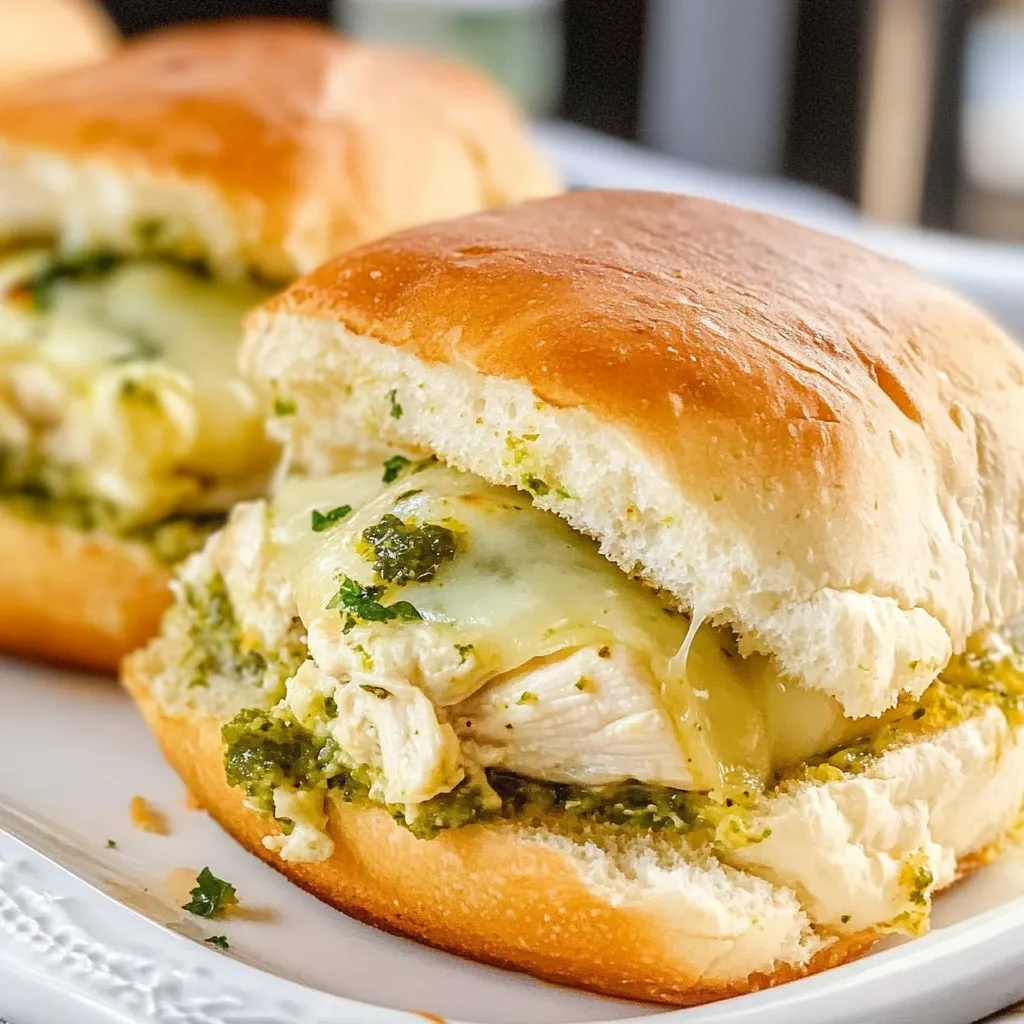
Cheesy Garlic Pesto Chicken Sliders: Irresistible Flavor Bombs
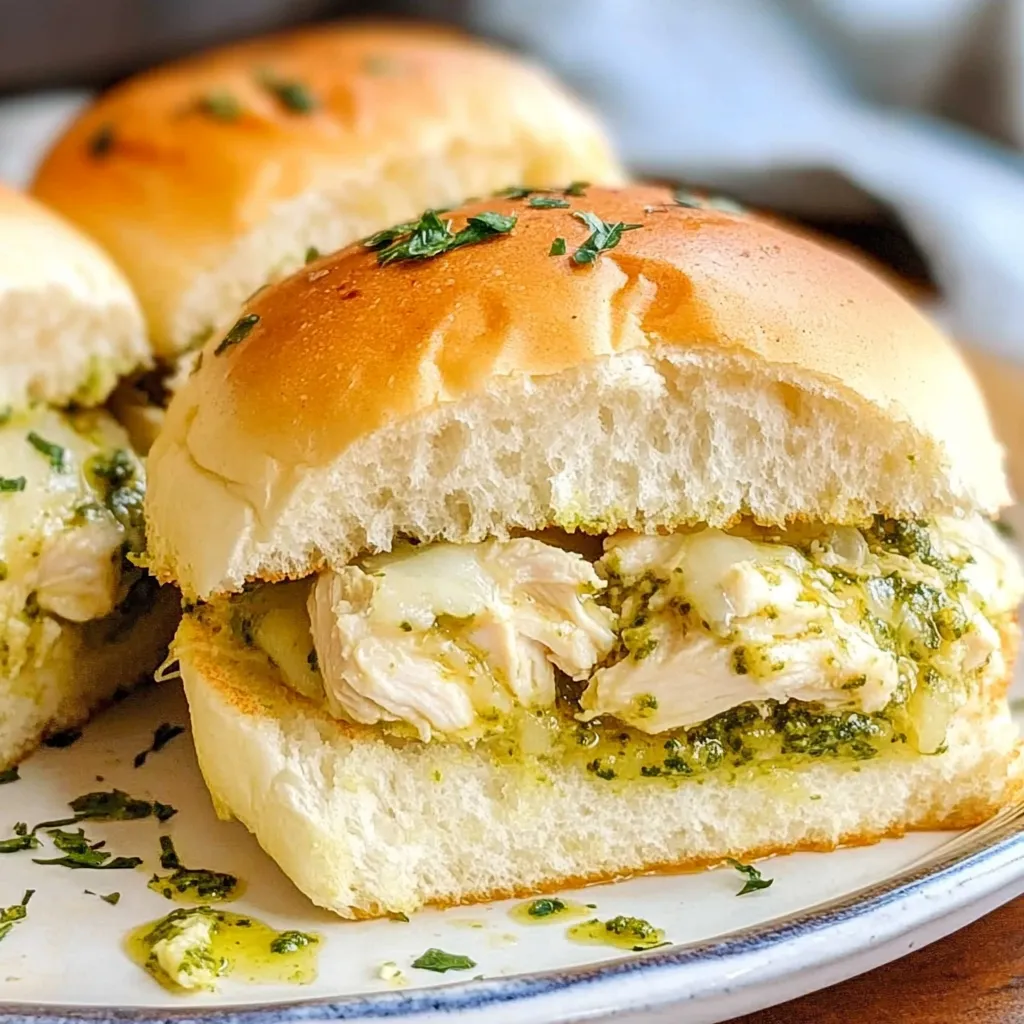
If you’re searching for a delightful twist on a classic slider, look no further than these flavorful cheesy garlic pesto chicken sliders. These delicious bites are perfect for a casual gathering, game day party, or a cozy family dinner. The fusion of tender chicken, rich garlic, and aromatic pesto creates a mouthwatering combination that will have everyone asking for seconds.
Experimenting with different cheeses can elevate this dish even further—think creamy mozzarella, sharp cheddar, or a sprinkle of feta for an unexpected kick. For a healthier spin, swap out the chicken for grilled zucchini or eggplant, maintaining that irresistible garlic pesto flavor.
To achieve perfect results, ensure your chicken is well-marinated for at least an hour, allowing the flavors to meld beautifully. Serve these sliders with a side of crispy sweet potato fries or a vibrant salad for a stunning meal. Get ready to impress your friends and family with these cheery crowd-pleasers!
Ingredients for Cheesy Garlic Pesto Chicken Sliders:
Making the perfect Cheesy Garlic Pesto Chicken Sliders requires a balance of flavor-rich ingredients. Below is a comprehensive list carefully tailored for a serving size of 8–10 people. Let’s gather everything you need:
For the Chicken Filling:
- 2 pounds boneless, skinless chicken breasts
- 1 cup fresh basil leaves, tightly packed
- ½ cup grated Parmesan cheese
- 3 cloves garlic, minced
- ⅓ cup extra virgin olive oil
- 1 teaspoon salt
- ½ teaspoon black pepper
- 1 teaspoon crushed red pepper flakes (optional for heat)
For the Sliders:
- 16 slider buns (white or whole wheat based on preference)
- 8 ounces mozzarella cheese, shredded or sliced
- ¼ cup pesto (store-bought or homemade)
- ¼ cup mayonnaise (optional for added creaminess)
For Topping:
- 2 tablespoons unsalted butter, melted
- 1 teaspoon garlic powder
- 1 teaspoon Italian seasoning
- Fresh basil leaves for garnish (optional)
- Freshly cracked black pepper to taste
Suggested Variations:
- For a spicier kick, consider using pepper jack cheese instead of mozzarella.
- Add roasted red peppers or sun-dried tomatoes to the chicken mixture for an extra depth of flavor.
- If you’re looking for a vegetarian option, swap the chicken with grilled portobello mushrooms or a chickpea salad, keeping the pesto for flavor.
- Experiment with different herbs in the pesto, such as arugula or spinach for a unique twist.
This ingredient list allows you to create scrumptious Cheesy Garlic Pesto Chicken Sliders that are not only packed with flavor but also easy to assemble. Enjoy your culinary adventure!
How to prepare Cheesy Garlic Pesto Chicken Sliders:
Follow these detailed instructions to make the perfect cheesy garlic pesto chicken sliders. Each step focuses on precise action for amazing results.
Step 1: Gather Your Ingredients
Start by preparing all your ingredients. You will need chicken breasts, garlic, pesto sauce, cheese, mini slider buns, and seasonings. Make sure everything is fresh and ready.
Step 2: Preheat Your Oven
Preheat your oven to 375°F (190°C). This will ensure that your sliders cook evenly and achieve that perfect golden touch.
Step 3: Cube the Chicken
Take the chicken breasts and cut them into small, bite-sized cubes. Keeping them uniform in size promotes even cooking.
Step 4: Sauté the Chicken
In a large skillet, heat olive oil over medium heat. Add the cubed chicken and season with salt and pepper. Sauté until the chicken is cooked through, about 5-7 minutes.
Step 5: Add Garlic and Pesto
Once the chicken is cooked, add minced garlic to the skillet. Cook for an additional 1-2 minutes until fragrant. Next, stir in the pesto sauce, ensuring all the chicken pieces are well coated.
Step 6: Cheese It Up
Remove the skillet from heat. Add shredded cheese to the chicken mixture and stir until melted and gooey. This cheesy blend will elevate your sliders.
Step 7: Prepare the Slider Buns
Slice the mini slider buns in half. Arrange the bottom halves on a baking sheet, ready for filling.
Step 8: Assemble the Sliders
Spoon a generous amount of the cheesy chicken mixture onto each bottom bun. Top with the other half of the slider bun to create a complete sandwich.
Step 9: Bake the Sliders
Place assembled sliders in the preheated oven. Bake for 10-12 minutes, or until the tops are lightly toasted and the cheese is bubbling.
Step 10: Serve and Enjoy
Once done, remove from the oven and let them cool for a few minutes. Serve warm and enjoy your delicious cheesy garlic pesto chicken sliders with friends and family!
Tips for the Perfect Cheesy Garlic Pesto Chicken Sliders
Creating mouth-watering sliders can elevate any meal. Follow these practical tips to make your chicken sliders irresistible!
Quality Ingredients Matter
Start with quality chicken. Fresh, organic chicken breasts provide the best flavor and moisture. You can use ground chicken or shredded rotisserie chicken for a quicker option. Always select a high-quality pesto; homemade is delicious, but store-bought can save time. Opt for a garlic-infused olive oil or use fresh garlic to bring out that strong, savory flavor.
Correct Temperature for Cooking
Cooking chicken to the right temperature is crucial for both flavor and safety. Ensure your chicken reaches an internal temperature of 165°F. Use a meat thermometer for accuracy. If grilling, keep the heat medium to ensure even cooking without burning the exterior. For baked sliders, preheat your oven and bake at 375°F for a crispy finish.
Know Your Bread Options
Choosing the right bread can make a difference in texture. Use slider buns, ciabatta, or even mini bagels. Whole grain options add a nutty flavor. If you’re gluten-free, look for gluten-free buns that suit your taste. Toasting the buns before assembling the sliders can also add extra crunch.
Flavor Variations for Dietary Needs
Accommodating different diets can be easy with a few substitutions. For a dairy-free option, replace regular cheese with vegan cheese. To lower calories, consider using chicken breast fillets instead of thighs. If you’re looking for a savory twist, add roasted red peppers or sun-dried tomatoes for an extra layer of flavor.
Experiment with Toppings
Enhance your sliders with various toppings. Avocado slices, arugula, or sautéed mushrooms can add freshness. For a kick, include jalapeños or a spicy aioli. Don’t hesitate to mix and match flavors to create your perfect sandwich.
By following these guidelines, you’ll create sliders that impress your friends and family. Enjoy your cooking and happy eating!
Storage Tips for Cheesy Garlic Pesto Chicken Sliders:
To enjoy your Cheesy Garlic Pesto Chicken Sliders at their best, proper storage is essential. These delicious sliders require careful handling to maintain their freshness and flavor. Follow these practical tips to ensure your sliders remain tasty and safe to eat.
Cooling Before Storage
First, allow your sliders to cool completely before you store them. Placing warm sliders in a container can create moisture that leads to sogginess. Spread them out on a wire rack for at least 30 minutes to let excess heat escape. Once cooled, it’s time to pack them securely.
Choosing the Right Container
Use an airtight container for optimal freshness. This method limits air exposure, which can dry out or spoil the sliders. Alternatively, you can wrap individual sliders tightly in plastic wrap or foil. If you plan to stack them, separate layers with parchment paper to prevent sticking.
Refrigeration Tips
If you want to store your sliders for short periods, place them in the refrigerator. Stored correctly, they can last up to 3 days in a fridge. Keep the temperature below 40°F (4°C) to prevent bacterial growth. When ready to eat, heat them in the oven or microwave to restore their delightful taste.
Freezing for Longer Shelf Life
For longer storage, freezing sliders is a great option. Wrap each slider in plastic wrap and then place them in a freezer bag to protect against freezer burn. Label the bag with the date; this way, you’ll know when they were prepared. Your sliders can last up to 2 months in the freezer. When you’re ready to enjoy them, simply thaw in the refrigerator overnight before reheating.
Reheating Properly
When reheating, aim for thorough heating to eliminate any potential bacteria. For the best results, use an oven set to 350°F (175°C) and heat for about 10-15 minutes. Keep an eye on them to ensure they don’t dry out. Alternatively, microwaving them works well; just cover them with a damp paper towel to retain moisture.
Following these storage tips ensures your Cheesy Garlic Pesto Chicken Sliders remain fresh, firm, and flavorful for every bite. Enjoy your sliders, whether fresh, refrigerated, or frozen, with confidence!
Related Recipes
If you love Cheesy Garlic Pesto Chicken Sliders, you might enjoy these similar or complementary dishes. Each recipe shares flavors or ingredients that will enhance your dining experience.
1. Pesto Pasta Salad
This vibrant salad combines pasta with the freshness of basil pesto, cherry tomatoes, and mozzarella balls. The creaminess and garlic notes found in this salad mirror the sliders beautifully. It makes for a refreshing side that balances the richness of the sliders.
2. Garlic Parmesan Roasted Vegetables
These roasted vegetables add a satisfying texture to your meal. The garlic and Parmesan flavors pair perfectly with the sliders, bringing a savory touch to the table. Plus, they’re an easy and nutritious side dish that complements any main course.
3. Caprese Skewers
Caprese skewers feature juicy tomatoes, fresh basil, and creamy mozzarella. Drizzled with balsamic glaze, they offer a fresh and tangy contrast to the rich flavors of sliders. They’re a perfect appetizer to kick off your meal and keep the Italian-inspired theme going.
4. Chicken Pesto Pizza
For fans of pesto, this pizza offers a delightful twist. Topped with grilled chicken, cheese, and fresh basil, it incorporates the same elements as the sliders but on a crispy crust. This option serves well as a filling main dish, ideal for pizza night.
These recipes not only match but also enhance the flavors you love in your sliders. Mix and match them for a delicious feast that delights your taste buds!
Frequently Asked Questions:
What are Cheesy Garlic Pesto Chicken Sliders made of?
Cheesy garlic pesto chicken sliders consist of tender chicken breast coated in a flavorful garlic and basil pesto, topped with melty cheese, and served between soft slider buns. The combination of the aromatic pesto and creamy cheese creates a delightful burst of flavor that impresses at any gathering.
How can I customize my sliders?
There are countless ways to personalize your cheesy garlic pesto chicken sliders. You can try using different types of cheese such as mozzarella, provolone, or even pepper jack for an added kick. Additionally, you can incorporate roasted vegetables, fresh spinach, or even sautéed mushrooms to enhance the flavor and nutritional value of your sliders.
Can these sliders be made ahead of time?
Absolutely! You can prepare the cheesy garlic pesto chicken sliders in advance by marinating the chicken and assembling them a few hours before serving. Just keep the assembled sliders covered in the refrigerator, and bake them just before you’re ready to enjoy. This makes them perfect for parties or meal prep.
What type of side dishes pair well with these sliders?
These sliders are a versatile dish that pairs beautifully with various side options. Consider serving them with a fresh garden salad, crispy sweet potato fries, or even coleslaw for a nice contrast in texture. The richness of the cheesy garlic pesto chicken sliders complements these sides perfectly.
Are cheesy garlic pesto chicken sliders suitable for meal prep?
Yes, they are ideal for meal prep! The sliders can be easily stored in an airtight container in the fridge after baking. You can reheat them quickly for a warm and satisfying meal throughout the week.
Can I use a different protein besides chicken?
Certainly! While chicken is the star ingredient, you can substitute it with turkey, pork, or even plant-based proteins for a vegetarian version. These alternatives will still allow you to enjoy the delicious pesto and cheese combination you love.
Conclusion:
In summary, the Cheesy Garlic Pesto Chicken Sliders offer a delightful blend of flavors that make them an irresistible choice for any meal. This recipe stands out for its simplicity, enabling even novice cooks to create a gourmet experience with minimal effort. The versatility of the sliders allows you to customize ingredients according to your preferences, whether you prefer a different cheese or swapping the chicken for veggies or beef. Additionally, these sliders are perfect for entertaining, serving a crowd, or meal prepping for busy weeknights. By incorporating fresh ingredients and a vibrant pesto sauce, you can elevate your sliders to a new level. Embrace the endless possibilities, and make this recipe a staple in your culinary arsenal. Enjoy every bite, and let the Cheesy Garlic Pesto Chicken Sliders become a favorite in your household!
Print
Cheesy Garlic Pesto Chicken Sliders: Irresistible Flavor Bombs
- Total Time: 30 minutes
- Yield: 8 sliders 1x
Description
Soft slider buns stuffed with juicy chicken, savory garlic pesto, and melted cheese — a guaranteed crowd-pleaser.
Ingredients
-
1 lb cooked chicken breast, shredded or sliced
-
1/2 cup pesto sauce
-
1 cup shredded mozzarella or provolone cheese
-
8 slider buns
-
2 cloves garlic, minced
-
2 tbsp butter, melted
-
Optional: fresh basil leaves for garnish
Instructions
-
Preheat oven to 350°F (175°C).
-
Prepare garlic butter: Mix melted butter with minced garlic. Brush on slider buns.
-
Assemble sliders: Spread pesto on buns, add chicken, and top with cheese. Place tops on sliders.
-
Bake: Arrange sliders in a baking dish, cover with foil, and bake 15 minutes. Remove foil and bake another 5 minutes until cheese melts and buns are golden.
-
Serve: Garnish with fresh basil if desired.
Notes
-
Use rotisserie chicken for a quick shortcut.
-
Add a slice of tomato or sautéed mushrooms for extra flavor.
-
These sliders freeze well — reheat wrapped in foil.
- Prep Time: 10 minutes
- Cook Time: 20 minutes
Nutrition
- Calories: 320kal
- Sugar: 3g
- Fat: 14 g
- Carbohydrates: 28 g
- Protein: 22g