
Cheesy Taco Sticks: A Delicious Snack Recipe

If you’re on the lookout for a fun, flavorful snack that’s sure to please a crowd, look no further than cheesy taco sticks! These delightful treats combine the irresistible flavors of a classic taco with gooey cheese, all wrapped up in a crispy exterior. Perfect for game day, movie nights, or even casual family dinners, this recipe offers a versatile base that can be easily tailored to your preferences.
Craving a kick? Consider adding jalapeños or a zesty taco sauce for an extra layer of flavor. For a vegetarian twist, black beans or sautéed vegetables can be great fillers too. Want that perfect crunch? Bake them until golden brown, ensuring the cheese is melted and bubbling. With a few expert tips and creative variations at your fingertips, cheesy taco sticks can captivate your guests, turning any gathering into a fiesta. Grab your ingredients and let the deliciousness unfold!
Ingredients for Cheesy Taco Sticks:
To create delicious cheesy taco sticks that are perfect for sharing, you will need the following ingredients. This recipe serves 8-10 people, making it ideal for parties, game nights, or casual get-togethers.
Main Ingredients:
- 1 lb ground beef (or ground turkey for a leaner option)
- 1 packet (1 oz) taco seasoning mix
- 1 cup shredded cheddar cheese
- 1 cup shredded mozzarella cheese
- 1 cup refried beans
- 1 roll (or 2 sheets) of refrigerated crescent roll dough
Additional Ingredients:
- 1 cup diced tomatoes (drained if using canned)
- 1/2 cup sliced black olives (optional)
- 1/2 cup chopped green onions (optional)
- 1/2 cup sour cream (for dipping)
- 1/2 cup salsa (for dipping)
Seasoning and Flavor Enhancers:
- 1 teaspoon garlic powder
- 1 teaspoon onion powder
- 1/2 teaspoon cayenne pepper (optional, for heat)
- 1 tablespoon chopped fresh cilantro (optional, for garnish)
Variations and Alternative Ingredients:
You can customize your cheesy taco sticks by incorporating various ingredients based on your taste preferences. Consider these fun variations:
- Veggie Taco Sticks: Substitute the ground meat with a combination of black beans, corn, and bell peppers for a delicious vegetarian alternative.
- Spicy Southwest: Add jalapeños to the meat mixture for an extra kick or use pepper jack cheese instead of cheddar for a spicier twist.
- Cheesy Chicken Taco Sticks: Swap the ground beef for shredded cooked chicken and use the same seasoning for a unique flavor.
With these carefully selected ingredients, you’re just a few steps away from making crowd-pleasing cheesy taco sticks that will be a hit at any gathering!
How to prepare Cheesy Taco Sticks:
Follow these simple steps to create delicious Cheesy Taco Sticks that everyone will love.
Gather Your Ingredients
Start by collecting all the necessary ingredients. You will need ground beef, taco seasoning, shredded cheese, crescent roll dough, and any additional toppings you like.
Cook the Beef
In a skillet over medium heat, add one pound of ground beef. Cook the beef until it’s browned, breaking it apart with a spatula. This should take about 5-7 minutes.
Add Taco Seasoning
Once the beef is fully cooked, drain any excess fat. Next, sprinkle in your taco seasoning. Stir well to combine, and add a splash of water if necessary. Let it simmer for about 2 minutes.
Prepare the Crescent Roll Dough
While the beef simmers, preheat your oven to 375°F (190°C). Open the crescent roll dough and lay it flat on a clean work surface. Unroll it carefully to avoid tearing the dough.
Cut the Dough
Using a pizza cutter or a sharp knife, cut the dough into triangles. Make sure each triangle is large enough to hold filling, aiming for a size of about 4 inches wide at the base.
Fill the Dough Triangles
Take a tablespoon of the seasoned ground beef and place it near the wide end of each triangle. Add a generous sprinkle of shredded cheese on top of the beef.
Roll the Dough
Starting from the wide end, carefully roll each triangle up towards the point. Make sure to secure the filling inside as you roll. Place each rolled stick seam-side down on a baking sheet lined with parchment paper.
Bake the Cheesy Taco Sticks
Once all the sticks are rolled, place the baking sheet in the preheated oven. Bake them for 12-15 minutes, or until they are golden brown and the cheese is bubbly. Keep an eye on them to prevent over-baking.
Serve and Enjoy
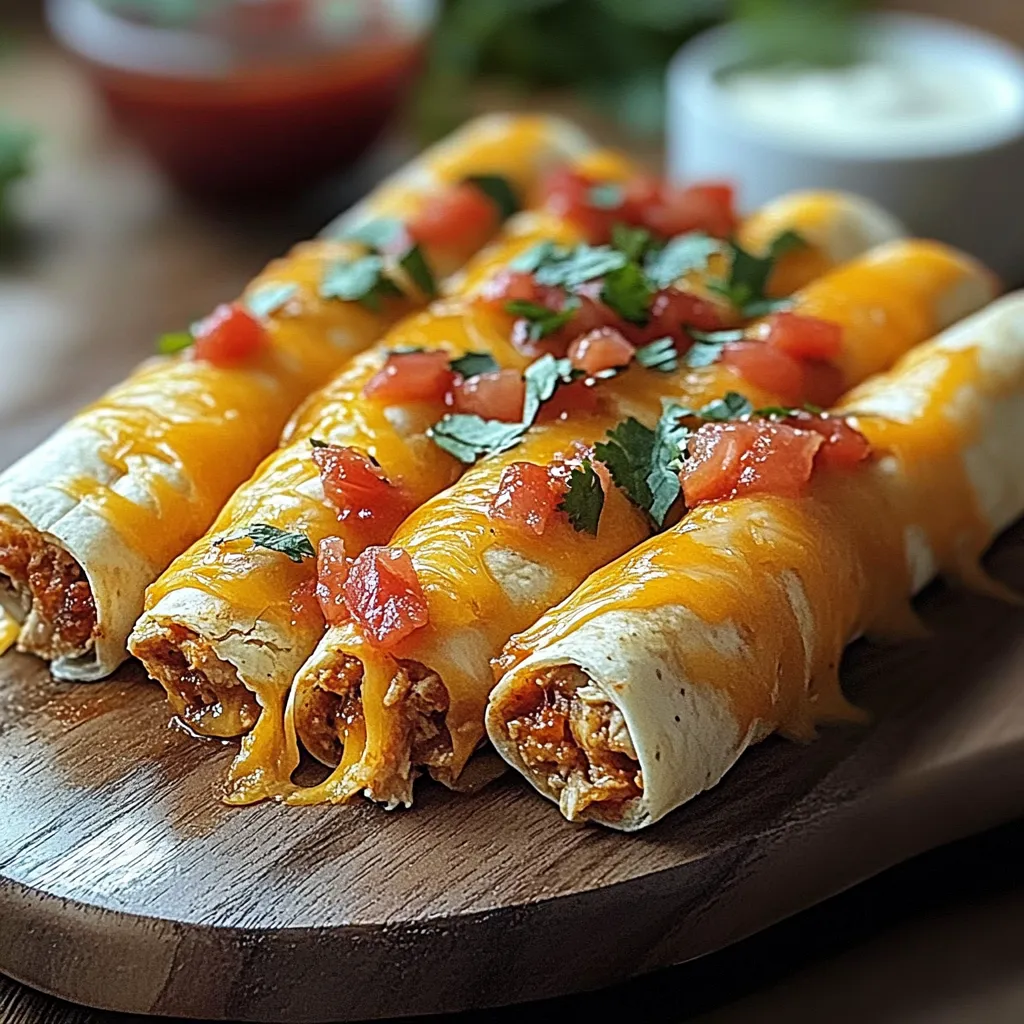
After baking, remove the Cheesy Taco Sticks from the oven. Let them cool for a few minutes before serving. Pair with your favorite dipping sauces like salsa or sour cream for an extra kick!
Tips for the Perfect Cheesy Taco Sticks
Creating delicious taco sticks is all about balancing flavors and textures. Here are some essential tips to ensure your cheesy creations are a hit!
Maintain the Correct Temperature
Temperature plays a crucial role in cooking. Keep your oven preheated to the right temperature before baking. A consistent 375°F (190°C) works best for crispy sticks with gooey cheese. Avoid opening the oven door frequently; this can lower the temperature and affect your outcome.
Use Quality Ingredients
Quality shines through in every bite. Choose fresh tortillas that are soft but sturdy enough to hold fillings. Incorporate high-quality cheese, like cheddar or pepper jack, for a robust flavor. Fresh vegetables and lean protein additions, such as seasoned ground beef or beans, enhance the overall dish, making each stick irresistible.
Smart Variations and Substitutions
Dietary needs vary, so consider these substitutions. For a vegetarian option, replace meat with black beans or sautéed mushrooms, adding extra spices for flavor. If you need a gluten-free version, use corn tortillas or gluten-free wraps. You can also experiment with low-fat cheese or dairy-free alternatives to suit different diets.
Avoiding Sogginess
To prevent soggy taco sticks, avoid overfilling them with wet ingredients like salsa. Instead, serve salsa on the side as a dip. This keeps the tortilla crispy and enhances texture contrasts. Choose drier fillings, and you’ll enjoy a crunchier bite each time.
Serving and Pairing Suggestions
Serving your taco sticks creatively can elevate the dining experience. Pair them with fresh guacamole, sour cream, or a zesty dip. Fresh herbs like cilantro or chives not only add flavor but also bring vibrant color to the plate. Try placing the taco sticks on a serving platter, garnishing with lime wedges for a burst of citrus that will brighten the flavors.
With these simple yet effective tips, your next gathering will be complete with a delicious batch of cheesy delicacies. Enjoy experimenting, and remember, the key to perfect taco sticks lies in the details!
Storage Tips for Cheesy Taco Sticks:
Maintaining Freshness
To keep your cheesy taco sticks delicious and fresh, store them in an airtight container as soon as they cool down. This prevents moisture from making the sticks soggy. Use a container that seals well to block out air. If you plan to eat them within a couple of days, the fridge works perfectly. For longer storage, consider freezing them.
Optimal Storage Conditions
When refrigerating, make sure your fridge temperature is consistently below 40°F (4°C). Place the container with the taco sticks on a middle shelf, where the temperature stays most even. Avoid storing them in the crisper drawer, as that section may not provide the right conditions. If you choose to freeze your sticks, wrap each one in plastic wrap before placing them in a freezer-safe bag or container. Removing as much air as possible helps prevent freezer burn while keeping the sticks tasty.
Shelf Life of Cheesy Taco Sticks
You can keep cheesy taco sticks in the refrigerator for up to three days. After this time, they may lose quality and flavor. When stored properly in the freezer, they can last for up to three months. For the best taste, try to consume them within the first month of freezing.
Reheating Tips
When you’re ready to enjoy your cheesy taco sticks again, you can reheat them in several ways. The oven offers the best results. Preheat your oven to 350°F (175°C) and bake for about 10-12 minutes or until heated through. This method helps them regain their crispiness. If you’re short on time, you may choose the microwave option. Heat the sticks for 30-45 seconds, but be aware that this may make them a bit softer.
Avoiding Waste
If you think you won’t eat all the sticks within a few days, consider freezing them right after you prepare them. This active choice keeps them fresh and minimizes waste. By following these storage tips, you ensure your cheesy taco sticks taste as good as the day you made them, keeping your meals enjoyable and waste-free.
Related Recipes to Enhance Your Taco Night
If you love Cheesy Taco Sticks, you will enjoy these flavorful recipes. Each dish brings a unique twist to your taco night, making the experience even more delicious.
- Taco Salad – This dish combines all the flavors of tacos in a fresh and crunchy salad. You can use ground beef or turkey, lettuce, tomatoes, and cheese. The crispy tortilla chips add a nice crunch, just like the texture found in Cheesy Taco Sticks. You can drizzle your favorite dressing on top for an added kick.
- Quesadillas – Cheese lover? Quesadillas are a fantastic option. Stuff tortillas with melted cheese, seasoned meat, and veggies. Like Cheesy Taco Sticks, they offer gooey cheese and savory fillings. You can customize them with different toppings or dips, such as salsa or guacamole.
- Taco Bake – This dish takes all the best elements of tacos and layers them together for a hearty meal. Ground meat, beans, cheese, and tortilla chips combine in a baking dish. The comforting texture and flavors complement the cheesy goodness of Cheesy Taco Sticks, making them a perfect match.
- Stuffed Peppers – For a lighter option, try stuffed peppers. Fill bell peppers with a mixture of rice, beans, cheese, and taco seasoning. Baking allows the flavors to meld nicely. These peppers add color and freshness to your meal, similar to the vibrant ingredients of taco sticks.
These recipes provide exciting alternatives while keeping the essence of taco flavors. They will undoubtedly elevate your next taco-themed dinner!
Frequently Asked Questions:
What are Cheesy Taco Sticks?
Cheesy Taco Sticks are a delightful fusion snack that combines the flavors of traditional tacos with a cheesy, crispy exterior. They typically consist of seasoned meat, cheese, and taco spices wrapped in a dough or tortilla and baked or fried until golden brown. This scrumptious treat is perfect for parties, game days, or a fun family dinner.
How can I customize the filling for my cheesy taco snacks?
You can easily tailor the filling of your cheesy taco treats to suit your taste preferences. Consider adding ingredients like black beans, corn, jalapeños, or various types of cheese. For a vegetarian option, substitute meat with lentils or mushrooms seasoned similarly to taco meat. The versatility allows you to explore different flavor combinations and keep it exciting.
Can I make Cheesy Taco Sticks ahead of time?
Absolutely! You can prepare the filling and assemble the sticks in advance. Just keep them in an airtight container in the refrigerator and bake them when you’re ready to serve. They can also be frozen for up to three months—just be sure to thaw them before baking for the best results.
What’s the best dipping sauce for cheesy taco sticks?
Many love to pair cheesy taco sticks with classic dips like salsa, guacamole, or sour cream. You can also experiment with spicy ranch dressing or nacho cheese sauce if you prefer something indulgent. Experiment with different sauces to find the flavor profile that excites your palate!
Are cheesy taco treats healthy?
The healthiness of cheesy taco treats largely depends on the ingredients used and preparation methods. Opting for whole-grain tortillas, lean meats, and plenty of vegetables can make them a healthier choice. You can also bake instead of frying to cut down on excess fat, making them a more nutritious option without compromising taste.
Can I use other types of cheese for my taco sticks?
Certainly! While classic Cheddar is a favorite choice, you can use other types of cheese such as Monterey Jack, Pepper Jack, or even a blend of cheeses for a more complex flavor. Experimenting with different cheeses can enhance the richness and depth of flavor in your cheesy taco creations!
Conclusion:
In summary, creating delicious Cheesy Taco Sticks is an easy and enjoyable endeavor that everyone can dive into. This recipe not only highlights the delightful combination of cheese and taco flavors but also emphasizes flexibility and customization. Feel free to adjust ingredients according to personal preferences, whether you prefer spicier elements or additional veggies to the mix. The simplicity of preparation makes these sticks a fantastic option for quick snacks, game-day treats, or even as a fun meal for gatherings. Experiment with various dips and toppings to elevate your cheesy creation further. With this guide, you’ll have the perfect balance of convenience and taste, ensuring that Cheesy Taco Sticks are a go-to dish for any occasion. Enjoy crafting these flavorful bites that are sure to please both kids and adults alike!
Print
Cheesy Taco Sticks: A Delicious Snack Recipe
- Total Time: 25 minutes
- Yield: About 12 sticks 1x
Description
Crunchy, cheesy, and packed with bold taco flavors—these cheesy taco sticks make the perfect snack for any occasion. Crispy on the outside, melty on the inside, and totally addictive!
Ingredients
-
1 sheet puff pastry (thawed)
-
1 cup shredded cheddar cheese
-
1 tsp taco seasoning
-
1 tbsp melted butter
-
Optional: chopped jalapeños or cilantro
Instructions
-
Preheat oven to 400°F (200°C).
-
Roll out puff pastry on a floured surface.
-
Sprinkle shredded cheese evenly, then dust with taco seasoning.
-
Cut into strips about 1 inch wide.
-
Twist each strip a few times and place on a baking sheet lined with parchment.
-
Brush with melted butter.
-
Bake for 12–15 minutes until golden and crispy.
-
Cool slightly and serve warm with salsa or guacamole.
Notes
-
Swap cheddar for pepper jack for a spicy kick.
-
Add jalapeños inside before twisting for extra heat.
-
Best eaten fresh but can be reheated in the oven.
- Prep Time: 10 minutes
- Cook Time: 15 minutes
Nutrition
- Calories: 120kal
- Sugar: 1g
- Sodium: 150mg
- Fat: 7g
- Saturated Fat: 4g
- Carbohydrates: 10 g
- Protein: 3g