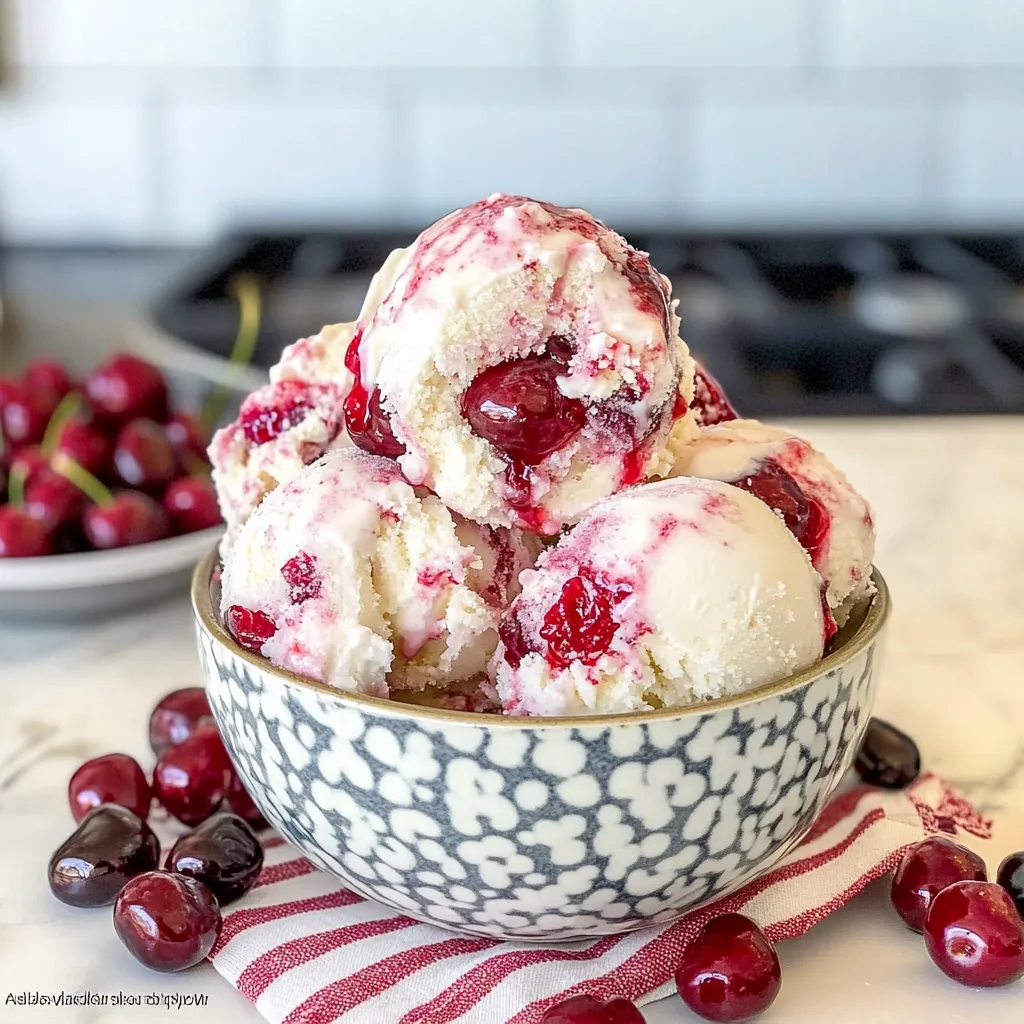
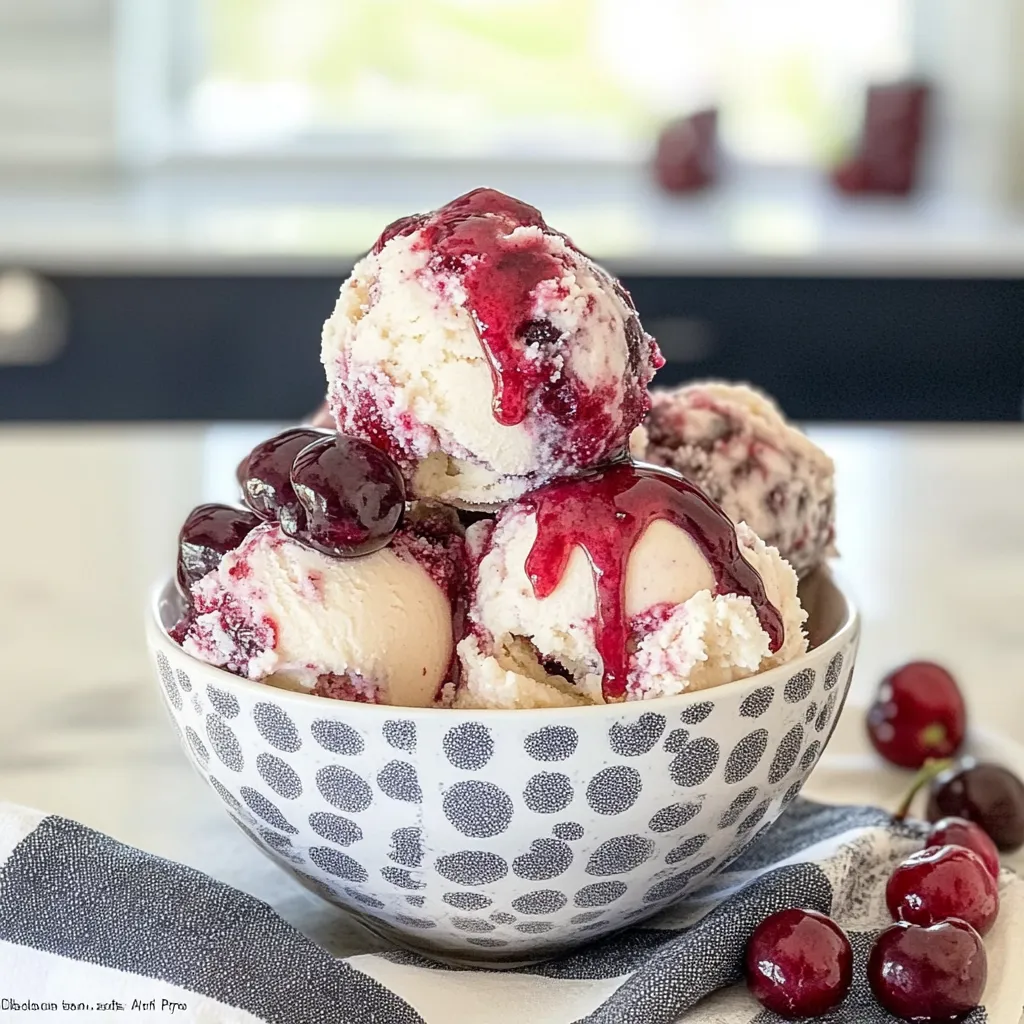
Cherry Vanilla Ice Cream Recipe – Creamy & Delicious Treat

Indulging in a scoop of homemade Cherry Vanilla Ice Cream is like savoring a summer day in a bowl. This delightful treat combines the tart sweetness of cherries with the smooth, creamy essence of vanilla, creating a dessert that tantalizes your taste buds with every bite. What makes this recipe even more appealing is its versatility; from experimenting with different fruit combinations to adjusting the sweetness, you can tailor it to your preferences.
For those seeking a little adventure, why not try adding a swirl of chocolate or a handful of nuts for extra texture? If you’re a fan of a richer taste, incorporating cream cheese into the base can elevate the flavor profile to new heights. To achieve that perfect creamy consistency, ensure your ice cream mixture is well-chilled before churning, and allow it ample time to freeze solid. With these tips in mind, you’ll create a Cherry Vanilla Ice Cream that transforms any occasion into a special celebration. Get ready to scoop into something truly delightful!
Ingredients for Cherry Vanilla Ice Cream Recipe:
To create a delightful cherry vanilla ice cream that serves 8 to 10 people, gather the following ingredients:
Dairy and Base Ingredients
- 2 cups whole milk
- 2 cups heavy cream
- 1 cup granulated sugar
- 1 tablespoon pure vanilla extract
- 1/2 teaspoon sea salt
Cherry Components
- 2 cups fresh or frozen cherries (pitted and halved)
- 1 tablespoon lemon juice (to enhance the cherry flavor)
- 1 tablespoon sugar (optional, to taste for sweeter cherries)
Mix-Ins and Optional Ingredients
- 1/2 cup cherry preserves or fruit syrup (for a pronounced cherry flavor)
- 1/2 cup chopped dark chocolate or chocolate chunks (if you enjoy the contrast of chocolate with cherries)
- 1/4 cup chopped nuts (such as pecans or almonds for added crunch)
Variations and Alternative Ingredients
If you’re looking to customize your cherry vanilla ice cream, consider these variations:
- Try using almond extract instead of vanilla extract for a delightful twist.
- For a richer ice cream, consider substituting condensed milk for part of the sugar and cream.
- Mix in other fruits like strawberries or raspberries for a mixed berry version.
- For a vegan option, use coconut milk and plant-based heavy cream alternatives, sweetening with agave syrup.
By carefully selecting these ingredients, you can ensure an indulgent and flavorful cherry vanilla ice cream experience. Each component adds depth to the flavor profile, resulting in a creamy and delicious dessert that’s perfect for gatherings or warm summer days. Enjoy the process of making this delightful treat!

How to prepare Cherry Vanilla Ice Cream Recipe:
Creating your own cherry vanilla ice cream at home is simple and rewarding. Follow these steps to enjoy a delicious treat.
Gather Your Ingredients
Start by collecting all the necessary ingredients. You will need:
- 2 cups of fresh cherries, pitted and halved
- 1 cup of granulated sugar
- 2 cups of heavy cream
- 1 cup of whole milk
- 1 tablespoon of vanilla extract
- Pinch of salt
Prepare the Cherry Mixture
In a mixing bowl, combine the halved cherries with half a cup of sugar.
Toss the cherries to coat them evenly with sugar, then let this sit for about 30 minutes.
During this time, the cherries will release their juices, creating a syrupy mixture.
Blend Ice Cream Base Ingredients
In a separate large bowl, whisk together the remaining half cup of sugar, heavy cream, whole milk, vanilla extract, and a pinch of salt.
Ensure that the sugar dissolves completely in the mixture.
This will create a smooth and well-combined base for your ice cream.
Combine Cherry Mixture with Ice Cream Base
Once the cherries are ready, gently fold them, along with their syrup, into the ice cream base.
Mix thoroughly to ensure the cherries are distributed evenly throughout the creamy mixture.
Chill the Mixture
Cover the bowl with plastic wrap and refrigerate the combined mixture for at least 2 hours.
This step is crucial for achieving a rich texture and enhancing the flavors.
Churn the Ice Cream
After chilling, pour the mixture into an ice cream maker.
Churn according to the manufacturer’s instructions, typically for 20-30 minutes.
The mixture will thicken and turn into a soft-serve consistency.
Freeze Until Firm
Transfer the churned ice cream into an airtight container.
Cover it with a lid and freeze for at least 4 hours to firm it up.
Serve and Enjoy
When ready to serve, scoop the cherry vanilla ice cream into bowls or cones.
Enjoy your homemade treat with cherries and vanilla in every bite!
Tips for the Perfect Cherry Vanilla Ice Cream Recipe
Maintain the Right Temperature
Keeping your ice cream at the correct temperature is crucial. Start with your ice cream maker’s bowl. Chill it in the freezer for at least 24 hours before use. If the bowl is not adequately frozen, the ice cream may not achieve the desired texture. Additionally, after churning the mixture, transfer it to a container that is freezer-safe. Place the container in the coldest part of your freezer to help it firm up evenly.
Use Quality Ingredients
The flavor of your ice cream largely depends on the ingredients you choose. For the best results, opt for whole, fresh ingredients. Use ripe cherries for a sweeter, more vibrant taste. If possible, go for organic cherries to avoid pesticides and ensure natural flavors shine through. Similarly, select high-quality vanilla extract or even vanilla beans for a richer flavor.
Make Suitable Substitutions
Dietary restrictions shouldn’t prevent you from enjoying delicious ice cream. If you or your guests are lactose intolerant, consider using full-fat coconut milk or almond milk as a base. These alternatives will give your ice cream a creamy texture while catering to different dietary needs. For low-sugar options, sweeten your dessert with natural substitutes like maple syrup, honey, or agave nectar. They can provide sweetness without causing a spike in blood sugar.
Texture Tips
Achieving the right texture is essential for a successful cherry vanilla treat. When mixing the base ingredients, avoid over-churning. Over-churning can introduce too much air, resulting in a fluffy rather than creamy ice cream. If you prefer a denser consistency, you can incorporate less air by churning for shorter periods.
Storage Guidance
To store your ice cream properly, keep it in an airtight container to prevent freezer burn and ice crystals from forming. When you’re ready to serve, allow it to sit at room temperature for about 5-10 minutes. This softens the ice cream, making it easier to scoop while maintaining its creamy texture.
By following these tips, you will enjoy a perfect batch of cherry vanilla ice cream every time.
Storage Tips for Cherry Vanilla Ice Cream Recipe:
Properly storing your homemade ice cream ensures that it remains fresh, creamy, and delicious. Follow these storage tips to maintain the quality of your Cherry Vanilla Ice Cream.
Optimal Storage Conditions
First, ensure you store the ice cream in a suitable container. Use an airtight, freezer-safe container to minimize exposure to air. This reduces the risk of freezer burn, which can affect texture and flavor. Always choose a container that is just the right size; avoid leaving too much empty space as this can allow air to circulate.
When you place the container in the freezer, make sure the temperature remains consistently at or below 0°F (-18°C). Fluctuations in temperature can lead to ice crystals forming, ruining the smooth texture of your Cherry Vanilla Ice Cream.
How to Serve and Refreeze
When serving your ice cream, allow it to soften for a few minutes before scooping. This eases the transfer and helps you get perfect scoops. After serving, promptly return any remaining ice cream to the freezer. Use a clean ice cream scoop each time to maintain the ice cream’s hygiene and quality.
Shelf Life Considerations
Homemade ice cream can last up to two weeks in the freezer. After this time, it may begin losing flavor and texture. To enjoy the best quality, try to consume your Cherry Vanilla Ice Cream within the first week. To keep track, label your container with the date of preparation.
If you notice any changes in flavor or texture, such as an icy layer or a grainy feel, it’s best to discard the ice cream. These signs indicate that the ice cream has exceeded its ideal storage time.
Tips for Extended Storage
For optimal long-term storage, consider freezing your ice cream in smaller portions. This allows you to enjoy a fresh scoop whenever the craving strikes while minimizing the time the rest of the ice cream spends exposed to air. You might also consider using silicone ice cream molds for easy serving sizes.
By following these storage tips, you can ensure your Cherry Vanilla Ice Cream remains a delightful treat for days to come. Enjoy responsibly!
Related Recipes to Enhance Your Cherry Vanilla Ice Cream Experience
If you’re looking to complement your delicious Cherry Vanilla Ice Cream, consider trying these related recipes. Each one enhances the flavors of the ice cream and adds variety to your dessert menu.
- Chocolate Chip Cookies: These classic cookies serve as a delightful pairing. The rich, buttery flavor of the cookies contrasts beautifully with the light sweetness of the cherry vanilla ice cream. Enjoy them together by sandwiching a scoop of ice cream between two cookies for a decadent treat.
- Fresh Berry Compote: Whip up a quick berry compote using strawberries, raspberries, and blueberries. The tartness of the berries complements the creamy sweetness of the Cherry Vanilla Ice Cream. Drizzle the warm compote over scoops for a refreshing flavor boost.
- Chocolate Sauce: A drizzle of warm chocolate sauce can create a rich, indulgent experience when added to a bowl of cherry vanilla ice cream. The combination of chocolate and cherries is a classic pairing that never disappoints.
- Homemade Waffle Cones: Crafting your own waffle cones adds a fun twist. The crisp texture and buttery flavor of the cones provide an enjoyable crunch with each bite of your ice cream. This recipe brings an element of nostalgia and enhances your ice cream experience.
- Peach Cobbler: Serve a warm slice of peach cobbler alongside scoops of cherry vanilla ice cream. The combination of warm and cold, along with the sweet, juicy peaches, creates a tantalizing contrast that will leave your taste buds dancing.
These recipes not only work well with your Cherry Vanilla Ice Cream but also bring new flavors to the table. Try them out for a well-rounded dessert experience!
Frequently Asked Questions:
What are the main ingredients needed for the cherry vanilla ice cream recipe?
The primary ingredients for a delightful cherry vanilla ice cream include fresh or frozen cherries, heavy cream, milk, sugar, vanilla extract, and a pinch of salt. These ingredients work together to create a creamy and flavorful treat that’s perfect for any occasion. You can also consider adding cherry puree or pieces of cherry for an extra burst of flavor.
Can I make this cherry vanilla ice cream without an ice cream maker?
Absolutely! If you don’t have an ice cream maker, you can still whip up this delicious cherry dessert. Simply blend all the ingredients together and pour the mixture into a freezer-safe container. Stir it every 30-60 minutes to break up any ice crystals until it reaches a creamy consistency. This method will yield a satisfying treat without the need for special equipment.
How long does it take to make cherry vanilla ice cream?
While the actual preparation time for this cherry-flavored treat is relatively short, the total time to achieve a perfect texture can vary. Expect about 15-20 minutes for mixing, followed by 4-6 hours in the freezer for optimal results. If using an ice cream maker, the churning process can take around 20-30 minutes.
Can I substitute other fruits in this ice cream recipe?
Certainly! If cherries aren’t your favorite or you want to explore different flavors, feel free to substitute with other fruits such as strawberries, raspberries, or blueberries. Just ensure that the fruit you choose complements the vanilla base for a harmonious flavor.
Is there a dairy-free version of this cherry vanilla ice cream?
Yes, you can easily make a dairy-free adaptation of this recipe by using coconut milk or almond milk in place of heavy cream and regular milk. Selecting a non-dairy alternative maintains creaminess while offering a refreshing cherry flavor without dairy.
How should I store leftover cherry vanilla ice cream?
To preserve the quality and flavor of your cherry ice cream, store it in an airtight container. Ideally, it should be placed in the coldest part of your freezer. Enjoy it within a few weeks for the best taste and texture, although it can last longer if stored properly.
Conclusion:
In summary, this Cherry Vanilla Ice Cream recipe offers a delightful way to enjoy homemade frozen treats. Its straightforward approach ensures that even novice cooks can whip up a batch with ease. The beauty of this recipe lies in its flexibility; you can customize the sweetness and creaminess to suit your preferences or dietary needs. Feel free to experiment with different mix-ins, such as chocolate chips or nuts, to make it your own. Remember, using fresh cherries elevates the flavor profile, but frozen cherries can also work wonderfully in a pinch. By embracing these personalization options, you’re not just making ice cream—you’re creating a unique dessert that captures your taste buds. Indulge in this refreshing delight and savor every scoop of your custom Cherry Vanilla Ice Cream.
Print
Cherry Vanilla Ice Cream Recipe – Creamy & Delicious Treat
- Total Time: 10 minutes
- Yield: 1 pint (about 2–3 servings) 1x
Description
This Cherry Vanilla Ice Cream combines the sweetness of ripe cherries with smooth vanilla cream in every bite. It’s a refreshing and rich dessert perfect for warm days or any sweet craving!
Ingredients
-
1 cup whole milk
-
½ cup heavy cream
-
¼ cup granulated sugar
-
1 tsp vanilla extract
-
½ cup chopped sweet cherries (fresh or thawed frozen)
-
Optional: 1 tsp cherry juice or syrup for extra flavor
Instructions
-
Mix base: Whisk together milk, cream, sugar, and vanilla until fully dissolved.
-
Add cherries: Stir in chopped cherries and optional cherry syrup.
-
Freeze: Pour mixture into a Ninja Creami pint container. Freeze upright for 24 hours.
-
Creamify: Insert into Ninja Creami and run on “Ice Cream” mode.
-
Adjust texture: If crumbly, add a splash of milk and respin until smooth and creamy.
-
Serve: Enjoy as-is or top with extra cherries or white chocolate chips.
Notes
-
For a dairy-free version, use full-fat coconut milk and plant-based cream.
-
Maraschino cherries add a sweeter, more vibrant flavor if preferred.
-
Store any leftovers in the pint container in the freezer for up to a week.
- Prep Time: 10 minutes
- Cook Time: 0 minutes (freeze overnight)
Nutrition
- Calories: 290 kcal
- Sugar: 21g
- Sodium: 45mg
- Fat: 20g
- Saturated Fat: 13g
- Carbohydrates: 25g
- Fiber: 1g
- Protein: 3g
