
Chocolate Meringue Easter Nests: Delightful Spring Treats
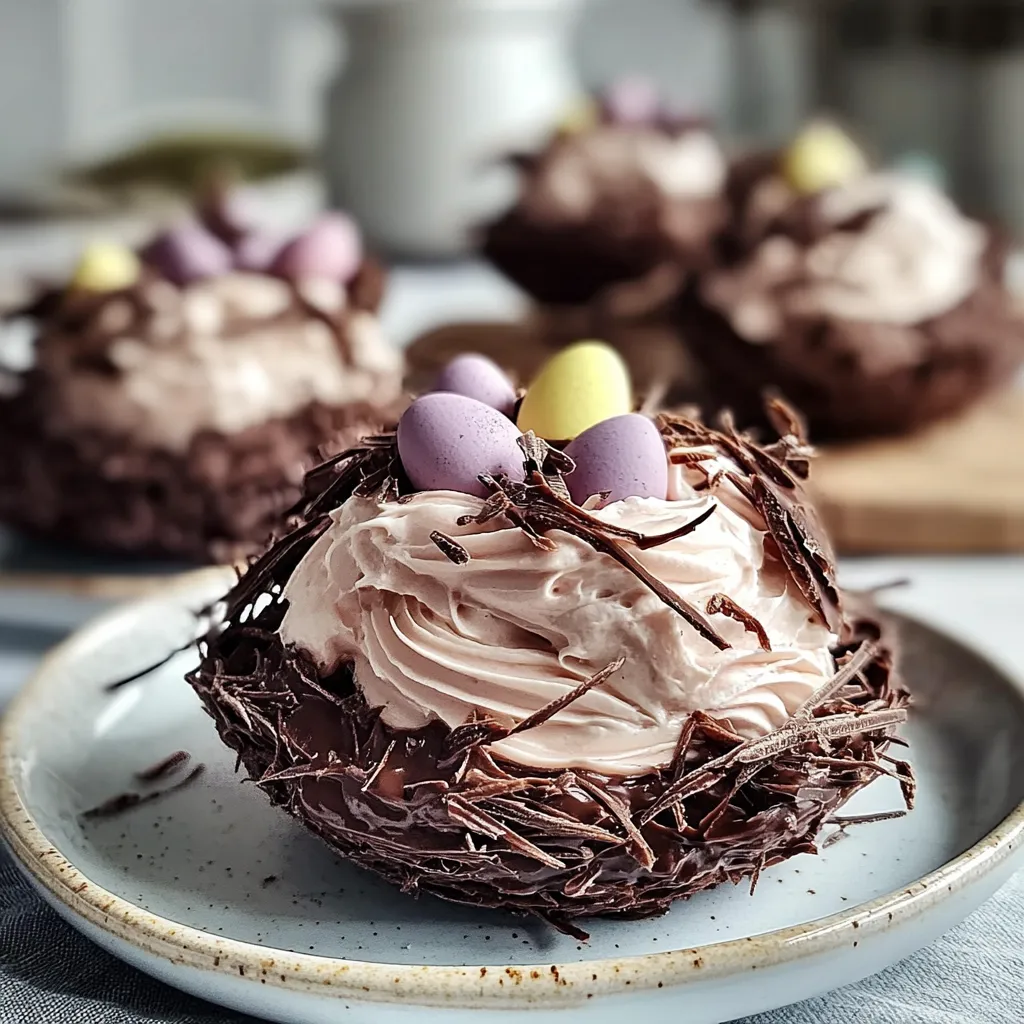
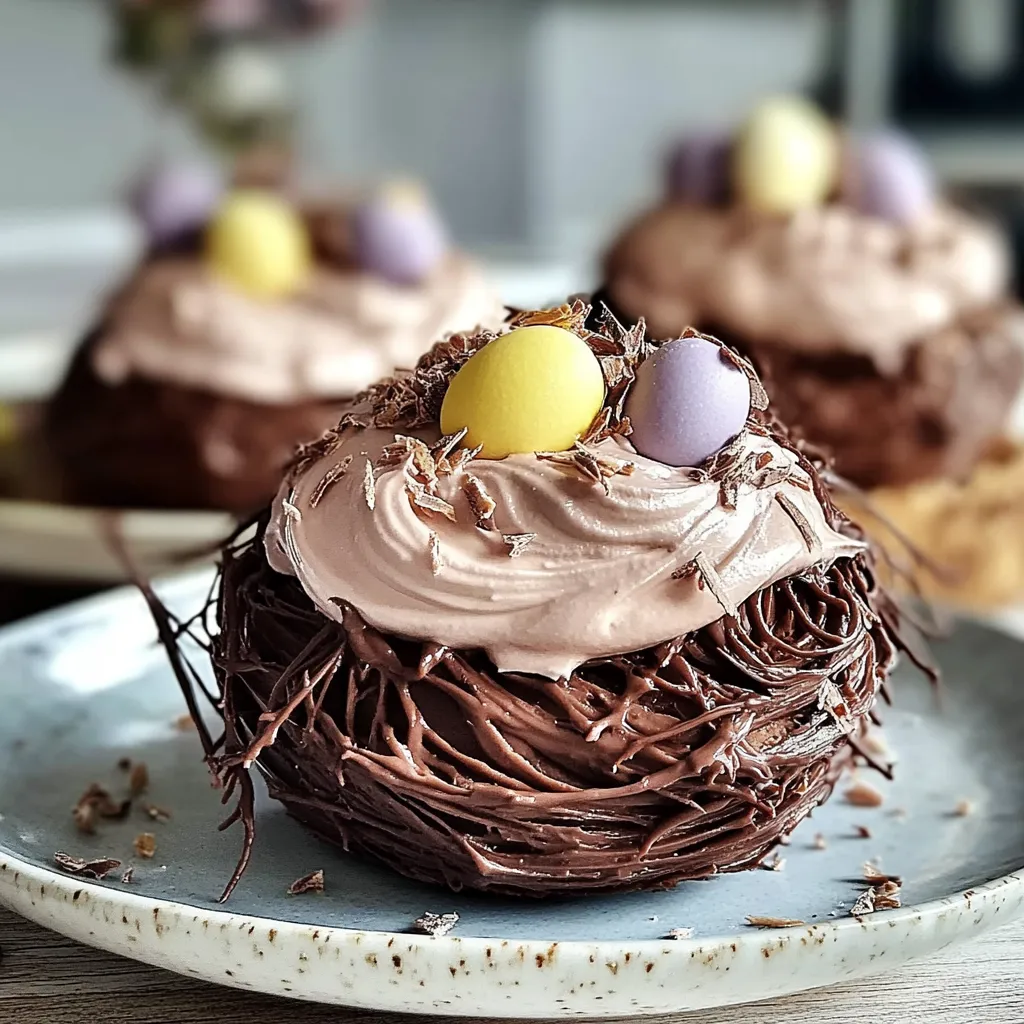
As the joyous occasion of Easter approaches, there’s nothing quite like indulging in sweet treats that celebrate the spirit of the season. Chocolate Meringue Easter Nests are not only visually stunning but also provide a delightful contrast between airy meringue and rich chocolate. These whimsical nests serve as the perfect canvas for colorful candy eggs, making them a hit with both kids and adults alike.
Feel free to experiment with different fillings—swap out candy eggs for dried fruits or berries for a healthier twist! For a decadent touch, incorporate flavors such as peppermint or orange zest into your meringue. To master the art of meringue, remember to use room temperature egg whites and ensure your mixing bowl is completely grease-free. Whether you are an experienced baker or looking to impress at your first Easter gathering, these delectable creations are sure to leave a lasting impression. Let’s dive into how to make your own Chocolate Meringue Easter Nests!
Ingredients for Chocolate Meringue Easter Nests:
To make a delightful batch of Chocolate Meringue Easter Nests that serves 8 to 10 people, gather the following ingredients:
Main Ingredients:
- 4 large egg whites (room temperature)
- 1 cup granulated sugar
- ½ teaspoon cream of tartar
- ¼ teaspoon salt
- 1 teaspoon pure vanilla extract
- 2 tablespoons unsweetened cocoa powder
- ½ cup semi-sweet chocolate chips (melted and slightly cooled)
For the Filling:
- 1 cup heavy whipping cream
- 2 tablespoons powdered sugar
- ½ teaspoon vanilla extract
- 1 cup mini chocolate eggs (for decoration)
Optional Garnishes:
- Fresh mint leaves (for decorating your nests)
- Shredded coconut (to resemble nest grass, toasted for added flavor)
- Edible flowers (like violets or pansies for a festive touch)
Substitutions and Variations:
- For a lighter texture, you can use 3 large egg whites instead of 4, but ensure they are still at room temperature for better volume.
- If you prefer a different flavor, consider adding a teaspoon of almond extract or orange zest to the meringue for a unique twist.
- Replace the semi-sweet chocolate chips with dark chocolate or milk chocolate to tailor the sweetness to your liking.
- Upgrade the filling by embedding layers of fruit like raspberries or strawberries under the whipped cream for freshness and a colorful presentation.
This collection of ingredients will ensure your creation is both visually appealing and delicious, making for a perfect Easter treat. Enjoy crafting your Chocolate Meringue Easter Nests, each bite a celebration!
How to prepare Chocolate Meringue Easter Nests:
Creating delightful Chocolate Meringue Easter Nests is a fun activity that’s perfect for the holiday season. Follow these clear and straightforward steps to make your own unique treats.
Gather Your Ingredients and Tools
Start by collecting all necessary ingredients: 4 large egg whites, 1 cup of granulated sugar, 1 teaspoon of vanilla extract, 2 tablespoons of cocoa powder, and chocolate eggs for decoration. Ensure your mixing bowl and whisk are clean and dry.
Preheat Your Oven
Set your oven to 250°F (120°C). A low temperature will help the meringues dry out properly without burning.
Beat the Egg Whites
Place the egg whites into the mixing bowl. Use an electric mixer to beat the egg whites on medium speed until soft peaks form. This usually takes about 3-4 minutes.
Add Sugar Gradually
Once you have soft peaks, gradually sprinkle in the granulated sugar while continuing to mix. Beat on high speed until the mixture is glossy and holds stiff peaks. This should take an additional 4-5 minutes.
Incorporate Vanilla and Cocoa
Carefully add the vanilla extract and cocoa powder to the meringue mixture. Gently fold these ingredients in using a spatula to maintain the light texture of the meringue.
Shape the Meringue Nests
Line a baking sheet with parchment paper. Use a large spoon or a piping bag to drop dollops of the meringue onto the paper, forming small nests. Create a slight indentation in the center of each nest, which will hold your chocolate eggs later.
Bake the Nests
Place the baking sheet in the preheated oven. Bake for about 1 hour, or until the meringues are dry and crisp. They should easily lift off the parchment paper when they’re ready.
Cool and Decorate
Once baked, turn off the oven and leave the nests inside to cool completely. This helps to prevent cracks. Once cooled, fill each nest with chocolate eggs of your choice.
Enjoy your festive Chocolate Meringue Easter Nests as a delightful treat for friends and family, or use them as an eye-catching centerpiece!
Tips for the Perfect Chocolate Meringue Easter Nests
Maintain the Right Temperature
Getting the temperature right is critical when making meringue. Before you start, make sure your oven is preheated to 250°F (120°C). This lower temperature helps the meringue dry out slowly, preventing cracks. After you’ve piped your nests, bake them for about 1 to 1.5 hours. Don’t open the oven door during baking, as this change in temperature can cause them to collapse. Once baked, turn off the oven and let the nests cool down inside. This allows them to set properly and achieve that crunchy texture.
Use Quality Ingredients
Choosing high-quality ingredients significantly enhances the flavor and texture of your nests. Select fresh eggs because older eggs might not whip to the desired stiffness. For the chocolate drizzle, opt for a good quality dark chocolate with at least 70% cocoa content. This rich chocolate will contrast beautifully with the sweet meringue, elevating the overall taste. Always sift the cocoa powder and sugar before mixing to remove any lumps, ensuring a smooth and airy finish in your dessert.
Substitutions for Dietary Restrictions
If you’re catering to dietary restrictions, you can easily modify the recipe. For a dairy-free option, use dairy-free chocolate when drizzling. To avoid refined sugar, consider using coconut sugar or a blend of stevia and erythritol for a low-calorie option. If you need an egg-free meringue, aquafaba (the liquid from canned chickpeas) can be whipped to create a similar texture. Use 3 tablespoons of aquafaba to replace one egg white. This makes the dessert suitable for vegans and those allergic to eggs.
Additional Tips
When piping the nests, use a piping bag fitted with a star nozzle for a beautiful design. If you’re short on time, you can also spoon the meringue mixture into shape. Be patient while whipping the egg whites; they should reach stiff peaks. Add the cocoa powder and sugar gradually to prevent deflating the mixture. Finally, let your creativity shine through with the decorations. Use colorful candies or edible glitter to make your Easter nests festive and fun!
By following these various tips and adjustments, you’ll master the art of crafting delightful meringue nests that will impress family and friends alike. Enjoy the process and the delicious results!
Storage Tips for Chocolate Meringue Easter Nests:
Properly storing your delightful creations can keep them fresh and enjoyable for longer. Follow these simple tips to maintain the quality of your Chocolate Meringue Easter Nests.
Maintaining Freshness
To keep your meringue nests fresh, avoid exposing them to moisture. Moisture softens the meringue, making it lose its signature crunch. Always handle the nests with clean, dry hands. It’s best to store them in an airtight container to protect them from humidity. Choose a container that is just the right size so the nests fit snugly without being crushed.
Optimal Storage Conditions
Store your meringue treats in a cool, dry area. A pantry shelf works great, but avoid locations near ovens or other heat sources. Heat can affect the texture and stability of the meringue. The temperature should remain consistent; fluctuating temperatures can lead to undesirable changes in the meringue’s structure.
Shelf Life of Meringue Treats
Chocolate Meringue Easter Nests will typically maintain their best quality for about 1 to 2 weeks when stored correctly. While they may remain safe to eat beyond this timeframe, the texture may not be as enjoyable. For longer storage, consider freezing the meringues, though be aware that freezing can alter their texture. If you choose to freeze them, wrap each nest individually in plastic wrap, then place them in an airtight container or freezer bag. Properly stored, they can last for about 2 to 3 months in the freezer.
Tips for Freezing
When it’s time to enjoy your frozen nests, let them thaw at room temperature. Avoid using a microwave, as this can cause them to become soft. Once thawed, enjoy them quickly, as they won’t retain their freshness for long.
Following these storage tips ensures you savor your Chocolate Meringue Easter Nests at their best. With a little care in handling and storage, you can enjoy your delicious treats longer, celebrating the joy of homemade sweets!
Related Recipes to Chocolate Meringue Easter Nests
If you love the delightful crunch and sweetness of Chocolate Meringue Easter Nests, you’ll enjoy the following recipes that complement their flavors and textures beautifully:
- Mini Chocolate Tartlets: These bite-sized treats feature a rich chocolate filling in a buttery crust. The tart’s smooth texture contrasts with the airy meringue, creating a balanced dessert experience. Both desserts highlight chocolate, making them a perfect pairing for an Easter celebration.
- Coconut Macaroons: Chewy and sweet, coconut macaroons provide a lovely twist to the meringue theme. Their crispy exterior and soft interior echo the texture of meringue nests. Both treats appeal to those who love light and airy desserts, featuring a touch of nutty sweetness.
- Carrot Cake Cupcakes with Cream Cheese Frosting: These cupcakes offer a seasonal flavor that pairs well with Easter celebrations. The moist carrot cake combined with the tangy frosting complements the sweetness of meringue nests. Serving a fruity dessert alongside chocolate balances flavors and gives your guests variety.
- Strawberry Pavlova: A cousin to meringue, pavlova boasts a similar airy texture but adds freshness with seasonal fruits. The tartness of strawberries contrasts beautifully with the sweetness of the Chocolate Meringue Easter Nests, enhancing your dessert table with vibrant flavors.
These suggestions cater to many palates, providing options that harmonize well with the delightful experience of enjoying Chocolate Meringue Easter Nests.
Frequently Asked Questions:
What are Chocolate Meringue Easter Nests?
Chocolate Meringue Easter Nests are delightful confections made primarily from whipped egg whites, sugar, and cocoa, shaped into delicate nest-like forms. These treats are often filled with colorful candy eggs or other sweets, making them a festive dessert option during the Easter season. The combination of a crispy exterior and a soft, chewy interior makes these nests a popular choice for spring celebrations.
How do I make the chocolate meringue for the nests?
To create the perfect chocolate meringue, you will need to whip egg whites until they form stiff peaks and gradually add sugar until fully dissolved. Cocoa powder is then folded in gently to maintain the light texture. It’s crucial to handle the mixture with care; over-mixing can lead to a collapse of the meringue structure. Once well combined, the mixture is piped onto a baking sheet to form the nest shape.
Can I substitute ingredients in Chocolate Meringue Easter Nests?
Yes, you can substitute various ingredients based on dietary preferences or restrictions. For instance, you can use a sugar alternative in place of regular sugar, or even try aquafaba as a vegan substitute for egg whites. Note, however, that such substitutions may alter the final texture and flavor, so a little experiment may be required.
How should I store my Easter nests?
To keep your chocolate nests fresh, store them in an airtight container at room temperature. Avoid refrigerating them, as humidity can soften the meringue and affect its crispness. If made in advance, it’s best to add any candy fillings closer to serving time to prevent melting or moisture from affecting the nests.
Can I make these nests in advance for Easter?
Absolutely! Chocolate meringue nests can be made ahead of time, as they hold up well when stored correctly. It’s often suggested to prepare them a few days before your celebration. Just be sure to add filling right before serving to ensure they remain crispy and visually appealing.
What types of candy are best to fill the nests?
The beauty of these chocolate creations lies in their versatility. Classic options for filling include mini chocolate eggs, jelly beans, or pastel-colored candies that evoke the essence of Easter. You can also get creative with other small confections like caramel pieces or nuts, tailoring the delights to your personal preferences or those of your guests.
Conclusion:
In summary, creating delightful Chocolate Meringue Easter Nests is an enjoyable and straightforward process that anyone can master. The recipe’s simplicity allows for quick preparation, making it a perfect choice for festive gatherings or a fun activity with kids. Not only are these nests visually stunning, but they also offer remarkable flexibility; feel free to customize them with your favorite fillings, be it colorful candies or fresh fruits. The balance between the sweet, crispy meringue and the rich chocolate ensures a delectable treat that brings joy to any occasion. With this guide, you can easily adapt the recipe to suit personal tastes or dietary preferences, making it a versatile addition to your Easter celebrations. Embrace the creativity and indulge in the sweet rewards of your culinary efforts with these charming nests!
Print
Chocolate Meringue Easter Nests: Delightful Spring Treats
- Total Time: 13 minute
- Yield: Makes 8 nests 1x
Description
Light, crispy chocolate meringue shaped into whimsical nests and filled with whipped cream or chocolate and candy eggs—perfect for Easter or any spring celebration!
Ingredients
-
3 large egg whites (room temperature)
-
¾ cup granulated sugar
-
2 tbsp unsweetened cocoa powder (sifted)
-
½ tsp vanilla extract
-
Pinch of salt
-
Whipped cream or chocolate ganache (for filling)
-
Mini candy eggs (for garnish)
Instructions
-
Preheat oven to 250°F (120°C) and line a baking sheet with parchment paper.
-
In a clean, dry bowl, beat egg whites and salt until soft peaks form.
-
Gradually add sugar, beating until stiff peaks form and mixture is glossy.
-
Gently fold in cocoa powder and vanilla.
-
Spoon or pipe meringue into 8 nest shapes on the baking sheet, with a slight indentation in the center of each.
-
Bake for 1 hour, then turn off oven and let nests cool inside with door ajar.
-
Once cool, fill with whipped cream or ganache and top with mini eggs.
Notes
-
Meringue nests can be made 1–2 days in advance and stored in an airtight container.
-
Use natural food dyes or edible flowers for an extra spring flair.
-
Swap candy eggs with fresh berries for a lighter option.
- Prep Time: 20 minutes |
- Cook Time: 60 minutes
Nutrition
- Calories: 130kal
- Sugar: 20g
- Sodium: 25mg
- Fat: 4g
- Saturated Fat: 2g
- Carbohydrates: 22g
- Protein: 2g