
Cookie Monster Cake Jars: Fun & Delicious Treats
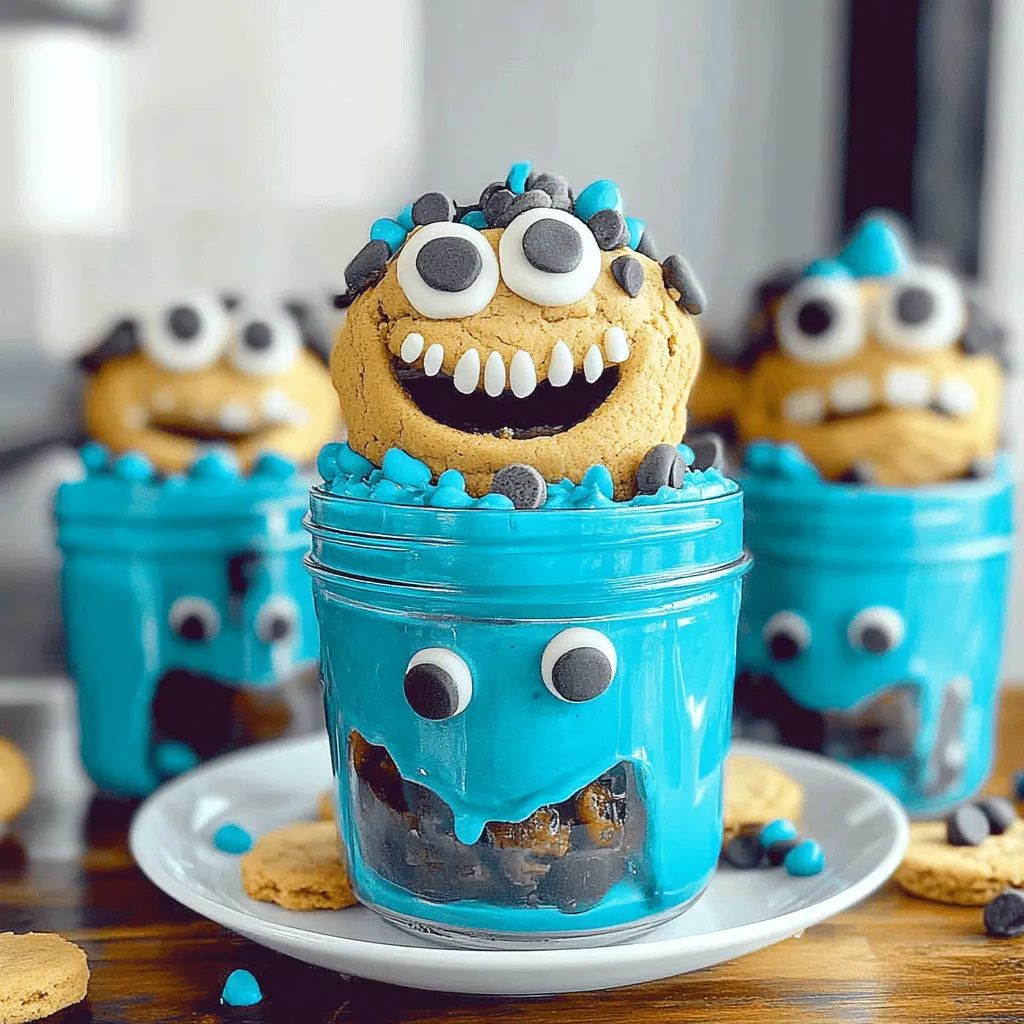
Indulging in a whimsical dessert is always a treat, and there’s no better way to do it than with the delightful Cookie Monster Cake Jars. These colorful, fun, and oh-so-decadent creations capture the spirit of childhood while offering a sophisticated twist that appeals to all ages. Imagine layers of moist cake, creamy frosting, and scattered cookie crumbles, all layered beautifully in a convenient jar! Perfect for parties, picnics, or a cozy night in, these jars can easily be customized. From swapping chocolate chip cookies for oatmeal raisin to trying different flavors like peanut butter or snickerdoodle, the possibilities are endless.
To achieve the ideal results, consider using fresh ingredients and a mix of textures—think crunchy cookies and smooth icing. Don’t forget to experiment with various garnishes like sprinkles or gummy candies for visual appeal. Whether you’re entertaining guests or simply treating yourself, these cake jars promise to deliver a standout dessert experience. Dive into the recipe and let your creativity shine!
Ingredients for Cookie Monster Cake Jars:
This delightful treat, perfect for parties or a fun dessert night, uses a flavorful base of cookies and cake layered beautifully in jars. Below, you’ll find the exact measurements of each ingredient needed to create approximately 8–10 servings of this whimsical dessert.
For the Cookie Base:
- 1 cup all-purpose flour
- 1/2 teaspoon baking soda
- 1/4 teaspoon salt
- 1/2 cup unsalted butter, softened
- 1/2 cup brown sugar, packed
- 1/4 cup granulated sugar
- 1 large egg
- 1 teaspoon vanilla extract
- 1 cup semi-sweet chocolate chips
For the Cake Layer:
- 1 1/2 cups all-purpose flour
- 1 teaspoon baking powder
- 1/2 teaspoon baking soda
- 1/2 teaspoon salt
- 1/2 cup unsalted butter, softened
- 1 cup granulated sugar
- 2 large eggs
- 2 teaspoons vanilla extract
- 1/2 cup whole milk
- 1/2 cup mini chocolate chips (for cake layer)
For the Blue Frosting:
- 1 cup unsalted butter, softened
- 4 cups powdered sugar
- 2 tablespoons heavy cream
- 1 teaspoon vanilla extract
- 1-2 tablespoons blue food coloring (adjust based on desired color)
For Garnishing:
- 1/2 cup crushed Oreo cookies (for layering)
- 3-4 whole oreos, crumbled (for topping)
- Extra chocolate chips (for decoration)
Suggested Variations:
For those interested in adding a unique twist to their Cookie Monster Cake Jars, consider incorporating different flavors into the cake layer. Here are a few ideas:
- Replace some of the all-purpose flour with cocoa powder for a chocolate cake variant.
- Try using different flavored extracts, like almond or hazelnut, instead of vanilla for a flavor boost.
- Substitute chocolate chips with butterscotch or white chocolate chips for a different taste profile.
These adaptable ingredients and variations will help you create a fun and personalized version of the beloved dessert!
How to prepare Cookie Monster Cake Jars:
Creating delightful Cookie Monster Cake Jars involves several fun steps. Follow this guide for the best results!
Step 1: Gather Ingredients
Collect all necessary ingredients. You will need chocolate chip cookies, blue frosting, cake mix (vanilla or chocolate), and edible eyes. For added texture, consider adding sprinkles or extra cookie crumbles.
Step 2: Bake the Cake
Begin by baking your chosen cake mix according to the package instructions. Preheat your oven first, then prepare the cake batter in a large mixing bowl. Once mixed, pour it into a greased baking pan and place it in the oven. Bake until a toothpick inserted in the center comes out clean.
Step 3: Cool the Cake
After baking, remove the cake from the oven. Let it cool in the pan for about 10 minutes, then transfer it to a wire rack. Allow it to cool completely to avoid melting the frosting later.
Step 4: Crumble Cookies
While your cake cools, take a few chocolate chip cookies. Crush them into fine crumbs using a rolling pin or food processor. This will give your cake jars the cookie texture desired. Set the cookie crumbs aside.
Step 5: Frost the Cake
Once the cake is cool, use a serrated knife to cut it into even layers. Place the layers on a cutting board and frost each layer generously with blue frosting. This will help create that signature Cookie Monster look.
Step 6: Assemble the Cake Jars
To assemble, take jars for an appealing presentation. Start by adding a layer of cake at the bottom of each jar. Next, sprinkle a layer of cookie crumbs on top of the cake layer. Repeat this process, alternating between cake and crumbs until you fill the jars.
Step 7: Add Finishing Touches
Top the final layer with a generous dollop of blue frosting. Use a spatula to create swirls for a whimsical effect. Add edible eyes on top, making sure they stick well into the frosting.
Step 8: Chill and Serve
Place the assembled jars in the refrigerator for about an hour. This will help the layers set. When ready, serve chilled for a delightful treat that’s sure to impress your guests!
Tips for the Perfect Cookie Monster Cake Jars
Maintaining the Right Temperature
To create delicious dessert jars, start by ensuring your ingredients are at room temperature. Room temperature butter and eggs mix more easily, giving your cake a lighter texture. If your butter is too cold, it will not cream properly with sugar, resulting in a denser cake. Aim for a temperature around 68°F (20°C) for optimal mixing results.
When baking, always preheat your oven. A hot oven helps your cake rise perfectly. Use an oven thermometer if you’re unsure; sometimes ovens can be off by a few degrees. Remember to place your cake jars on the middle rack for even baking. If you’re making multiple jars, rotate them halfway through to avoid hot spots.
Using Quality Ingredients
The quality of your ingredients directly impacts the final product. Use fresh baking powder and soda; stale ingredients can prevent cakes from rising. Choose high-quality vanilla extract for flavor, as artificial flavors can alter the overall taste. Always opt for fresh, creamy butter instead of margarine.
While chocolate chips are essential for that cookie monster flavor, using a mixture of milk and dark chocolate can balance sweetness and enhance flavor depth. Consider using high-quality cocoa powder for a richer chocolate taste.
Suitable Substitutions for Dietary Restrictions
If you’re accommodating specific dietary needs, don’t worry! You can easily make substitutions without sacrificing flavor. For gluten-free options, use almond flour or a store-bought gluten-free flour blend. This hatch of flours can maintain texture and taste similar to traditional cake flour.
For dairy-free versions, consider substituting almond or coconut milk for regular milk and using vegan butter in place of dairy butter. You can also implement flax eggs. Simply mix one tablespoon of ground flaxseed with three tablespoons of water to replace each egg.
Adding Personal Touches
Feel free to personalize your dessert jars! Toss in some crushed Oreos between layers or add a swirl of frosting on top for that extra indulgence. For a fun twist, consider adding colorful sprinkles or even mini candy bars to enhance both flavor and presentation.
Creating fun and engaging layers can also make your jars visually appealing. Alternate cake layers with creamy frosting and sprinkle layers for bursts of flavor. This not only looks good but brings complexity to each bite. Enjoy crafting your cookie-inspired jars!
Storage Tips for Cookie Monster Cake Jars:
To ensure your Cookie Monster Cake Jars stay fresh and delicious, follow these simple storage tips. Proper care prolongs their taste and quality, making your treats enjoyable for longer.
Optimal Storage Conditions
Store your cake jars in a cool, dry place. Avoid direct sunlight, as it can heat the jars and lead to spoilage. A pantry or cupboard works well. If you live in a warm climate, consider placing them in the refrigerator.
Refrigeration Tips
If you choose to refrigerate your Cookie Monster Cake Jars, seal each jar tightly with a lid or cover it with plastic wrap. This action keeps out moisture and prevents the cake from drying out. However, note that refrigeration may change the texture slightly, so only refrigerate if necessary.
Freezing for Longer Shelf Life
For extended storage, freezing your jars is an excellent choice. Before freezing, make sure the jars are airtight. Wrap individual jars with plastic wrap and then place them in a freezer bag. Label each bag with the date so you remember when you made them. Frozen cake jars can last for up to three months.
Handling Leftovers
If you have leftover cake jars, consume them within a week for the best taste. After opening, ensure you seal the jars tightly again. If they sit out for more than two hours, refrigerate what’s left. This practice helps prevent any bacterial growth.
Checking for Freshness
Before enjoying your cake jars, check for any signs of spoilage. Look for changes in smell, texture, or appearance. If you notice any unusual aspects, discard the cake. Trust your senses; if it doesn’t smell or look right, it’s best to throw it away.
By following these storage tips, you can enjoy your Cookie Monster Cake Jars for days or even weeks. Keep them fresh and delicious by storing them properly and regularly checking their condition. This way, each bite remains delightful and satisfying!
Related Recipes
If you love Cookie Monster Cake Jars, you might enjoy these related recipes that share similar flavors, textures, or themes. Each of these treats offers a delightful twist and complements the fun of cake jars beautifully.
- Monster Cookies: These chewy cookies combine oats, chocolate chips, and M&M’s, channeling the same joyful spirit as cake jars. Their vibrant colors and chewy texture make them a hit at any occasion.
- Funfetti Cupcakes: Decorate these soft, fluffy cupcakes with colorful sprinkles to mimic the joyful colors seen in Cookie Monster Cake Jars. Funfetti adds a festive vibe to birthdays or celebrations, just like cake jars do.
- Blue Velvet Cake: This vision in blue provides a stunning presentation similar to that of cookie monster-themed desserts. Layered with cream cheese frosting, these cakes offer a rich flavor and look fantastic for parties.
- Cookies and Cream Milkshake: This creamy drink features crushed cookies, creating layers that pay homage to the textures of cake jars. It’s a fun, refreshing treat perfect for cooling off on warm days.
Each of these recipes enhances the same playful and indulgent experience found in cookie jars. Try them out for parties or as a sweet treat to enjoy at home!
Frequently Asked Questions:
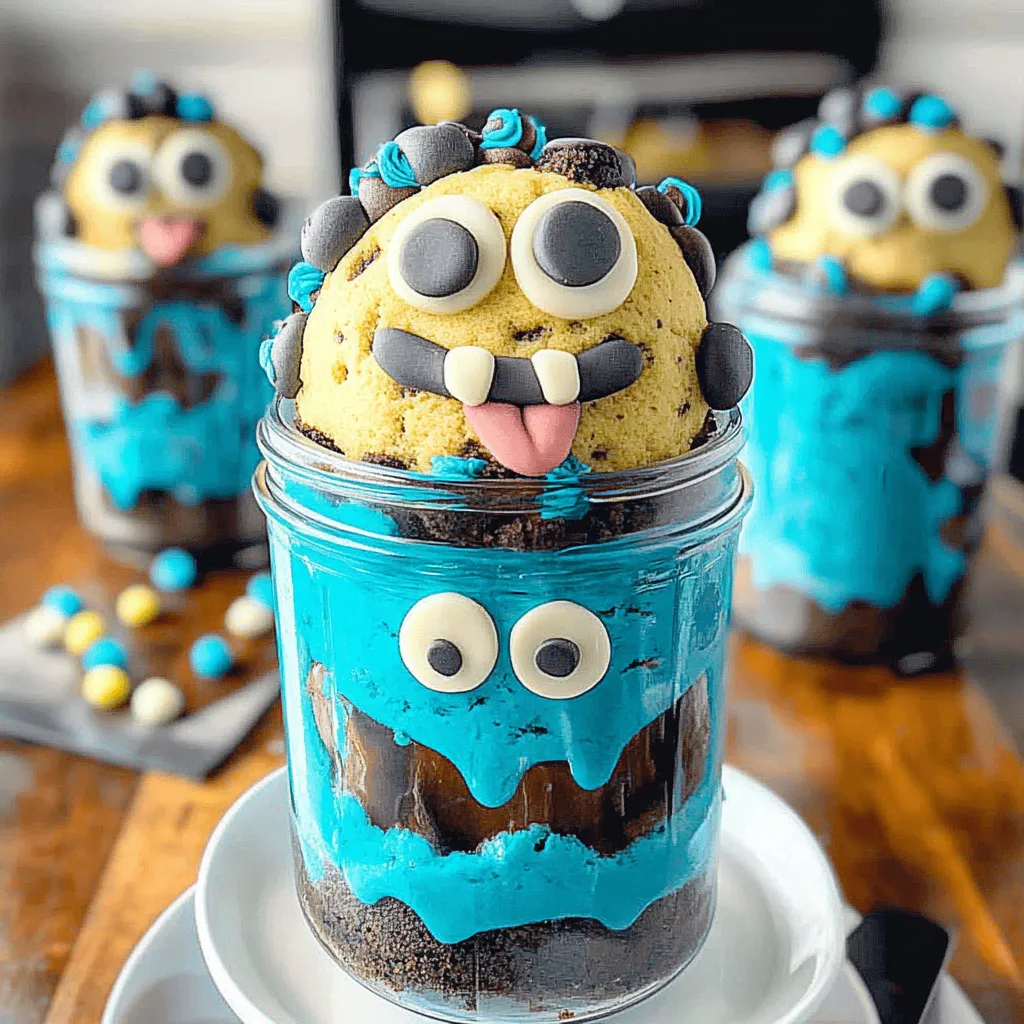
What are Cookie Monster Cake Jars?
Cookie Monster Cake Jars are delightful layered dessert creations inspired by the beloved character from “Sesame Street.” These charming treats typically include an amalgamation of fluffy cake, gooey frosting, and crunchy cookie pieces, all beautifully presented in a jar. They are perfect for any occasion, combining fun and flavor in every bite.
Can I customize the flavor of my Cake Jars?
Absolutely! One of the best aspects of these dessert jars is their versatility. While traditional Cookie Monster Cake Jars often feature chocolate or vanilla cake, you can experiment with flavors such as red velvet or lemon. Additionally, feel free to switch out the cookie types or frostings to match your taste preferences, creating a personalized treat.
How do I store Cookie Monster Cake Jars?
To maintain the freshness of your cake jars, it’s best to seal them tightly and store them in the refrigerator. Properly stored, these delightful desserts can last up to a week. Just make sure to consume them within this timeframe for the best flavor and texture.
Are Cookie Monster Cake Jars suitable for special diets?
Yes, you can tailor these sweet jars to accommodate various dietary needs. For gluten-free options, use almond flour or gluten-free cake mixes, and vegan ingredients can replace eggs and dairy. With a little creativity, you can make these treats accessible for everyone!
How do I make my own Cookie Monster Cake Jars?
Creating your own version is simple and fun! Begin by baking a cake of your choice, allowing it to cool before breaking it into pieces. Layer the cake with frosting and cookie bits in a jar, repeating until full. The finished product can be topped with additional cookie crumbles for added texture and flair.
What occasions are perfect for Cookie Monster Cake Jars?
These charming dessert jars are great for various celebrations, such as birthday parties, baby showers, or casual gatherings. Their whimsical appeal also makes them a hit at themed events. Plus, being in jars makes them easy to transport and serve, ideal for potlucks or picnics!
Conclusion:
Cookie Monster Cake Jars are a delightful treat perfect for any occasion. This recipe highlights the simplicity of preparing layered desserts that burst with flavor and texture. With a flexible foundation, you can easily swap cookie flavors, frosting varieties, or even add your favorite toppings, making it a customizable pleasure for everyone. Whether you opt for classic chocolate chip cookies or adventurous flavors like peanut butter, the possibilities are endless. The bonus of using jars allows for easy serving and storage, ensuring each portion remains fresh. Remember, the charm lies in personalizing your creation to reflect your taste. So gather your ingredients and start crafting these fun, whimsical cake jars that are sure to impress and satisfy. Experience the joy of making Cookie Monster Cake Jars that are as fun to eat as they are to create!
Print
Cookie Monster Cake Jars: Fun & Delicious Treats
- Total Time: 15 minute
- Yield: 6 jars (8 oz each) 1x
Description
These delightful dessert jars combine vibrant blue cake, creamy frosting, crushed cookies, and chocolate chips in layers of fun! Perfect for parties, gifting, or just a sweet treat to brighten your day.
Ingredients
-
1 box vanilla cake mix (plus ingredients on box)
-
Blue gel food coloring
-
1 cup vanilla frosting
-
1 cup whipped topping
-
1 cup crushed chocolate chip cookies
-
½ cup mini chocolate chips
-
6 whole chocolate chip cookies (for topping)
-
6 small jars (8 oz each)
Instructions
-
Make the cake: Prepare cake mix as instructed, then tint with blue food coloring. Bake, cool completely, and crumble.
-
Whip the frosting: Combine vanilla frosting and whipped topping until fluffy.
-
Layer it up: In each jar, alternate layers of crumbled cake, whipped frosting, crushed cookies, and mini chocolate chips.
-
Final touches: Top each jar with a swirl of frosting and a whole cookie.
-
Chill: Refrigerate for 30 minutes before serving.
Notes
-
Customize with candy eyes for a true Cookie Monster vibe.
-
Store jars in the fridge for up to 3 days.
-
Great for kids’ parties or as creative edible gifts!
- Prep Time: 20 minutes |
- Cook Time: 25 minutes
Nutrition
- Calories: 430 kcal
- Sugar: 38g
- Sodium: 310mg
- Fat: 22g
- Carbohydrates: 57g
- Fiber: 1g
- Protein: 3g