
Crispy Chicken Caesar Sandwich Recipe for Ultimate Flavor
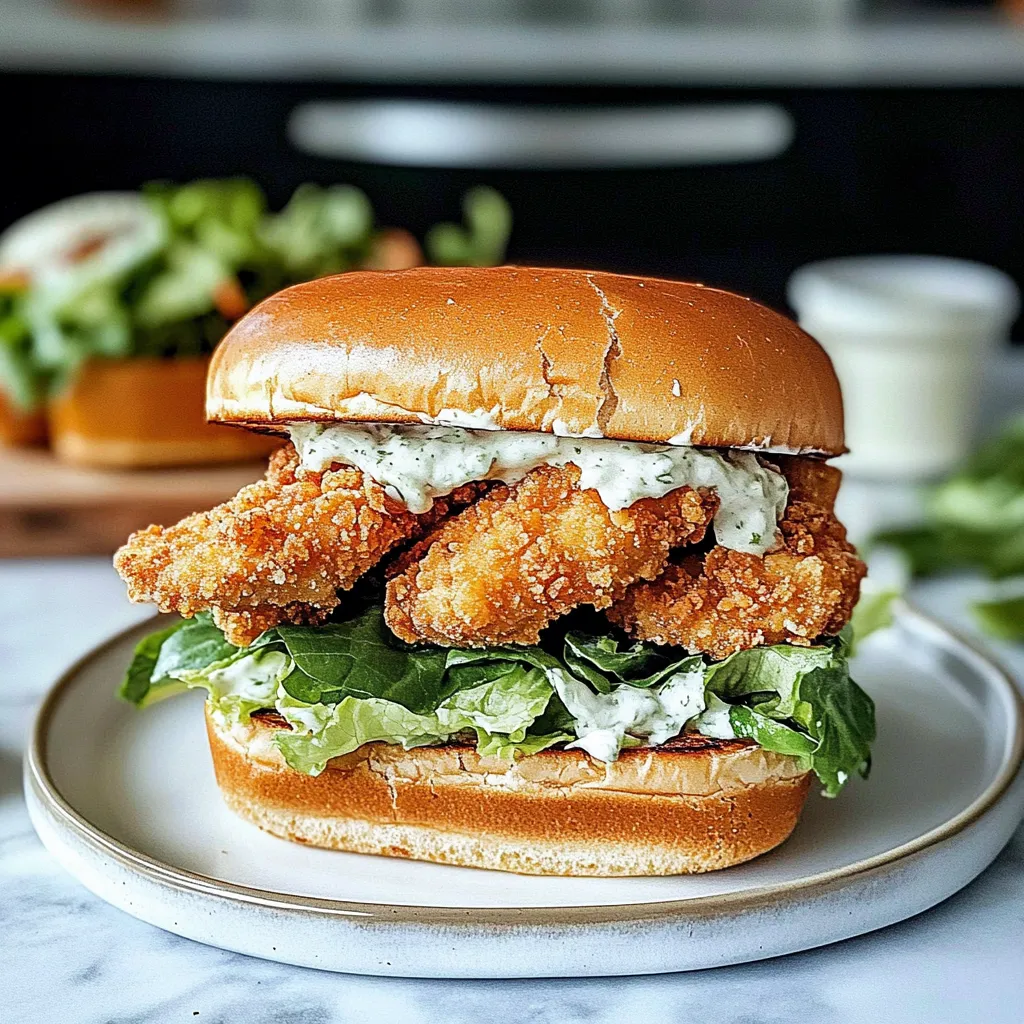
If you’re in search of a sensational meal that marries classic flavors with satisfying crunch, you simply can’t go wrong with a Crispy Chicken Caesar Sandwich. This delightful dish elevates the traditional Caesar salad experience, wrapping it in a warm, toasted bun that invites you to dig right in. Imagine succulent, seasoned chicken fillets—crispy on the outside and juicy within—paired with the creamy tang of Caesar dressing, crisp romaine lettuce, and a sprinkle of Parmesan cheese, all coming together to create a blissful bite.
For those eager to explore, variations abound! Consider adding sautéed mushrooms for an earthy twist or swapping chicken for grilled shrimp for a lighter option. To achieve peak crunchiness, double fry your chicken, ensuring that perfect golden texture. A brush of garlic butter on your buns before toasting can also enhance the flavor profile. With these tips and more, your version of this sandwich could quickly become a go-to favorite that impresses friends and family alike!
Ingredients for Crispy Chicken Caesar Sandwich:
This delectable recipe for a Crispy Chicken Caesar Sandwich serves 8–10 people, making it perfect for gatherings or family dinners. Below, you’ll find a detailed list of ingredients you will need to create this irresistible dish.
For the Crispy Chicken:
- 4 large boneless, skinless chicken breasts (about 1.5 pounds total)
- 1 cup buttermilk
- 1 cup all-purpose flour
- ¾ cup seasoned bread crumbs
- 1 teaspoon garlic powder
- 1 teaspoon onion powder
- 1 teaspoon smoked paprika
- ½ teaspoon cayenne pepper (optional, for a spicy kick)
- Salt and pepper to taste
- Oil for frying (about 1–2 cups, depending on your frying method)
For the Caesar Sauce:
- 1 cup mayonnaise
- ¼ cup grated Parmesan cheese
- 2 tablespoons fresh lemon juice
- 2 teaspoons Worcestershire sauce
- 1 garlic clove, minced
- Salt and black pepper to taste
- Optional: 1 teaspoon anchovy paste for added depth of flavor
For the Assembly:
- 8–10 crusty sandwich rolls or brioche buns
- 4 cups romaine lettuce, washed and roughly chopped
- 1 cup cherry tomatoes, halved (for freshness)
- Extra grated Parmesan cheese for garnishing
- Freshly cracked black pepper for seasoning
Possible Variations:
Add a twist to your sandwich by incorporating different flavors:
- For a Mediterranean flair, consider adding feta cheese and kalamata olives.
- Replace the chicken with crispy tofu for a plant-based alternative.
- Experiment with different types of greens such as kale or spinach for varied texture and flavor.
- Use flavored mayonnaise (like garlic or chipotle) for an extra layer of taste.
With these fresh ingredients and customizable options, prepare to delight your guests with a crunchy, savory Crispy Chicken Caesar Sandwich that is sure to satisfy.

How to prepare Crispy Chicken Caesar Sandwich:
Creating a delicious Crispy Chicken Caesar Sandwich involves several steps that ensure flavor and texture. Follow these instructions carefully to craft your perfect sandwich.
Step 1: Prepare the Chicken
Start by preheating your oven to 400°F (200°C). While it heats, take two boneless, skinless chicken breasts and place them between sheets of plastic wrap. Use a meat mallet to pound them to an even thickness, about half an inch.
Step 2: Season the Chicken
In a small bowl, mix together salt, pepper, garlic powder, and paprika. This blend will enhance the chicken’s flavor. Sprinkle this mixture evenly over both sides of the pounded chicken breasts.
Step 3: Dredge the Chicken
Set up a dredging station with three bowls. In the first bowl, place flour. In the second, beat one egg. In the third, combine breadcrumbs and grated Parmesan cheese. Coat each chicken breast in flour, dip it in the egg, and finally cover it with the breadcrumb mixture.
Step 4: Fry the Chicken
In a large skillet, heat about 1/4 inch of oil over medium-high heat. Once the oil sizzles when touched by the breadcrumbs, carefully add the chicken breasts. Cook for 4-5 minutes per side until golden brown and crispy. Use a meat thermometer to ensure the chicken reaches an internal temperature of 165°F (75°C).
Step 5: Prepare the Caesar Dressing
While the chicken is frying, mix your dressing. In a bowl, whisk together mayonnaise, lemon juice, Dijon mustard, minced garlic, and Worcestershire sauce. Season with salt and pepper to taste. Adjust ingredients as desired for creaminess or tanginess.
Step 6: Assemble the Sandwich
Once the chicken is cooked, remove it from the pan. Place it on a paper towel-lined plate to drain excess oil. For each sandwich, toast a ciabatta roll or your choice of bread until golden brown. Spread Caesar dressing on the bottom half of the roll.
Step 7: Add Toppings
Layer slices of crispy chicken onto the spread side, followed by crisp romaine lettuce, and sprinkle with additional Parmesan if desired. Finally, place the top half of the roll on the sandwich to complete the assembly.
Enjoy your homemade crispy chicken delight, bursting with Caesar flavors!
Tips for the Perfect Crispy Chicken Caesar Sandwich
Maintain the Right Temperature
To achieve a truly crispy coating on your chicken, it’s essential to maintain the right cooking temperature. Preheat your oil to about 350°F (175°C) before adding the chicken. If the oil is not hot enough, the chicken will absorb excess oil, resulting in a greasy texture. Use a thermometer for accuracy. After frying, let the chicken rest on a wire rack instead of paper towels. This helps preserve its crunchiness.
Use Quality Ingredients
Quality ingredients can significantly enhance the flavor of your sandwich. Choose fresh, organic chicken breast for the best taste and texture. Opt for a high-quality Caesar dressing, either homemade or from a reputable brand, to elevate the dish. Fresh romaine lettuce adds the right crunch and a vibrant green color. Whole-grain or sourdough bread will not only provide a delightful flavor but will also hold up well against the moist ingredients.
Suitable Substitutions for Dietary Restrictions
While crafting your tasty sandwich, always consider dietary preferences or restrictions. For a gluten-free option, use gluten-free bread or lettuce wraps. If you’re looking for a lighter alternative, grilled or baked chicken works just as well. Those following a vegetarian diet can substitute chicken with crispy chickpeas or grilled portobello mushrooms, providing a satisfying texture and flavor.
Perfecting the Crispy Coating
The coating is crucial for the crunch factor. Start with a dry mix of flour and spices, followed by a dip in an egg wash, and finish with seasoned breadcrumbs. For extra crunch, you can mix in some panko breadcrumbs or crushed cornflakes. Remember to double-dip your chicken for a thicker crust.
Balance Flavors with Toppings
Don’t forget about the toppings! Add freshly grated Parmesan cheese for an extra umami kick. You can also include sliced tomatoes or crispy bacon to complement the chicken. For a zesty twist, try a squeeze of lemon juice or a sprinkle of chili flakes. These small additions can make your sandwich pop with flavor.
By following these tips, your creation will be not just a meal but a delightful experience. Enjoy crafting your sandwich with these practical suggestions!
Storage Tips for Crispy Chicken Caesar Sandwich:
Maintaining the freshness of your Crispy Chicken Caesar Sandwich is essential for enjoying its delightful flavors. Follow these practical storage tips to keep your sandwich delicious longer.
Proper Cooling Before Storage
Always allow your sandwich to cool down to room temperature before you store it. If you place a warm sandwich in the fridge, moisture can build up and make the bread soggy. Set it on a wire rack for about 20-30 minutes to ensure that it is adequately cooled before wrapping.
Use Airtight Containers
Store your sandwich in airtight containers or wrap it tightly in aluminum foil or plastic wrap. This helps block out air, which can cause the bread to dry out or the filling to go stale. Choose a container that fits the sandwich snugly to minimize movement and maintain its shape.
Optimal Refrigerator Storage Conditions
Keep your sandwich in the refrigerator if you plan to eat it within 1 to 2 days. Set the refrigerator temperature to below 40°F (4°C) to ensure food safety. The shelf life for your delightful Crispy Chicken Caesar Sandwich can last up to 2 days but aim to consume it sooner for the best taste.
Freezing for Longer Shelf Life
If you need to store it for a longer period, consider freezing your sandwich. Wrap it tightly in plastic wrap, then place it in a freezer-safe container. This method can extend its shelf life for up to 2 months. When you’re ready to eat it, defrost it in the refrigerator overnight before reheating.
Reheating Tips for Best Results
To enjoy your sandwich at its best, reheat it gently. Use an oven or toaster oven rather than a microwave to keep the bread crispy. Set the oven to 350°F (175°C) and heat for about 10-15 minutes, or until warmed through. This keeps the texture appealing while ensuring the chicken is hot and safe to eat.
Following these storage tips helps you enjoy your sandwich at its freshest. Storing properly allows you to relish each bite, keeping it crispy and flavorful for your next meal!
Related Recipes to Explore
If you love the flavor and crunch of a Crispy Chicken Caesar Sandwich, you will enjoy these complementary recipes. Each offers a unique twist while sharing similar ingredients or textures.
- Spicy Chicken Wrap: This wrap showcases tender, spicy chicken with fresh greens and a zesty dressing. Like the Caesar sandwich, it features a satisfying crunch and savory chicken. You can easily swap in your favorite Caesar dressing for an extra familiar flavor.
- Grilled Chicken Salad: Packed with protein and freshness, this salad includes grilled chicken, crisp romaine, and a tangy Caesar dressing. It offers a lighter option while maintaining the essence of the original sandwich. The combination of flavors and textures will appeal to any Caesar lover.
- Buffalo Chicken Quesadillas: For those who enjoy a bit of heat, buffalo chicken quesadillas provide a cheesy, spicy alternative. These quesadillas combine crispy chicken with the creamy texture reminiscent of Caesar dressing, all tucked inside golden tortillas for a delightful crunch.
- Caesar Pasta Salad: This dish takes the classic Caesar salad and adds pasta, making it heartier. It retains the familiar dressing and textures, but with a fun twist. Enjoy chilled, making it a perfect companion for a summer meal alongside your favorite sandwich.
These recipes share a love for crispy chicken, fresh greens, and rich, creamy dressings. Each one can enhance your dining experience and offer new ways to enjoy similar flavors!
Frequently Asked Questions:
What is a Crispy Chicken Caesar Sandwich made of?
A Crispy Chicken Caesar Sandwich typically consists of a fried or grilled chicken breast served on a toasted bun, accompanied by Caesar salad ingredients. This often includes romaine lettuce, Parmesan cheese, and Caesar dressing, bringing together the flavors of a classic Caesar salad with the satisfying crunch of crispy chicken.
Can I make the crispy chicken at home?
Absolutely! You can prepare the chicken using various methods. A popular way is to coat chicken breasts in seasoned flour, dip them in buttermilk, and then dredge them in breadcrumbs or panko for extra crunch before frying or baking until golden brown.
What’s a great alternative to traditional Caesar dressing?
If you’re looking for a healthier option or a vegan version, you can swap traditional Caesar dressing for a yogurt-based dressing, or for a vegan alternative, use a cashew or tahini dressing mixed with garlic, lemon juice, and nutritional yeast to mimic the flavor profile.
How can I add flavor to the sandwich?
You can elevate the taste of your Crispy Chicken Caesar Sandwich by adding toppings like sliced avocado, sun-dried tomatoes, or crispy bacon. Additionally, seasoning the chicken with spices like paprika, garlic powder, or Italian herbs before cooking can impart more flavor.
Is the sandwich suitable for meal prep?
Yes, this sandwich can be prepared in advance. You can cook the chicken and store it separately from the other components to maintain the crispiness. Just assemble it right before serving for the best flavor and texture.
What are some side dishes that pair well with this sandwich?
Some delightful sides to accompany a Crispy Chicken Caesar Sandwich include sweet potato fries, a fresh fruit salad, or even a light soup. These options complement the flavors and offer a well-rounded meal experience.
Conclusion:
In summary, the Crispy Chicken Caesar Sandwich is a delightful fusion of flavors and textures that is both easy to prepare and versatile enough to suit any palate. With its crispy chicken fillet, creamy Caesar dressing, and fresh toppings, this sandwich elevates a classic dish to new heights. Customize it by adding extra veggies, substituting the protein, or even using gluten-free bread to meet dietary preferences. The beauty of this recipe lies in its flexibility, making it perfect for lunch or a quick dinner. By following the straightforward steps and unique tips shared, you’ll be well on your way to crafting an impressive meal that dazzles your taste buds. Whether you’re serving it at a gathering or indulging solo, this sandwich is sure to satisfy your cravings while keeping the preparation simple and fun! Enjoy every delicious bite!
Print
Crispy Chicken Caesar Sandwich Recipe for Ultimate Flavor
- Total Time: 30 minutes
- Yield: 4 sandwiches 1x
Description
This Crispy Chicken Caesar Sandwich combines juicy, breaded chicken with fresh Romaine, tangy Caesar dressing, and melted cheese on a toasted bun for a flavorful, satisfying meal.
Ingredients
2 boneless, skinless chicken breasts
1 cup all-purpose flour
2 large eggs, beaten
1 1/2 cups panko breadcrumbs
1/2 cup grated Parmesan cheese
Salt and pepper, to taste
4 sandwich buns, toasted
1 cup Romaine lettuce, chopped
1/2 cup Caesar dressing
4 slices provolone or mozzarella cheese
2 tablespoons olive oil
Instructions
1. Pound chicken breasts to even thickness.
2. Season flour with salt and pepper.
3. Dredge chicken in flour, then dip in beaten eggs, and coat with a mixture of panko and Parmesan.
4. Heat olive oil in a skillet over medium heat.
5. Fry chicken breasts until golden brown and cooked through, about 4-5 minutes per side.
6. Remove chicken and drain on paper towels.
7. Spread Caesar dressing on bottom buns.
8. Layer with Romaine lettuce, crispy chicken, and cheese slices.
9. Place top buns and serve immediately.
Notes
For extra crispiness, double-dip the chicken.
Use homemade Caesar dressing for best flavor.
Add sliced tomatoes or avocado for variety.
- Prep Time: 15 minutes
- Cook Time: 15 minutes
- Category: Main Dish
- Method: Frying
- Cuisine: American
Nutrition
- Serving Size: 1 sandwich
- Calories: 520
- Sugar: 3g
- Sodium: 920mg
- Fat: 28g
- Saturated Fat: 8g
- Unsaturated Fat: 15g
- Trans Fat: 0g
- Carbohydrates: 45g
- Fiber: 2g
- Protein: 35g
- Cholesterol: 110mg
Keywords: crispy chicken sandwich, Caesar sandwich, breaded chicken sandwich