
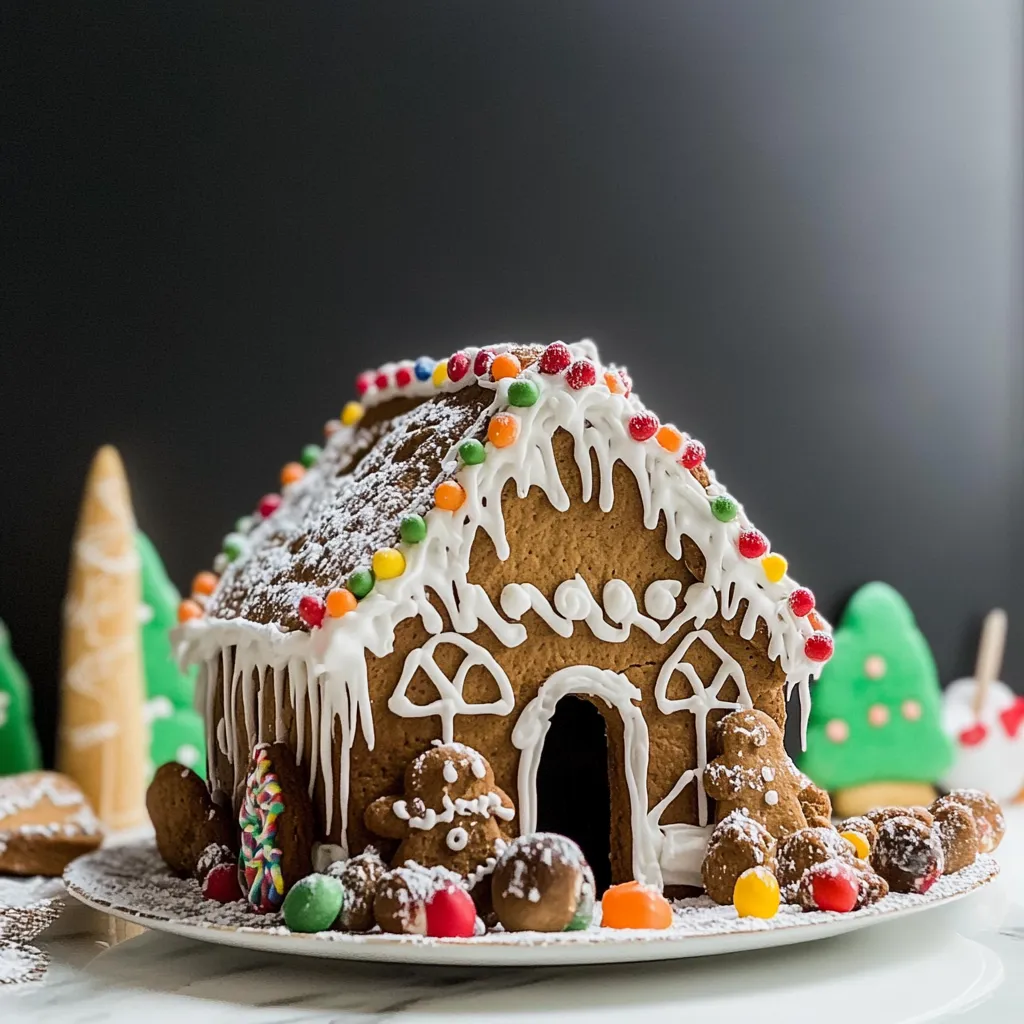
Ultimate Gingerbread House Recipe Unleash Your Creativity

Ah, the smell of gingerbread wafting through the house is one of my absolute favorite things about the holiday season! It takes me back to my childhood, where every year, my family and I would gather around our kitchen table, flour dusting our noses and laughter spilling into the air. We transformed simple ingredients into magical creations—a gingerbread house complete with royal icing and candy. The excitement of crafting those silly little houses, each uniquely imperfect, is a memory I hold dear. Today, I want to share with you my favorite Gingerbread House Recipe, perfect for creating your very own edible masterpiece!
Why You’ll Love This Recipe
- Perfect for holiday traditions and family bonding.
- Smells heavenly while baking (your kitchen will smell like Christmas!).
- Customizable! Use your favorite candies and decorations.
- Fun and engaging for all ages—kids will love it!
- It’s a great way to unleash your creativity.
Ingredients
Gather these ingredients before you dive in—you’ll be glad you did!
- 4 cups all-purpose flour
- 1 teaspoon baking soda
- 1 tablespoon ground ginger
- 1 tablespoon ground cinnamon
- 1/2 teaspoon ground cloves
- 1/2 teaspoon salt
- 1 cup unsalted butter, softened
- 1 cup brown sugar, packed
- 1/2 cup unsulfured molasses
- 1 large egg
- 2 teaspoons vanilla extract
- Royal icing for decorating (you can make your own or buy ready-made)
- Assorted candies for decoration (think gumdrops, candy canes, and M&Ms)
Note: Using fresh spices rather than old ones will pack more flavor into your gingerbread. Don’t skip the molasses; it adds that classic richness we all love!
Step-by-Step Instructions
Now, let’s roll up those sleeves and get baking!
- Preheat the Oven: Preheat your oven to 350°F (175°C). This ensures that your gingerbread will rise beautifully once it hits those warm oven walls.
- Mix the Dry Ingredients: In a large mixing bowl, whisk together the flour, baking soda, ground ginger, cinnamon, cloves, and salt until well combined. Set aside.
- Cream the Butter and Sugar: In another bowl, cream the softened butter and brown sugar until it’s light and fluffy. This should take about 2-3 minutes—trust me, this step adds a lovely texture to your dough!
- Add Molasses, Egg, and Vanilla: Beat in the molasses, egg, and vanilla extract, mixing until smooth. You might need to scrape down the sides with a spatula to ensure everything is fully incorporated.
- Combine Wet and Dry Ingredients: Gradually add your dry mixture to the wet mixture, stirring gently until just combined. Be careful not to overmix; we want a tender, flavorful dough!
- Chill the Dough: Wrap your dough in plastic wrap and refrigerate for at least 1 hour. Chilling helps to firm up the dough, making it easier to roll out.
- Roll Out the Dough: Once chilled, roll the dough out on a floured surface to about 1/4-inch thick. You should be able to cut out shapes without it sticking!
- Cut the Gingerbread Pieces: Use a sharp knife or cookie cutter to cut out pieces for your house. You’ll generally need two squares for the front and back, two rectangles for the sides, and two triangles for the roof. Feel free to get creative with any extra shapes!
- Bake: Place your shapes on a parchment-lined baking sheet and bake for 8-10 minutes, or until the edges are firm and the top is slightly puffed. It’s okay if they puff up a bit; they’ll still be cute!
- Cool: Once baked, let them cool completely on a wire rack before decorating—this is very important! Hot gingerbread might warp if you try to get fancy with it too soon.
Personal Tip: If you’re planning to make a sturdy house, consider adding an extra scoop of flour. Just remember, the less flour you use, the softer your gingerbread will be!
Pro Tips & Variations
Time to get funky! Here are some ways you can put your spin on this Gingerbread House Recipe:
- Flavor Boost: Add a touch of nutmeg or cardamom for extra warmth.
- Gluten-Free Version: You can substitute the all-purpose flour with a gluten-free blend. Just make sure it contains xanthan gum!
- Colorful Icing: Use food coloring to tint your royal icing—it’ll make your decorations pop with vibrancy!
- Unique Shapes: Want a gingerbread train instead of a house? Go for it! Get creative with the designs and make whatever your heart desires.
Serving Suggestions
Once you’ve constructed your gingerbread house, it’s time to admire it! Here’s how I like to serve up the experience:
- Set it up as the centerpiece on your holiday dessert table—it’s an instant conversation starter!
- Pair it with a warm mug of hot cocoa or spiced apple cider for a cozy treat.
- Invite friends over for a gingerbread decorating party—everyone loves a little friendly competition!
Just remember, this gingerbread house might be mesmerizing to look at, but it’s even better when shared with others!
Storage Tips
Your gingerbread house can last surprisingly long if stored properly:
- Room Temperature: Keep it in a cool, dry place for up to 2 weeks if it’s fully assembled and decorated.
- Refrigeration: If you have extra gingerbread pieces, wrap them tightly in plastic wrap and store them in the fridge for 3-5 days.
- Freezing: You can freeze un-decorated gingerbread pieces by simply placing them in an airtight container for up to 3 months. When ready to use, let them thaw completely before decorating.
FAQs
Can I use gingerbread mix instead of making it from scratch?
Absolutely! A convenient gingerbread mix can save time, especially if you’re short on it. Just follow the package instructions, and you’ll still have a blast decorating! However, homemade dough has a special charm that’s hard to beat.
How can I make my gingerbread house stable?
The key to a strong gingerbread house is in the royal icing! Make it thicker for assembling the walls; allowing it to dry completely before adding the roof is crucial. A little patience goes a long way in keeping it from collapsing.
What types of candies work best for decorating?
Go wild! Gummy candies, chocolate bars, sprinkles, cereal—anything goes! Just ensure your candies are stable and won’t melt in the heat if you’re using a warm lacquer of icing.
Can I eat the gingerbread after decorating?
Of course! The whole point is to enjoy the fruits of your labor. Just keep in mind that the longer it’s out, the harder it may get. But that’s a small price to pay for a delicious treat!
Can I reuse the gingerbread house structure next year?
While it’s acceptable, it might not be as appetizing after a year on display! You can certainly save the base pieces by retrying your gingerbread recipe. If you want to reuse it, simply keep it in an airtight container and treat it like a decoration instead of a snack!
Conclusion
And there you have it—a delightful Gingerbread House Recipe that’s sure to sweeten your holidays! I hope it brings as much joy to your kitchen as it has in mine over the years. Don’t forget to share how your creations turned out—whether they were picture-perfect or a bit wobbly! If you have any questions or tips of your own, drop them in the comments below. Happy baking, friends, and may your gingerbread houses be filled with laughter and cheer!
Print
Ultimate Gingerbread House Recipe Unleash Your Creativity
- Total Time: 1 hour 10 minutes
- Yield: 1 Gingerbread House 1x
Description
Discover a creative gingerbread house recipe that will impress Easy steps and tips for building delicious holiday treats Perfect for family fun 155 chars
Ingredients
Instructions
Notes
A delightful Gingerbread House Recipe perfect for holiday traditions, family bonding, and unleashing creativity!
- Prep Time: 1 hour
- Cook Time: 10 minutes
- Category: Dessert
- Cuisine: American
Nutrition
- Serving Size: 1 Gingerbread House
- Calories: 200
- Sugar: 15g
- Fat: 7g
- Carbohydrates: 34g
- Fiber: 1g
- Protein: 3g
Keywords: Gingerbread, Gingerbread House, Holiday Baking, Christmas Recipe, Family Tradition