
Delicious Graveyard Pudding Cookie Cups for Spooky Treats
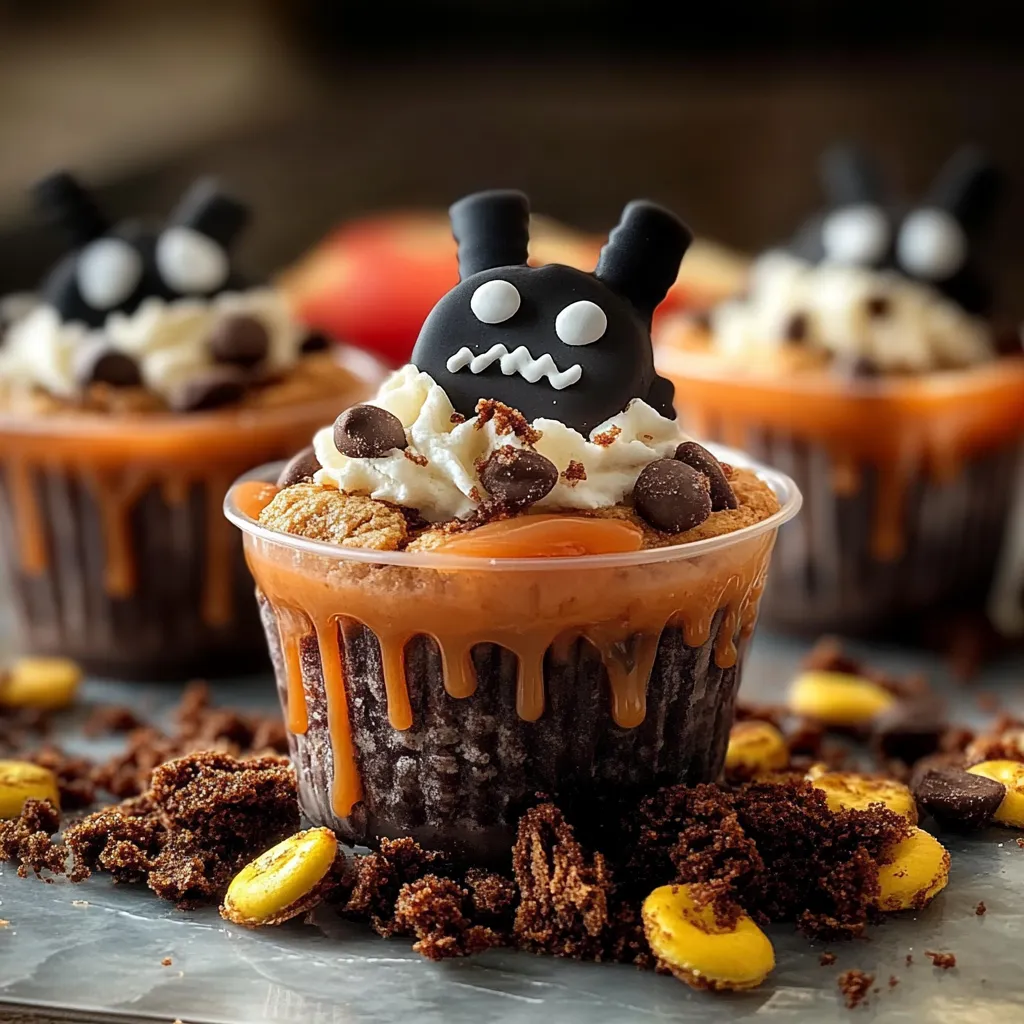
As the leaves start to change and the air takes on a crispness that feels like a warm hug, my thoughts drift to those special moments of Halloween excitement. I can vividly remember gathering around the kitchen table with my friends, creating spooky treats to celebrate the season. There’s something magical about combining a little whimsy with deliciousness, and that’s exactly what I’m here to share with you today: Graveyard Pudding Cookie Cups! They’re the perfect blend of sweet and spooky, combining soft cookie cups with creamy chocolate pudding and adorned with delightful decorations. Get ready to embrace your inner child while treating your taste buds!
Why are these cookie cups so special? Well, they’re easy to make, perfect for sharing with loved ones, and offer endless opportunities for creativity. Let’s dive into this hauntingly delicious recipe together!
Why You’ll Love This Recipe
- Simple to prepare – no extensive baking skills needed!
- Perfect for Halloween gatherings or themed parties.
- Decadent chocolate goodness in every bite.
- Kids and adults alike will love decorating their own spooky graveyards!
Ingredients
Gathering your ingredients is the first step to creating these delightful Graveyard Pudding Cookie Cups. Here’s what you’ll need:
- For the Cookie Cups:
- 1 cup all-purpose flour
- 1/2 teaspoon baking soda
- 1/4 teaspoon salt
- 1/2 cup unsalted butter, softened
- 1/4 cup granulated sugar
- 1/4 cup brown sugar, packed
- 1/2 teaspoon vanilla extract
- 1 egg
- For the Chocolate Pudding:
- 2 cups whole milk
- 1/2 cup granulated sugar
- 1/4 cup unsweetened cocoa powder
- 3 tablespoons cornstarch
- 1/4 teaspoon salt
- 2 tablespoons unsalted butter
- 1 teaspoon vanilla extract
- For Decorating:
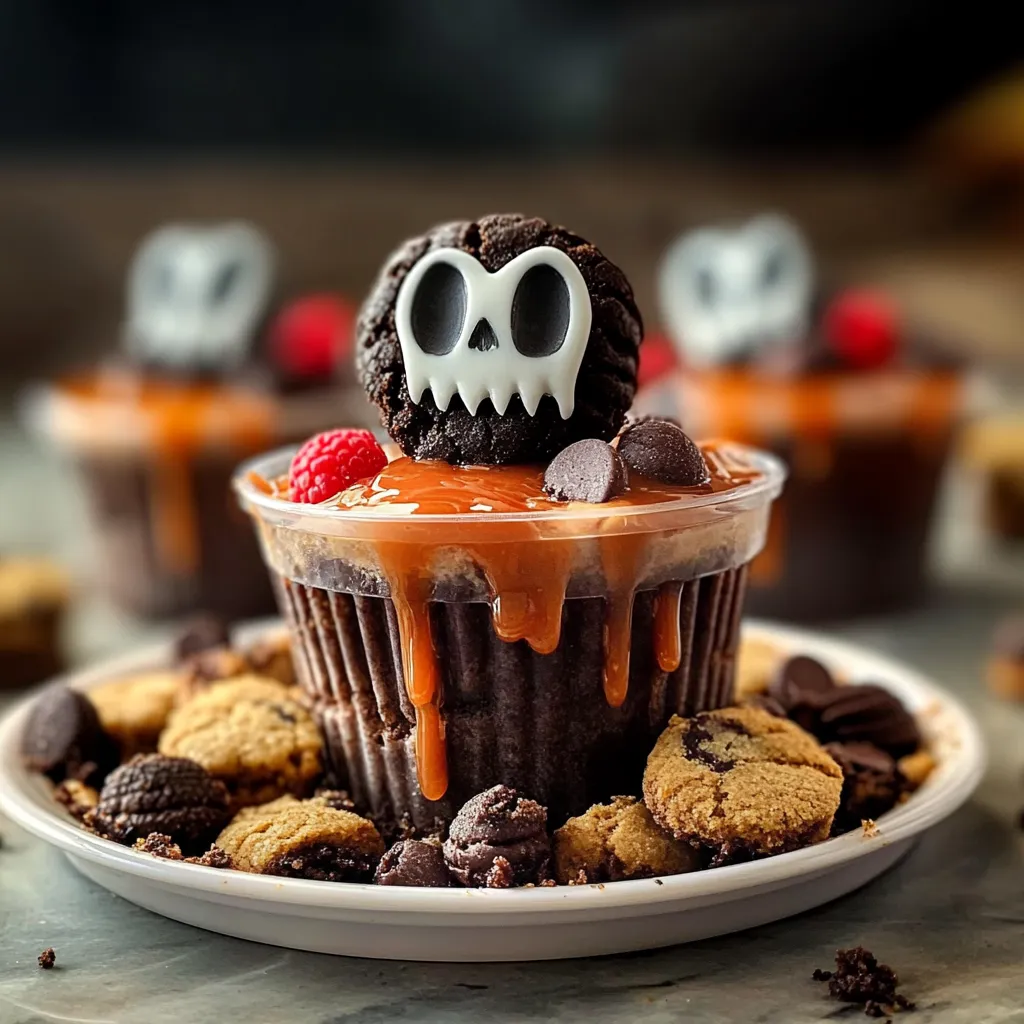
- Chocolate sandwich cookies (like Oreos), crushed
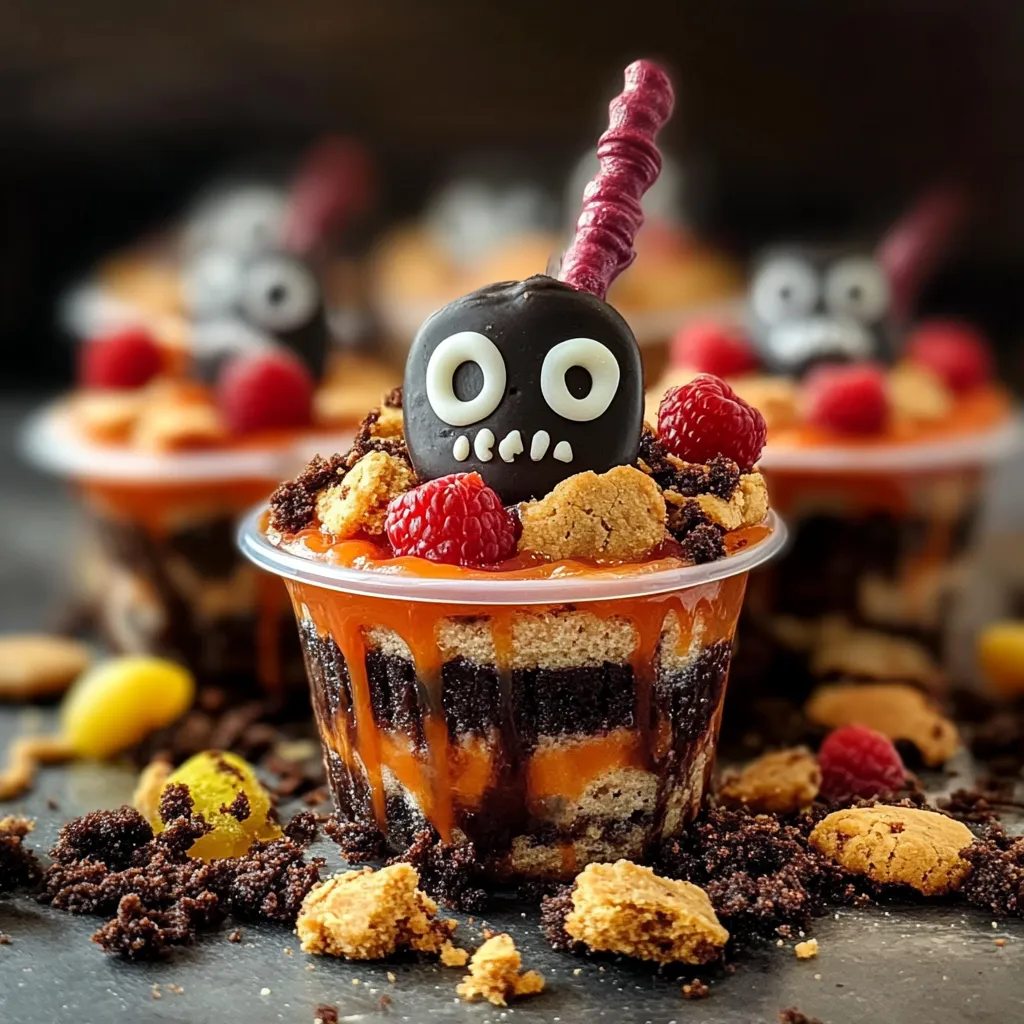
- Gummy worms or candy tombstones
- Green frosting or edible grass (optional)
Step-by-Step Instructions
Let’s get our hands a little dirty and have some fun with this recipe! Follow these steps for a spooky, delicious treat:
- Make the Cookie Cups: Preheat your oven to 350°F (175°C). In a medium bowl, mix together the flour, baking soda, and salt. This dry mixture will give your cookie cups a nice structure.
- Cream the Butters and Sugars: In a large bowl, beat together the softened butter, granulated sugar, and brown sugar until creamy and smooth. You want it to have a lovely light color and fluffy texture.
- Add the Egg and Vanilla: Beat in the egg and vanilla until well combined. The batter should smell heavenly at this point!
- Combine Wet and Dry Ingredients: Gradually mix in the flour mixture until just combined. Don’t overmix! You want a tender cookie cup.
- Mold the Cookie Cups: Lightly grease a muffin tin or use silicone muffin cups. Scoop about a tablespoon of dough into each cup, pressing down to create a well in the center for the pudding.
- Bake the Cups: Bake for 10-12 minutes until the edges are golden brown but the centers are soft. Remove from the oven and let them cool in the pan for 5 minutes, then gently transfer them to a wire rack to cool completely.
- Make the Chocolate Pudding: In a medium saucepan, whisk together the milk, sugar, cocoa powder, cornstarch, and salt over medium heat. Keep whisking until the mixture thickens into a luscious pudding, about 5-7 minutes.
- Finish the Pudding: Remove the saucepan from heat, and stir in the butter and vanilla until melted and smooth. Let it cool slightly.
- Assemble the Cups: Fill each cooled cookie cup with the chocolate pudding, smoothing the top with a spatula.
- Decorate to Spook: Here comes the fun part! Sprinkle the crushed chocolate cookies on top to create “dirt.” Add gummy worms and candy tombstones for that graveyard look. You could also pipe green frosting around the edges for extra flair!
Pro Tips & Variations
Here are some personal tips and variations that can make your Graveyard Pudding Cookie Cups even more creative:
- Add Some Flavor: If you want to spice things up a bit, add a pinch of cinnamon or a splash of almond extract to the cookie dough for a unique twist.
- Make It Gluten-Free: Swap out the all-purpose flour for a gluten-free blend to accommodate any allergies!
- Go Wild with Toppings: Think outside the box! You could use candy eyeballs, sprinkles, or even edible glitter to make your graveyard even spookier.
- Make It a Layered Dessert: You can layer the cookie crumbs, pudding, and decorations in individual cups to create a visually stunning dessert!
Serving Suggestions
These Graveyard Pudding Cookie Cups are wonderful on their own, but you can elevate the experience by serving them with:
- Your favorite hot beverage, like coffee or spiced cider, for a cozy touch.
- A side of fresh fruit or a simple salad to balance the sweetness.
- Other Halloween-themed treats for a festive dessert table!
Picture this: friends gathered around, laughter filling the air, as you all dig into these spooky delights. It’s the perfect way to enjoy a delightful fall evening!
Storage Tips
These treats are best enjoyed fresh, but if you happen to have leftovers (which is rare!), here’s how to store them:
- Refrigerate: Store any uneaten cookie cups in an airtight container in the refrigerator for up to 3 days. The cookie cups will stay soft, but the pudding may need a little gentle stirring before serving.
- Freeze: If you want to make them ahead, you can freeze the cookie cups (without pudding). Place them in a single layer on a baking sheet until frozen solid, then transfer them to a freezer bag for up to a month. When you’re ready to enjoy, thaw and fill with pudding!
- Reheat: For the best texture, reheat the cookie cups in the oven at a low temperature (around 300°F or 150°C) for a few minutes before filling them with pudding or serving.
FAQs
Can I use a different flavor of pudding?
Absolutely! While chocolate is a classic choice, you can use vanilla, caramel, or any flavored pudding to create a different spin on these cookie cups. Just imagine a pumpkin spice pudding in the fall!
Can I make the cookie cups ahead of time?
Yes! You can bake the cookie cups a day in advance. Just store them in an airtight container until you’re ready to fill them. It’ll save you some time on the day of your gathering!
What if I don’t have a muffin tin?
No problem! You can create mini cookies instead. Just shape them on a baking sheet and create a little well in the center as they bake. You won’t get the exact same cup shape, but they’ll still be tasty!
Conclusion
And there you have it! Your very own Graveyard Pudding Cookie Cups, ready to impress and delight at your next Halloween gathering! I hope you enjoy making and decorating these sweet treats as much as I do. They’re a wonderful way to spark creativity and celebrate the season with friends and family. If you try this recipe, I’d love to hear how it turned out! Feel free to drop a comment below and share your spooky creations. Happy baking!
Print
Delicious Graveyard Pudding Cookie Cups for Spooky Treats
- Total Time: 37 minutes
- Yield: 12 servings 1x
Description
Indulge in delicious Graveyard Pudding Cookie Cups perfect for spooky treats at your Halloween gatherings A fun twist on classic desserts
Ingredients
Instructions
- Prep Time: 25 minutes
- Cook Time: 12 minutes
- Category: Dessert
- Cuisine: American
Nutrition
- Calories: 200 calories
- Sugar: 12g
- Fat: 10g
- Saturated Fat: 10g
- Carbohydrates: 28g
- Fiber: 1g
- Protein: 2g
Keywords: Halloween, dessert, cookie cups, pudding, spooky treats