
Ultimate Hiroshima Style Okonomiyaki Recipe in Frying Pan
Ah, the wonderful world of okonomiyaki! Every time I think about it, I’m instantly transported back to the vibrant streets of Hiroshima, where fragrant steam rises from hot griddles, and the excitement of choosing my toppings gives me a cheerful thrill. I remember one evening, huddled around a small table with friends during a chilly fall festival, the scent of sizzling cabbage and savory sauce in the air, laughter bouncing off the walls. That’s when I decided I had to recreate this delightful dish at home. Hiroshima-style okonomiyaki is unlike any other; it’s like a savory pancake cake layered high with goodies, making it both filling and oh-so-satisfying. And the best part? You can whip it up in your frying pan right at home!
Why You’ll Love This Recipe
- Quick and easy to prepare, perfect for weeknight dinners.
- Customizable to fit your taste—choose your favorite toppings!
- Budget-friendly ingredients that deliver comforting, rich flavors.
- A fun dish to make with family or friends, creating wonderful memories.
Ingredients
Gathering your ingredients is half the fun! For Hiroshima style okonomiyaki, you’ll need:
- 1 cup all-purpose flour
- ¾ cup dashi stock (or water, if you need a substitute)
- 2 large eggs
- 4 cups finely shredded cabbage (fresh is best, but you can use pre-packaged)
- ½ cup green onions, chopped
- 1 cup bean sprouts (optional, but they add a nice crunch)
- Cooking oil (for frying, about 2 tablespoons)
- Thinly sliced pork belly or bacon (about 150g, or adjust to your preference)
- Okonomiyaki sauce (store-bought or homemade, see tips below)
- Japanese mayonnaise (for drizzling on top)
- Bonito flakes (katsuobushi, for garnish)
- Nori (seaweed) flakes (for garnish)
- Optional: pickled ginger, chili flakes, or any other toppings you adore!
Note: Using fresh garlic in your batter adds a fantastic punch, while a splash of soy sauce can enhance the umami flavor.
![]()
Step-by-Step Instructions
Let’s get cooking! You’ll love how easy it is to make this Hiroshima style okonomiyaki at home.
- Prepare the batter: In a large mixing bowl, combine the flour and dashi stock, stirring until just combined. It’s okay if you see a few lumps—overmixing can make it dense!
- Add the eggs: Crack the eggs directly into your flour mixture and mix gently. The batter will be thick, but that’s what we want!
- Incorporate the veggies: Fold in the finely shredded cabbage, green onions, and bean sprouts. They should be evenly coated with the batter but be careful not to overmix!
- Heat your pan: Place a large frying pan over medium heat and drizzle in a tablespoon of cooking oil. Allow it to heat up until shimmering.
- Cook the base: Pour a generous amount of the batter into the pan, shaping it into a large pancake. Use a spatula to flatten it slightly and make it even. Add slices of pork belly or bacon on top.
- Flip it over: Let it cook for about 5-7 minutes, or until the bottom is golden brown. Here comes the fun part—carefully flip your pancake! If it helps, you can slide it onto a plate and then flip it back into the pan.
- Cook the other side: Now, let the other side sizzle for another 5-7 minutes. You want that perfectly crispy texture!
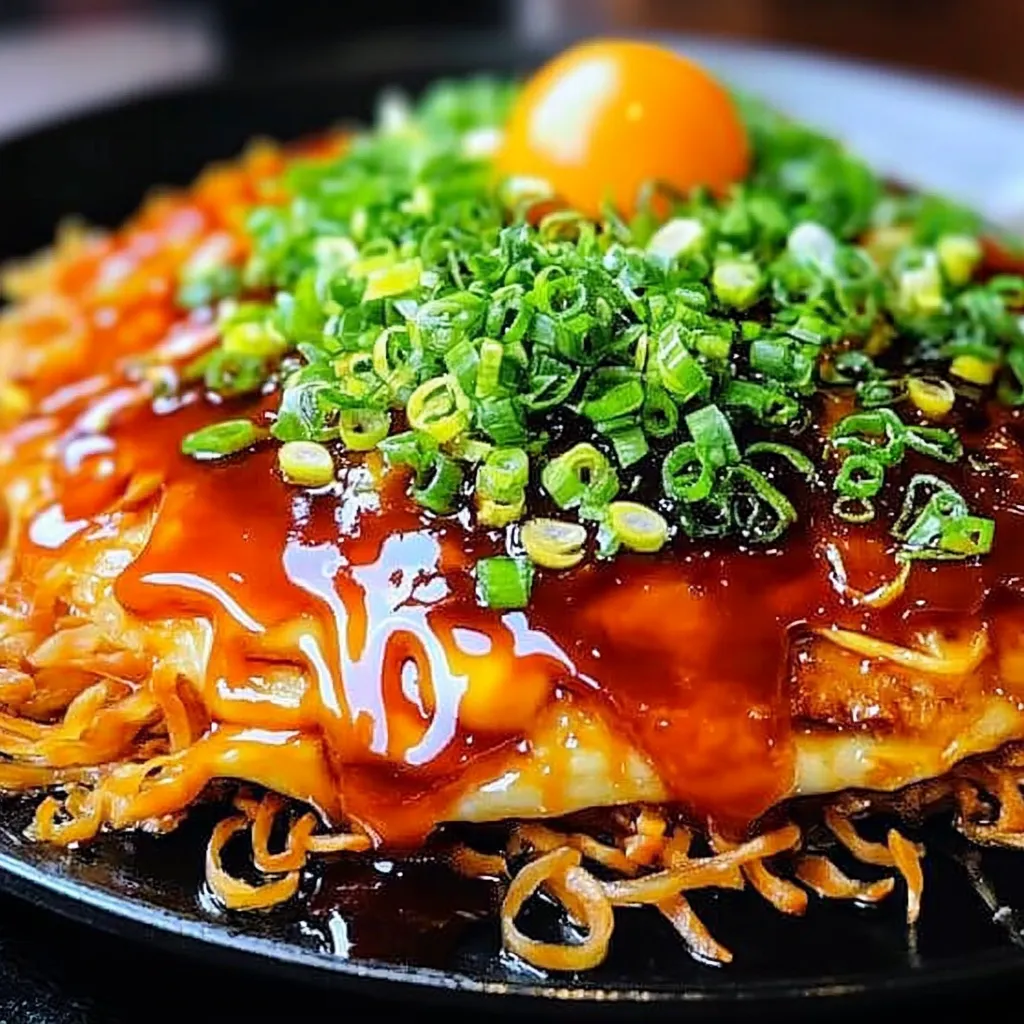
- Coat with sauce: Once both sides are beautifully browned, remove it from the pan and place it on a serving platter. Generously drizzle okonomiyaki sauce and Japanese mayonnaise over the top.
- Garnish: Finish off with a sprinkle of bonito flakes and nori. Optionally, add pickled ginger or a sprinkle of chili flakes for extra kick!
Tip: If the okonomiyaki wasn’t as thick as you’d like, don’t be shy! You’re not going for perfection; you’re going for deliciousness. Adjust thickness next time by adding a touch more batter or cooking it a little longer.
![]()
Pro Tips & Variations
Want to jazz up your okonomiyaki? Here are some fun twists to play around with:
- Toppings Galore: Try adding shrimp, squid, or veggies like mushrooms or bell peppers into the mix!
- Spicy Kick: Add a dash of cayenne or sriracha into the batter or drizzle it on top.
- Sweet Touch: A sprinkle of sugar in the batter might surprise you with a lovely sweet-savory balance.
- Vegetarian Style: Replace meat with tofu or additional vegetables for a plant-based delight.
Feel free to get creative! The beauty of okonomiyaki is that it’s all about what you love.
Serving Suggestions
When it’s time to serve your Hiroshima-style okonomiyaki, think cozy! I love to enjoy it with a side of steaming rice and a fresh salad for a complete meal. A hot cup of green tea pairs beautifully, or perhaps a light beer if you’re feeling festive! Slice into wedges for sharing, and watch the cheese-like gooeyness pull apart as you cut. It’s a sight to behold and utterly delicious!
![]()
Storage Tips
Though I doubt you’ll have leftovers, if you do, here’s how to store and reheat them:
- Refrigeration: Place your uneaten okonomiyaki in an airtight container in the fridge for 2-3 days. You can even separate layers with parchment paper to prevent sticking.
- Freezing: For longer storage, wrap them tightly in plastic wrap and place them in a zip-lock bag. They can stay good for about a month in the freezer.
- Reheating: To reheat, simply place them in a skillet over medium heat until warmed through. If frozen, let it thaw in the fridge overnight before reheating for best results. A few drops of oil in the pan help crisp them back up!
FAQs
Can I use different flour for the batter?
Absolutely! You can experiment with whole wheat flour or gluten-free options like rice flour. Just keep in mind that the texture may vary slightly, but it will still be delicious!
Is okonomiyaki sauce hard to find?
Not at all! Most Asian grocery stores carry okonomiyaki sauce, and it’s often available online. If you’re in a pinch, you can mix equal parts ketchup and Worcestershire sauce for a yummy substitute.
Can I make okonomiyaki in advance?
You can certainly prepare the batter ahead of time and refrigerate it for a day. Just remember not to add the toppings until you’re ready to cook. Enjoy warm, fresh pancakes for the best flavor!
What’s the difference between Hiroshima-style and Osaka-style okonomiyaki?
Great question! Hiroshima-style layers ingredients separately and often includes noodles, while Osaka-style mixes everything into a batter. Each has its charm, so give both a try!
Conclusion
As you take that first heavenly bite of your homemade Hiroshima-style okonomiyaki, I hope you feel as warm and cozy as I do every time I make it. There’s something so satisfying about creating a dish that brings people together. I’d love to hear all about your experience, any variations you tried, or if you enjoyed it with friends and family. So please, drop a comment below! Happy cooking, and may your kitchen be filled with laughter and delicious scents!
Print
Ultimate Hiroshima Style Okonomiyaki Recipe in Frying Pan
- Total Time: 30 minutes
- Yield: 4 servings 1x
Description
Discover the ultimate Hiroshima style okonomiyaki recipe cooked in a frying pan Master this unique tech for a delicious layered experience
Ingredients
Instructions
- Prep Time: 15 minutes
- Cook Time: 15 minutes
- Category: Main Course
- Method: Frying
- Cuisine: Japanese
Nutrition
- Serving Size: 1 serving
- Calories: 400 calories
- Sugar: 3 grams
- Fat: 24 grams
- Saturated Fat: 24 grams
- Carbohydrates: 36 grams
- Fiber: 4 grams
- Protein: 15 grams
Keywords: Hiroshima Okonomiyaki, Japanese Pancake, Savory Pancake, Easy Okonomiyaki Recipe