
Irresistible Monster Oreo Balls Sweet Treats That Wow
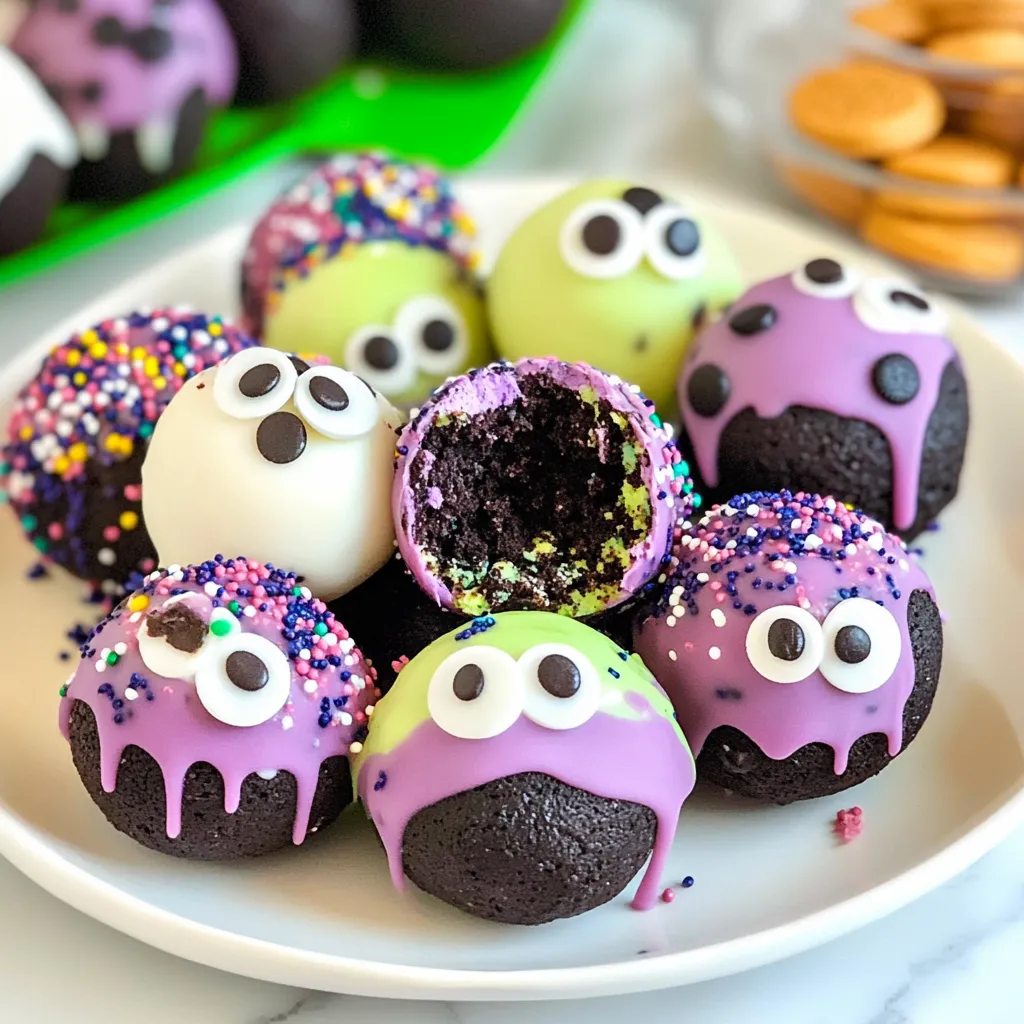
Hey there, friends! As the crisp autumn air sets in and pumpkins begin to dot the landscape, my thoughts turn to the fun, spooky celebrations that October brings. One of my absolute favorite treats for this time of year is none other than Monster Oreo Balls. These little bites of joy are not just a deliciously indulgent snack; they’re also a delightful nod to the Halloween spirit. Picture a chocolatey Oreo ball decorated with vibrant colors and silly faces—it’s hard not to smile just thinking about them!
I’ve been making these Monster Oreo Balls for years now, and they never fail to bring excitement to my family and friends. Whether it’s a spooky gathering or a cozy evening at home, these little delights always leave everyone wanting more. So, grab your mixing bowl and let’s dive into this fun and tasty recipe together!
Why You’ll Love This Recipe
- Super easy to make—perfect for kids and adults alike!
- Minimal ingredients—you probably have everything at home!
- Customizable decorations to unleash your creativity.
- Perfect for parties, playdates, or just a sweet pick-me-up.
Ingredients
Before we get cooking, let’s gather our ingredients. Here’s what you’ll need to whip up these Monster Oreo Balls:
- 1 package (15.35 oz) Oreo cookies (regular or double-stuffed works fine!)
- 8 oz cream cheese, softened (room temperature is key for easy mixing)
- 1 bag (14 oz) candy coating chocolate (milk, dark, or white—your choice!)
- Colored candy melts (for decorating—think green, orange, or purple)
- Edible eyes (you can find these at most craft or baking stores)
- Rainbow sprinkles (optional, for added fun!)
- Wax paper (to prevent sticking)
Step-by-Step Instructions
Time to roll up your sleeves and get started! Follow these simple steps, and you’ll have a batch of Monster Oreo Balls ready to impress:
- Crush those Oreos: Place the Oreo cookies in a food processor and pulse until they are finely crushed. Alternatively, you can put them in a resealable bag and crush them with a rolling pin—great for releasing any pent-up stress!
- Mix in the cream cheese: In a large mixing bowl, combine the crushed Oreos with the softened cream cheese. Use a spatula or your hands to mix until everything is nicely blended. You want a dough-like consistency—if it’s too crumbly, add a bit more cream cheese.
- Shape the balls: Now, scoop out about a tablespoon of the mixture and roll it into a ball. Place each ball on a baking sheet lined with wax paper. Aim for uniform size, so they’re all snazzy and cute!
- Chill them out: Pop the baking sheet in the fridge for about 30 minutes. This step is key! Chilling helps them firm up, making the next step much easier.
- Melt the chocolate: While your Oreo balls are chilling, melt the candy coating chocolate. You can use a microwave-safe bowl and heat it in 30-second intervals, stirring in between until smooth.
- Coat the balls: Once chilled, dip each Oreo ball into the melted chocolate until fully coated. Use a fork to lift them out, letting any excess chocolate drip off before placing them back on the wax paper.
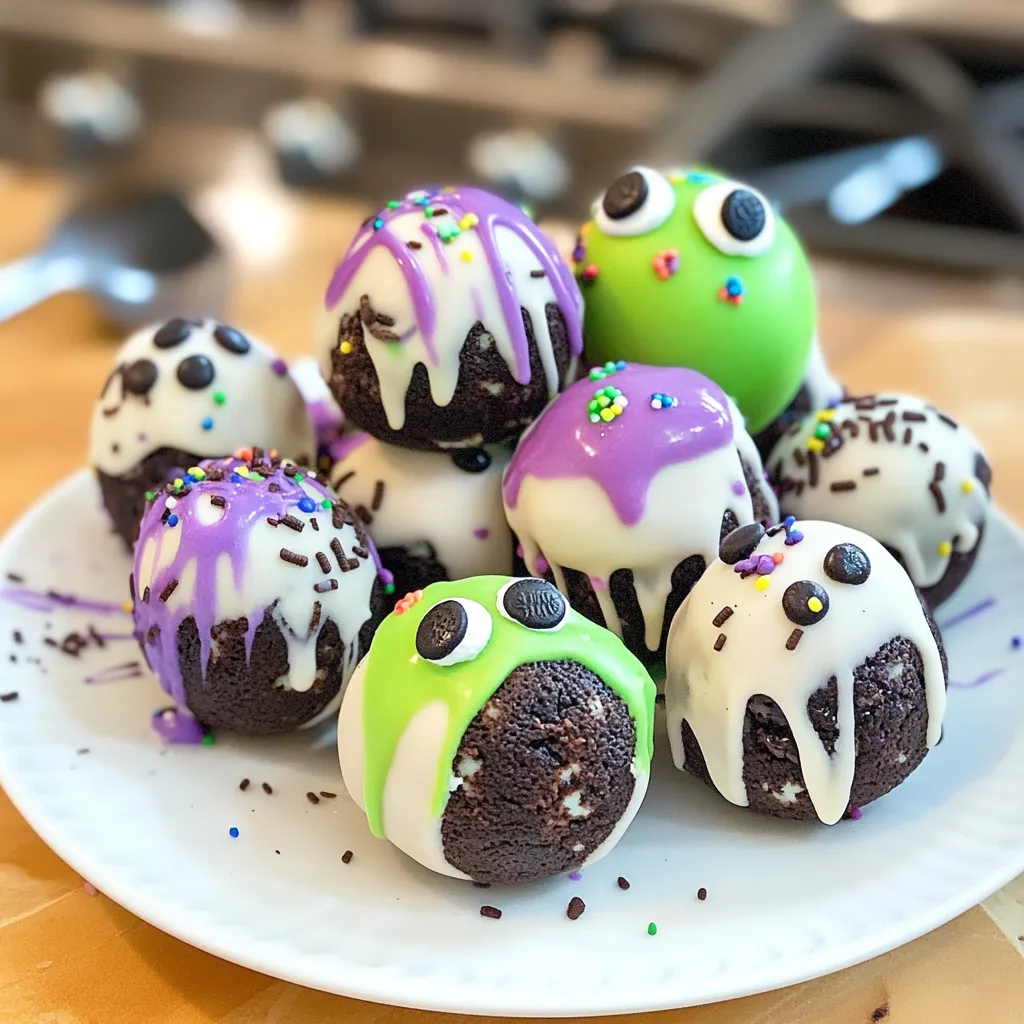
- Decorate your monsters: While the chocolate is still wet, sprinkle them with rainbow sprinkles or place edible eyes directly onto the surface. You can also create silly faces with the colored candy melts—just melt them as you did the chocolate, then drizzle them on for features!
- Set them to harden: Allow the Monster Oreo Balls to sit at room temperature until the chocolate has hardened, about 30 minutes. Or, if you’re impatient (like I usually am), pop them back in the fridge to speed things up!
Pro Tips & Variations
Now that you’ve got the basics down, let’s explore some playful twists and tips to make your Monster Oreo Balls even more special:
- Flavor variations: Add a splash of vanilla or almond extract to your cream cheese mixture for an extra layer of flavor.
- Mix it up: Swap out Oreos for other cookies like Nutter Butters for a peanut butter twist or Biscoff cookies for a hint of spice.
- Decorate with style: Use melted white chocolate or colored candy melts to drizzle over the hardened Oreo balls for added flair.
- Gluten-free option: If you need to cater to gluten-free friends, just use gluten-free Oreos!
Serving Suggestions
These Monster Oreo Balls are so versatile! You can arrange them on a cute platter for those Halloween parties, or put them in a cute jar for a sweet treat to share with friends. Imagine cozying up on the couch with a warm cup of hot cocoa, indulging in these delightful treats as you enjoy a spooky movie night!
They also make for a fun dessert at children’s parties—just watch the smiles light up when the little ones see the colorful designs and playful decorations. Plus, they’re a fantastic topping for ice cream; just chop them up and sprinkle over a scoop of vanilla or chocolate. Yum!
Storage Tips
Once you’ve made these adorable Monster Oreo Balls, you’ll want to enjoy them fresh, but I know how it is—sometimes you just can’t finish them all at once. Here’s how to keep them delicious:
- Refrigeration: Place your Monster Oreo Balls in an airtight container in the fridge. They will last about 1 week if you can resist!
- Freezing: If you want to save some for later, you can freeze them! Just place them in a single layer on a baking sheet until frozen, then transfer to an airtight container or freezer bag. They’ll keep for about 2-3 months.
- Reheating: Since these cuties are best enjoyed cold, you don’t need to reheat them. Just take them out of the fridge or freezer and enjoy as is!
FAQs
Can I make these ahead of time?
Absolutely! You can prepare the Oreo balls a day or two in advance and store them in the refrigerator. Just make sure to wait to decorate them until closer to serving time for the best results.
What if I don’t have a food processor?
No worries at all! You can simply place the Oreos in a sturdy resealable bag and crush them with a rolling pin or your hands. Just make sure you’re in a vented area; it can get a bit crumbly!
Can I use other fillings besides cream cheese?
Sure! If you’re looking for a dairy-free alternative, you can use vegan cream cheese, or even peanut butter! But of course, the classic cream cheese gives that rich, creamy flavor we love.
How do I make these more Halloween-themed?
You can use orange and black colored melts to decorate, and shape them like pumpkins or spooky ghosts! Let your imagination run wild—make them as cute or spooky as you like!
Conclusion
So there you have it—Monster Oreo Balls that are delicious, fun, and oh-so-easy to make! I hope you enjoy whipping up this treat as much as I do. Don’t be shy; I’d love to hear how yours turned out! Did you come up with fun designs? Maybe a new flavor twist? Please drop a comment below!
Happy baking and enjoy this delightful treat with your loved ones!
Print
Irresistible Monster Oreo Balls Sweet Treats That Wow
- Total Time: 30 minutes
- Yield: 24 servings 1x
Description
Indulge in Irresistible Monster Oreo Balls a perfect sweet treat that wows Perfect for parties or snacking these will delight dessert lovers everywhere
Ingredients
Instructions
- Prep Time: 30 minutes
- Cook Time: 0 minutes
- Category: Dessert
- Method: No-Bake
- Cuisine: American
Nutrition
- Calories: 100 calories
- Sugar: 9 g
- Fat: 5 g
- Saturated Fat: 5 g
- Carbohydrates: 13 g
- Fiber: 0 g
- Protein: 1 g
Keywords: Monster Oreo Balls, Halloween treats, easy dessert recipes, no-bake recipes