
No-Bake Cheesecake Greek Yogurt Cups: Easy & Delicious
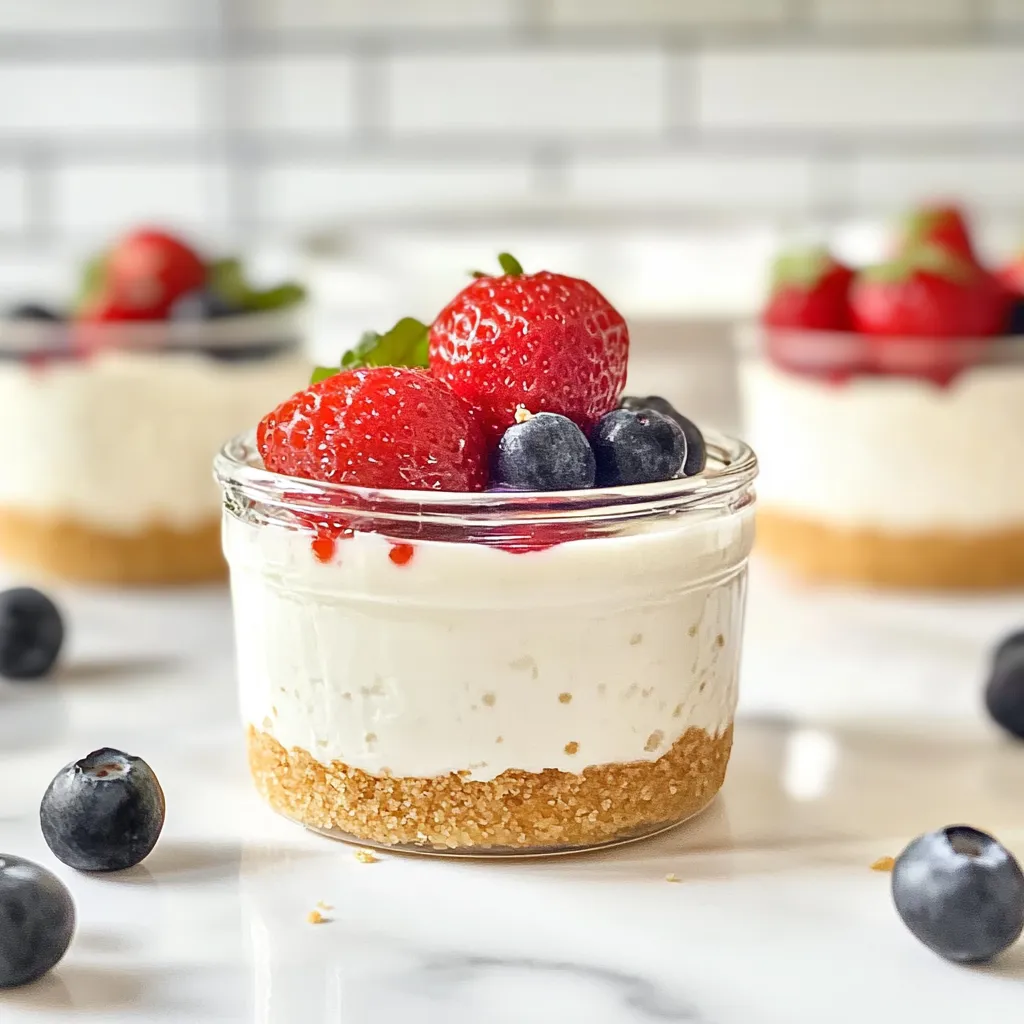
If you’re on the hunt for a delectable dessert that requires minimal effort and maximum flavor, look no further than delightful no-bake cheesecake Greek yogurt cups. Bursting with creamy richness and a hint of tanginess, these cups not only satisfy your sweet tooth but also come packed with nutritional benefits. With a base of Greek yogurt, they provide a healthier twist on traditional cheesecake while still delivering the indulgent taste we all crave.
One of the best aspects of this dessert is its versatility. Feel free to customize your yogurt cups with your favorite toppings—think fresh berries, crushed cookies, or even a drizzle of honey for added sweetness. To elevate your experience, consider adding a splash of vanilla extract or a sprinkle of lemon zest to enhance the flavors further. With expert tips for perfecting the creamy texture and managing balance between sweetness and tartness, you’ll be dishing out impressive treats in no time. Join me on this delightful journey to achieve your very own masterpiece!
Ingredients for No-Bake Cheesecake Greek Yogurt Cups:
This delightful no-bake dessert is not only simple but also offers a creamy texture and a refreshing taste. Below are the precise measurements for each ingredient necessary to create 8 to 10 servings of these indulgent Greek yogurt cups.
For the Cheesecake Filling:
- 2 cups of plain Greek yogurt (preferably full-fat for creaminess)
- 1 cup of cream cheese, softened (aim for a block style, not spreadable)
- ½ cup of granulated sugar (adjust based on sweetness preference)
- ¼ cup of honey or maple syrup (for a natural sweetener option)
- 1 tablespoon of fresh lemon juice (for a zesty kick)
- 1 teaspoon of pure vanilla extract (enhances flavor depth)
- 1 teaspoon of cornstarch (helps stabilize the mixture)
For the Crust Layer:
- 1 ½ cups of graham cracker crumbs (for that classic cheesecake flavor)
- ½ cup of unsalted butter, melted (binds the crust together)
- ¼ cup of brown sugar (adds extra sweetness and depth)
For the Topping (optional):
- 1 cup of mixed berries (such as strawberries, blueberries, and raspberries for a fresh garnish)
- ½ cup of whipped cream (to dollop on top for added fluffiness)
- Mint leaves (optional, for garnish and a touch of color)
Variations and Alternative Ingredients:
Feel free to experiment with different flavors and textures using the following substitutions or additions:
- Flavor Variations: Incorporate 2 tablespoons of cocoa powder for a chocolatey twist or mix in 1 teaspoon of almond extract for a nutty flavor.
- Fruit Options: Instead of mixed berries, try diced peaches or mango for a tropical flair.
- Alternative Sweeteners: Substitute coconut sugar for granulated sugar for a lower glycemic index option.
Make your No-Bake Cheesecake Greek Yogurt Cups uniquely yours by selecting the ingredients that suit your taste preferences!

How to prepare No-Bake Cheesecake Greek Yogurt Cups:
Creating delightful No-Bake Cheesecake Greek Yogurt Cups is simple and fun. Follow these clear steps to achieve a creamy and delicious dessert.
Gather Your Ingredients
Start by collecting all your ingredients. You will need Greek yogurt, cream cheese, powdered sugar, vanilla extract, and your favorite fruits for topping. Ensure the cream cheese is softened for easy mixing.
Prepare the Cream Cheese Mixture
In a medium mixing bowl, add 8 ounces of softened cream cheese. Make sure to break it into smaller pieces to encourage even mixing.
Using a hand mixer or a stand mixer, beat the cream cheese on medium speed until it becomes smooth and creamy. This should take about 1-2 minutes.
Incorporate Greek Yogurt
Gradually add 2 cups of Greek yogurt to the beaten cream cheese. Mix on low speed initially to avoid splattering, then increase to medium speed.
Continue mixing until the mixture is completely combined and no lumps remain. This step is crucial for achieving a smooth texture.
Add Sweetness and Flavor
Sprinkle in ⅓ cup of powdered sugar and 1 teaspoon of vanilla extract. Mix again until everything is well combined. Taste the mixture; if you prefer it sweeter, adjust the sugar accordingly.
Prepare the Dessert Cups
Grab individual cups or small glasses for serving. Start layering by spooning about ¼ cup of the cheesecake mixture into the bottom of each cup. Use a spatula to smooth the top.
Layering Fruit and More Mixture
Next, add a layer of your favorite fresh fruits. Strawberries, blueberries, or raspberries work perfectly for adding freshness. Then, spoon additional cheesecake mixture over the fruit layer until the cups are filled to about ¾ full.
Add Final Toppings
Top each cup with more fresh fruit and a sprinkle of granola or crushed cookies for added texture. This final touch enhances both the flavor and presentation.
Chill and Serve
Cover the cups with plastic wrap and refrigerate for at least 2 hours, allowing the flavors to meld. Serve chilled, and enjoy your delightful creation!
Tips for the Perfect No-Bake Cheesecake Greek Yogurt Cups
Maintain the Right Temperature
To ensure creamy texture, keep your ingredients cold. Start by refrigerating the Greek yogurt before use. This helps it blend smoothly with cream cheese and other ingredients. Also, chill your cups in the fridge after assembly. Let them sit for at least an hour for the flavors to meld and the texture to firm up. Avoid leaving them out at room temperature for long, as this can lead to spoilage and alter texture.
Choose Quality Ingredients
The taste of your no-bake dessert relies heavily on the quality of your ingredients. Opt for full-fat cream cheese, as it gives a richer flavor and creamier texture. Use fresh Greek yogurt, preferably plain and unsweetened, to control the sweetness level. Fresh fruits for toppings can enhance flavor and add texture. Use in-season fruits for the best taste because they are naturally sweeter and more vibrant.
Smart Substitutions for Dietary Restrictions
If you or your guests have dietary restrictions, there are easy ways to adapt this recipe. For a dairy-free version, substitute Greek yogurt and cream cheese with almond yogurt or a dairy-free cream cheese alternative. If you seek a lower-calorie option, use reduced-fat cream cheese and a light sweetener, such as stevia or monk fruit, to keep the flavors intact. For a gluten-free treat, ensure that any crust or toppings you use are certified gluten-free, especially if you’re including cookies or granola.
Sweetness Control and Flavor Variations
Adjust the sweetness of your no-bake cheesecake cups to your liking. Start with a small amount of sugar or honey, and taste as you go. For a unique flavor twist, add a splash of vanilla extract, a hint of lemon zest, or even flavored yogurt. Mix in cocoa powder for a chocolate version or incorporate spices like cinnamon for a warm touch. Each of these tweaks brings exciting new flavors to your dessert.
Layering and Presentation Tips
When assembling, layer thoughtfully. Begin with a layer of crust, followed by the cheesecake filling, and then a final layer of toppings. This not only improves the visual appeal but also enhances the taste experience with each bite. Use clear cups to showcase the beautiful layers. Garnish with mint leaves or a drizzle of fruit sauce for that extra flair.
Storage Tips for No-Bake Cheesecake Greek Yogurt Cups:
Keeping your No-Bake Cheesecake Greek Yogurt Cups fresh requires simple strategies. Proper storage helps preserve flavor, texture, and overall quality. Here are some practical tips you can follow.
Optimal Storage Conditions
Start by refrigerating your cheesecake cups as soon as you prepare them. Place the cups in an airtight container to protect them from absorbing other smells in the fridge. The best temperature for storage is between 34°F and 40°F (1°C to 4°C), which is the standard for most refrigerator settings. Ensure that the cups sit on a stable shelf away from the fridge door, as frequent opening can cause temperature fluctuations.
Maintaining Freshness
For optimal freshness, consume the yogurt cups within three to five days after making them. If you’ve added any toppings, such as fruit or granola, consider keeping those separate until you’re ready to serve. This approach prevents sogginess and maintains the textures. Always use clean utensils when serving to avoid contamination.
Freezing for Longer Storage
If you want to store the cups for an extended period, consider freezing them. Freezing can significantly extend their shelf life for about one to two months. To do this, place the cups in a freezer-safe container. Leave some space at the top to allow for expansion as the yogurt freezes. Wrap the container in plastic wrap or aluminum foil for extra protection against freezer burn.
Thawing Safely
When you’re ready to enjoy your frozen cheesecake cups, take them out and transfer them to the refrigerator. Allow them to thaw slowly for about 6-8 hours or overnight. This gradual thawing helps retain the creamy texture. Avoid thawing at room temperature, as doing this could lead to uneven thawing and spoilage.
By following these simple storage tips, you can enjoy your delightful yogurt cups whenever you want while maintaining their delicious taste and quality. Happy storing!
Related Recipes
If you enjoyed No-Bake Cheesecake Greek Yogurt Cups, you’ll love these similar recipes that offer delightful flavors and easy preparation.
- No-Bake Berry Parfait: This recipe features layers of creamy yogurt, fresh berries, and granola. It shares the same creamy texture and fruity freshness as the yogurt cups. You can easily create delightful layers, making it visually appealing and perfect for serving guests.
- Chocolate Avocado Mousse: This treat is rich and indulgent yet healthy. It uses creamy avocado blended with cocoa powder and sweetener for a smooth texture. Similar to the cheesecake cups, this mousse is easy to prepare and requires no baking. Both desserts satisfy cravings without too much guilt.
- Fruit and Yogurt Smoothie Bowls: These bowls combine yogurt with a mix of fruits and toppings like nuts and seeds. They are refreshing and provide a similar base of creamy yogurt, ensuring you still enjoy that satisfying texture. Smoothie bowls open up opportunities to get creative with toppings.
- Frozen Yogurt Bark: This simple snack incorporates yogurt, honey, and your choice of toppings. Just spread yogurt on a tray, sprinkle with fruits and nuts, freeze, and break into pieces. Like yogurt cups, it’s a chilled dessert that’s perfect for hot days.
All these recipes enhance your dessert experience by focusing on creamy yogurt and refreshing flavors. They are easy to make and perfect for satisfying your sweet tooth while keeping things light and wholesome.
Frequently Asked Questions:
What are No-Bake Cheesecake Greek Yogurt Cups?
No-Bake Cheesecake Greek Yogurt Cups are a delightful dessert that combines the creamy texture of Greek yogurt with the luscious flavor of cheesecake. These individual servings are perfect for satisfying your sweet tooth without the need for baking. They typically consist of layers of yogurt, a cheesecake-flavored cream, and can be topped with various fruits or graham cracker crumbs for added texture.
How do I make No-Bake Cheesecake Greek Yogurt Cups?
Creating these delightful yogurt cups is simple and quick. Start by blending Greek yogurt with softened cream cheese, sweeteners, and vanilla extract until smooth. Then, spoon a layer of this mixture into serving cups, followed by a layer of your favorite toppings such as fruits or crushed cookies. Repeat the layers as desired and refrigerate for a few hours to let the flavors meld before serving.
Can I use flavored Greek yogurt for these cheesecake cups?
Absolutely! Using flavored Greek yogurt can enhance the taste of your dessert and add a unique twist. Options like strawberry, raspberry, or lemon would pair beautifully and can reduce the need for additional sweeteners. Just make sure the chosen flavor complements the overall cheesecake theme.
How long do No-Bake Cheesecake Greek Yogurt Cups last in the fridge?
These yogurt treats can last for about 3 to 5 days when stored in an airtight container in the refrigerator. However, for optimal freshness and taste, it’s best to enjoy them within the first couple of days after preparation.
Can I make these cups dairy-free?
Yes, you can create dairy-free versions of these cheesecake yogurt cups by utilizing dairy-free yogurt alternatives, like coconut or almond yogurt. Additionally, consider substituting cream cheese with a plant-based cream cheese or cashew cream to keep the rich flavor while adhering to a dairy-free diet.
Are No-Bake Cheesecake Greek Yogurt Cups suitable for a gluten-free diet?
These yogurt cups can easily be made gluten-free by opting for gluten-free granola or cookie crumbs for layering. Just ensure that any other ingredients used, like sweeteners and flavorings, are also verified to be gluten-free for a safe and delicious treat for those with dietary restrictions.
Conclusion:
In summary, these delightful No-Bake Cheesecake Greek Yogurt Cups offer a simple yet impressive dessert solution that anyone can master. With their creamy texture and rich flavor, they shine as a perfect treat for any occasion. This recipe stands out for its flexibility; feel free to swap out ingredients to suit your taste preferences or dietary needs—be it low-fat yogurt or gluten-free bases. Additionally, using various toppings like fresh fruits, nuts, or even a fruit compote allows for endless customization, making each serving unique! Remember, the ease of preparation means you can whip them up in no time, ensuring your guests will be both impressed and satisfied. With this recipe, you’ll create a sweet, guilt-free indulgence that feels special without the fuss. Embrace your creativity and enjoy every delicious spoonful!
Print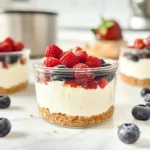
No-Bake Cheesecake Greek Yogurt Cups: Easy & Delicious
- Total Time: 2 hours 10 minutes
- Yield: 4 servings 1x
- Diet: Vegetarian
Description
Enjoy creamy, light, and tangy no-bake cheesecake cups made with Greek yogurt. This easy recipe combines a buttery graham cracker crust with a luscious cheesecake filling for a healthy and delicious treat.
Ingredients
1 cup graham cracker crumbs
3 tablespoons melted butter
1 tablespoon sugar
1 cup Greek yogurt (full-fat preferred)
8 oz cream cheese, softened
¼ cup honey or maple syrup
1 teaspoon vanilla extract
Fresh berries or fruit for topping
Instructions
1. Mix graham cracker crumbs, melted butter, and sugar in a bowl until combined.
2. Press the mixture evenly into the bottom of 4 small serving cups or jars.
3. In a mixing bowl, beat cream cheese until smooth.
4. Add Greek yogurt, honey, and vanilla extract; mix until creamy and well combined.
5. Spoon the cheesecake mixture over the crust in each cup.
6. Refrigerate for at least 2 hours to set.
7. Top with fresh berries or fruit before serving.
Notes
Use full-fat Greek yogurt for creamier texture.
Substitute honey with maple syrup or agave for a vegan option.
Add a sprinkle of cinnamon or lemon zest for extra flavor.
- Prep Time: 10 minutes
- Cook Time: 0 minutes
- Category: Dessert
- Method: No-Bake
- Cuisine: American
Nutrition
- Serving Size: 1 cup
- Calories: 280
- Sugar: 15g
- Sodium: 120mg
- Fat: 15g
- Saturated Fat: 8g
- Unsaturated Fat: 5g
- Trans Fat: 0g
- Carbohydrates: 25g
- Fiber: 1g
- Protein: 8g
- Cholesterol: 45mg
Keywords: no-bake, cheesecake, Greek yogurt, healthy dessert, easy dessert