
No Bake Timbit Cheesecake: A Delightful Treat You’ll Love!
Are you on the lookout for a delightful dessert that requires zero baking but delivers maximum flavor? Look no further than the irresistible No Bake Timbit Cheesecake! This luscious creation combines the rich, creamy texture of cheesecake with the beloved flavors of Timbit doughnuts, making it a sensational treat for any occasion. Perfect for warm days or when you simply don’t feel like turning on the oven, this dessert is as easy to make as it is enjoyable to eat.
Imagine indulging in a velvety slice of cheesecake, where every bite is infused with the sweet and nostalgic taste of Timbit doughnuts. Not only is this no-bake delight a showstopper at parties, but it’s also a fantastic way to please both kids and adults alike with its unique combination of textures and flavors. Bursting with the essence of your favorite doughnut, this uncomplicated cheesecake is sure to become a favorite in your dessert repertoire. So, let’s dive into the delightful world of this no bake wonder!
Delicious Twist on a Classic Dessert:
Are you ready to take your dessert game to the next level? Enter the delectable world of the No Bake Timbit Cheesecake—a delightful treat that brilliantly combines the flavors of classic cheesecake with the irresistible allure of donut holes. Perfect for those who love quick and easy recipes, this no-bake version is ideal for gatherings or a sweet indulgence at home.
Easy Preparation Steps
The beauty of this cheesecake lies in its simplicity. You won’t need an oven or extensive baking skills. Start by preparing a smooth crust made of crushed graham crackers mixed with melted butter. This forms a deliciously crunchy base that pairs well with the creamy filling. Next, make the cheesecake layer by blending cream cheese, powdered sugar, and vanilla extract until velvety smooth. For a unique twist, fold in mini donuts or donut holes, reminiscent of the iconic Timbit. This incorporation of familiar flavors brings joy to every bite.
Perfect for Any Occasion
Whether it’s a family gathering or a casual get-together with friends, this No Bake Timbit Cheesecake is sure to impress. If you love creamy desserts, you might also enjoy Sopapilla Cheesecake, which features a similar creamy texture that’s equally satisfying. Add a drizzle of chocolate or a sprinkle of colorful sprinkles on top, and watch it transform into a centerpiece dessert that draws everyone’s attention.
Storage and Serving Tips
To ensure that your dessert remains fresh, store it in the refrigerator, allowing it to set properly for a few hours. This will enhance the flavors and create a firmer consistency. Serve chilled for a refreshing dessert that’s smooth on your palate. You can slice it into squares or serve it in individual cups for a fun, whimsical twist.
Ultimately, the No Bake Timbit Cheesecake is a joyful and delicious creation that reinvents a classic favorite while providing an oasis of flavors in every chilled bite. With its easy preparation and delightful taste, this dessert is a must-try for any cheesecake aficionado.
Ingredients for No Bake Timbit Cheesecake:
If you’re looking for an easy and indulgent dessert, this No Bake Timbit Cheesecake will surely impress your friends and family. This delightful treat combines the creaminess of cheesecake with the fun, multi-colored Timbits for a playful twist. Below are the exact ingredient measurements you’ll need to create this luscious dessert:
- 8 oz cream cheese, softened
- ½ cup granulated sugar
- 1 teaspoon vanilla extract
- ⅓ cup heavy cream
- 1 ½ cups Cool Whip
- 13 Timbits (your favorite varieties)
- 1 graham pie crust (remember to place it in the freezer for about 30 minutes before using to firm it up and reduce delicacy)
Create Your No Bake Cheesecake Layer
To start, take the softened cream cheese and combine it with the granulated sugar in a mixing bowl. Beat them together until the mixture becomes smooth and creamy. Next, add the vanilla extract to infuse your cheesecake with a lovely aroma. In another bowl, whip the heavy cream until soft peaks form. Gently fold the whipped cream into the cream cheese mixture. Finally, add in the Cool Whip, stirring until the ingredients are fully combined.
Assemble the Cheesecake with Timbits
Now for the fun part: integrating the Timbits! Cut the 13 Timbits into quarters or small pieces, then fold them into the cheesecake mixture. This adds delightful bursts of flavor and crunch in every bite. Pour the cheesecake mixture into the prepared graham pie crust, smoothing the top with a spatula. For best results, refrigerate for at least two hours to allow the flavors to bond.
As a perfect accompaniment, consider trying this Strawberry Banana Cheesecake Smoothie for a refreshing drink to serve alongside your No Bake Timbit Cheesecake. It not only pairs well but also provides a delightful contrast in textures and flavors.
Enjoy serving this whimsical, no-bake dessert at your next gathering. Each slice of this flavorful cheesecake promises to be a hit!
How to Prepare No Bake Timbit Cheesecake:
Creating a delightful No Bake Timbit Cheesecake is an easy and fun way to enjoy a creamy dessert packed with nostalgia. The combination of rich cream cheese and delectable Timbits gives this cheesecake a unique twist. Let’s dive into the simple steps to make this delicious dessert!
Gather Your Ingredients
To get started, ensure you have all the necessary ingredients on hand. You will need 8 oz of softened cream cheese, ½ cup of granulated sugar, and 1 teaspoon of vanilla extract. Additionally, gather ⅓ cup of heavy cream, 1 ½ cups of Cool Whip, 13 Timbits, and a graham pie crust that has been chilled in the freezer for about 30 minutes. This cooling process makes the crust sturdier and easier to work with.
Create the Cheesecake Filling
Begin preparing the cheesecake filling by using a large mixing bowl. Beat the softened cream cheese and granulated sugar together until the mixture is smooth and creamy. Ensure there are no lumps remaining. Next, add the vanilla extract and continue mixing to incorporate the flavors fully.
In a separate bowl, pour in the heavy cream. Whip it until stiff peaks form. This step is crucial as it adds lightness to the cheesecake, making it fluffy and enjoyable. Gently fold the whipped heavy cream into the cream cheese mixture until well combined.
Then, introduce the Cool Whip into the mixture, folding it in gently to maintain that airy texture. Finally, chop up the Timbits into smaller pieces and fold them in to disperse them evenly throughout the cheesecake filling.
Assemble and Chill
Pour the creamy filling into the prepared graham pie crust, spreading it evenly. To enhance its flavors, consider letting the cheesecake chill in the refrigerator for at least 4 hours or overnight, allowing it to set properly. For additional recommendations, you can also explore this guide for various cheesecake methods.
Once set, your No Bake Timbit Cheesecake is ready to serve! Each slice will reveal the delightful combination of flavors, making it an ideal dessert for gatherings or family dinners. For an extra treat, try pairing this cheesecake with some delicious coffee or another sweet dessert like churro cheesecake bars to create a dessert platter everyone will love!
Enjoy your No Bake Timbit Cheesecake and the joy it brings!
Tips for Perfecting Your Cheesecake:
Creating the perfect cheesecake takes careful attention to detail, especially when making a delightful No Bake Timbit Cheesecake. This creamy dessert doesn’t require an oven, making it both simple and fun. Here are some essential tips to elevate your cheesecake to the next level.
Start with Quality Ingredients
Using high-quality ingredients is key. Select full-fat cream cheese for a rich texture. Remember to allow it to soften at room temperature. This step ensures that your cheesecake becomes silky smooth. Additionally, consider using fresh vanilla extract for an extra burst of flavor. If you want a twist, try incorporating mini donuts or donut holes, reminiscent of the classic Timbit flavor.
Perfect Your Crust
For the crust, graham cracker crumbs are a classic choice, but you might also experiment with crushed cookie options. A solid base is vital for any cheesecake. Use a 1:1 ratio of crumbs to melted butter for a buttery, crunchy crust. After mixing, press the mixture evenly into the bottom of your pan and chill it for at least 30 minutes. This extra chill time allows it to firm up nicely before adding the creamy filling.
Beat Your Filling Well
When you combine your cream cheese, sugar, and flavorings, mix them well, but be cautious not to overbeat. Overmixing can introduce unwanted air into your cheesecake, leading to cracks as it sets. You want a light and fluffy texture that holds its form without being too airy.
Chilling is Key
Once your No Bake Timbit Cheesecake is assembled, the real waiting game begins. Chill it in the refrigerator for at least 4 hours, preferably overnight. This time allows the flavors to meld and the filling to firm up. For more tips on incorporating delicious flavors in desserts, explore recipes like the Tiramisu Cheesecake Delight.
Garnishing and Serving
When it’s finally time to serve your cheesecake, let it sit at room temperature for about 10–15 minutes. This slight warm-up will enhance the flavors and make slicing easier. Consider garnishing with whipped cream, sprinkles, or even some mini donuts for that extra Timbit touch.
By following these tips, your No Bake Timbit Cheesecake will impress everyone with its creamy texture and indulgent flavor. Happy baking (or rather, chilling)!
Serving Suggestions for No Bake Timbit Cheesecake:
When it comes to serving your delicious No Bake Timbit Cheesecake, creativity can elevate the experience. The light, creamy consistency of this cheesecake pairs beautifully with various accompaniments. Here are some delightful serving suggestions that will impress your guests and enhance the overall flavor profile of your dessert.
1. Garnishes That Wow
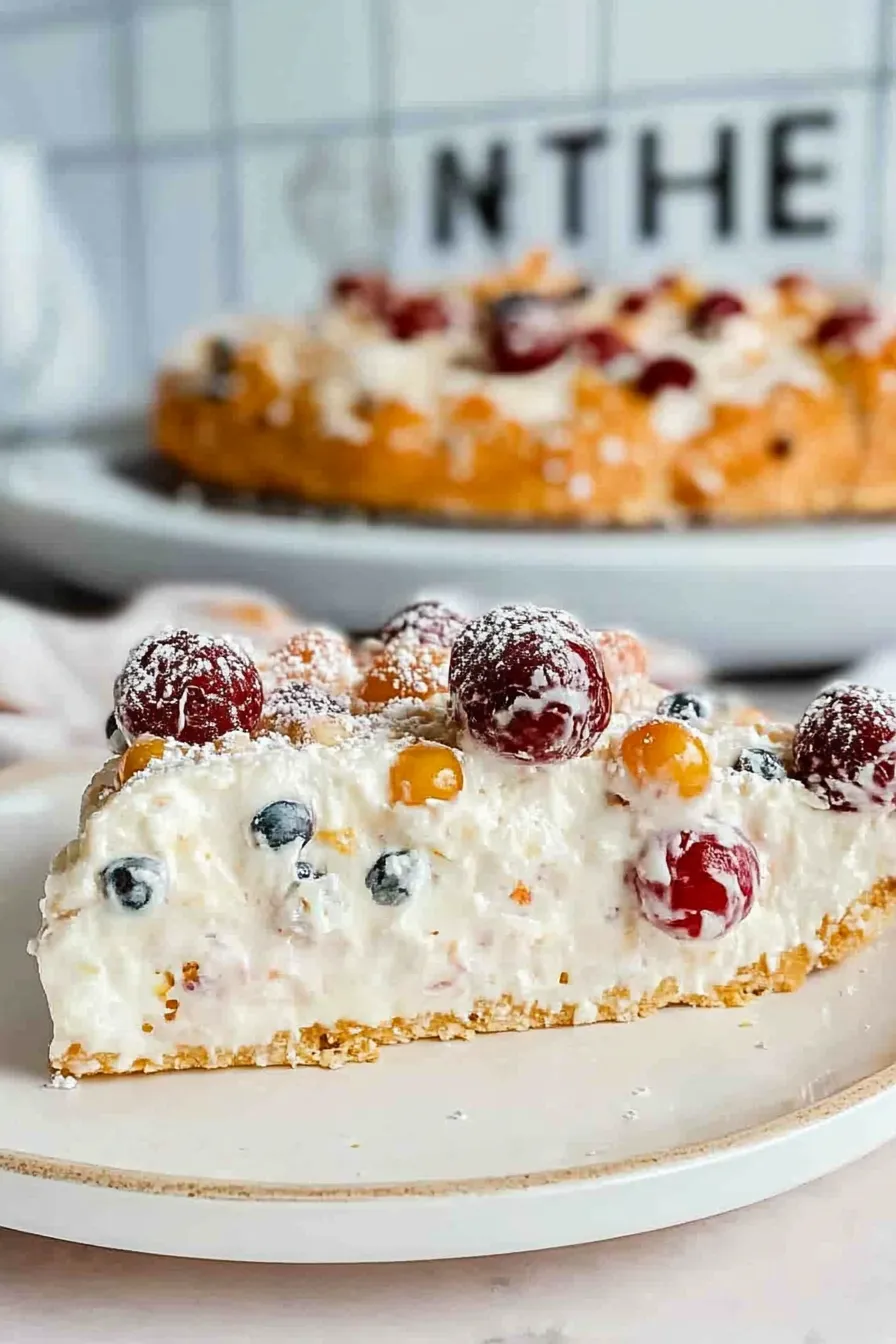
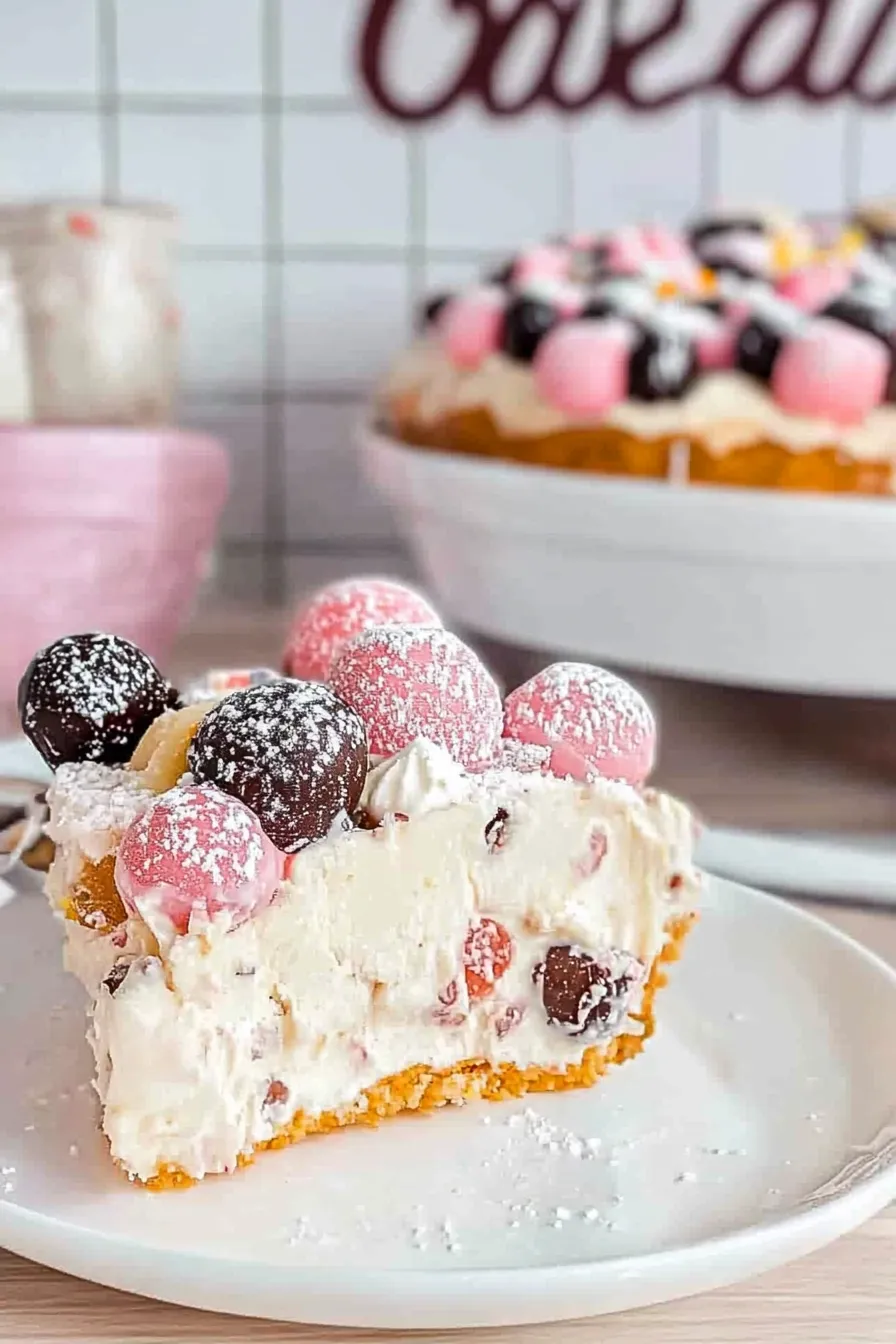
Start by adding delicious toppings. Fresh fruit like strawberries, raspberries, or blueberries not only adds color but also a fruity zest that balances the rich cheesecake flavor. Drizzle some chocolate sauce or caramel over the top for an indulgent touch. Crushed Timbit pieces, scattered on the surface, can also offer a fun, crunchy texture.
2. Incorporating Beverages
Consider pairing your cheesecake with a refreshing drink. A smooth coffee or a creamy latte complements the dessert’s sweetness perfectly. Alternatively, try serving it with a strawberry banana cheesecake smoothie for a uniquely satisfying combination. You can find this delightful recipe here. This smoothie echoes the cheesecake’s flavors, making them a perfect duo.
3. Plating Presentation
Presentation is everything when serving desserts. Use elegant plates, and consider slicing the cheesecake into small squares for bite-sized treats. Arrange a couple of pieces artfully on the plate, and for an eye-catching detail, add a mint leaf next to the cheesecake. This simple addition enhances both the flavor and the visual appeal.
4. Accompanying Desserts
If you’re hosting a gathering, think about serving the No Bake Timbit Cheesecake alongside other desserts. Sweet treats like churro cheesecake bars or mini no-bake Oreo cheesecakes can create an enticing dessert table. Variations add depth to your dessert selection and keep your guests excited for more.
Served as a finale to any meal, this no-bake cheesecake offers a delightful ending. Whether you’re celebrating a special occasion or simply treat yourself, these suggestions will surely elevate your cheesecake experience. Enjoy creating beautiful memories, one slice at a time!
Storage Tips for No Bake Timbit Cheesecake:
To ensure your No Bake Timbit Cheesecake stays fresh and delicious, it’s vital to store it properly. Begin by wrapping the cheesecake tightly in plastic wrap or aluminum foil to prevent air exposure. Ideally, refrigerated storage is essential; it can remain in the fridge for up to 5 days. For longer preservation, consider placing individual slices in airtight containers, allowing for easy portion control. If you’re looking for an alternative creamy dessert, check out our Sopapilla Cheesecake, which also benefits from proper storage techniques. Lastly, avoid freezing Timbit cheesecake, as the texture may suffer once thawed. Enjoy your delightful cheesecake fresh for maximum flavor!
Frequently Asked Questions (FAQs):
What is No Bake Timbit Cheesecake?
No Bake Timbit Cheesecake is a creamy, indulgent dessert inspired by the popular Canadian Timbit doughnuts. This delightful cheesecake incorporates all the flavors of your favorite bite-sized treat without the need for baking. It’s a quick and hassle-free option for those who crave a delicious sweet without the oven!
How long does it take to prepare the No Bake Timbit Cheesecake?
Preparation typically takes about 20-30 minutes, depending on your skill level. Since this dessert is chilled rather than baked, the overall time commitment is considerably less than traditional cheesecakes. Once prepared, it needs several hours in the fridge to firm up—a waiting game that’s well worth it!
Can I customize the flavors of this cheesecake?
Certainly! One of the great benefits of a no-bake cheesecake is its versatility. You can infuse various flavors, like chocolate or vanilla, to suit your preferences. For a unique twist, consider adding colorful sprinkles, similar to what you might find in mini no-bake Oreo cheesecakes, to elevate the presentation and taste.
Is No Bake Timbit Cheesecake suitable for special diets?
You can modify this recipe to cater to various dietary needs. For instance, using gluten-free cookies in the crust makes it a great option for gluten-sensitive friends. Additionally, you can opt for alternatives like dairy-free cream cheese if you’re looking to make a vegan version of this delightful treat.
What toppings work well with this cheesecake?
A variety of toppings can enhance your no bake creation. Try fresh berries, whipped cream, or even crumbled Timbit pieces for an authentic experience. Drizzling chocolate sauce or caramel can also give it that extra touch of indulgence.
How can I store leftover No Bake Timbit Cheesecake?
If you have any leftovers—though that’s rare!—you can store them in an airtight container in the refrigerator. This will keep the cheesecake fresh for 3-5 days, allowing you to enjoy this sweet treat long after it’s been made!
Print
No Bake Timbit Cheesecake: Easy and Delicious Dessert Recipe
- Total Time: 50
- Yield: 4 servings 1x
Description
This No Bake Timbit Cheesecake is a deliciously creamy dessert that’s perfect for any occasion. Made with soft cream cheese, sweet Timbits, and a light Cool Whip topping, it’s easy to prepare and requires no baking!
Ingredients
8 oz cream cheese
softened
½ cup granulated sugar
1 teaspoon vanilla extract
⅓ cup heavy cream
1 ½ cups Cool Whip
13 Timbits
1 graham pie crust (place it in the freezer for about 30 minutes before using to firm it up and make it less delicate)
Instructions
- In a mixing bowl, beat the softened cream cheese, granulated sugar, and vanilla extract until smooth and creamy.
- In another bowl, whip the heavy cream until stiff peaks form, then gently fold in the Cool Whip.
- Combine the cream cheese mixture with the whipped cream mixture, folding until well incorporated.
- Chop the Timbits into smaller pieces and gently fold them into the cream cheese mixture.
- Pour the mixture into the prepared graham pie crust and smooth the top with a spatula.
- Refrigerate for at least 2 hours to set before serving. For best results, chill overnight.
Notes
Make sure to firm up the graham crust in the freezer for better structure when filling. Use any flavor of Timbits you like for a fun twist.
- Prep Time: 20
- Cook Time: 30
- Category: Dessert
- Method: baking
- Cuisine: American
Nutrition
- Serving Size: 1 slice
- Calories: 250
- Protein: 3g
Keywords: No Bake Timbit Cheesecake, cheesecake recipe, no bake dessert, Timbit dessert, easy cheesecake