
Old-Fashioned Homemade Banana Pudding Recipe You’ll Love

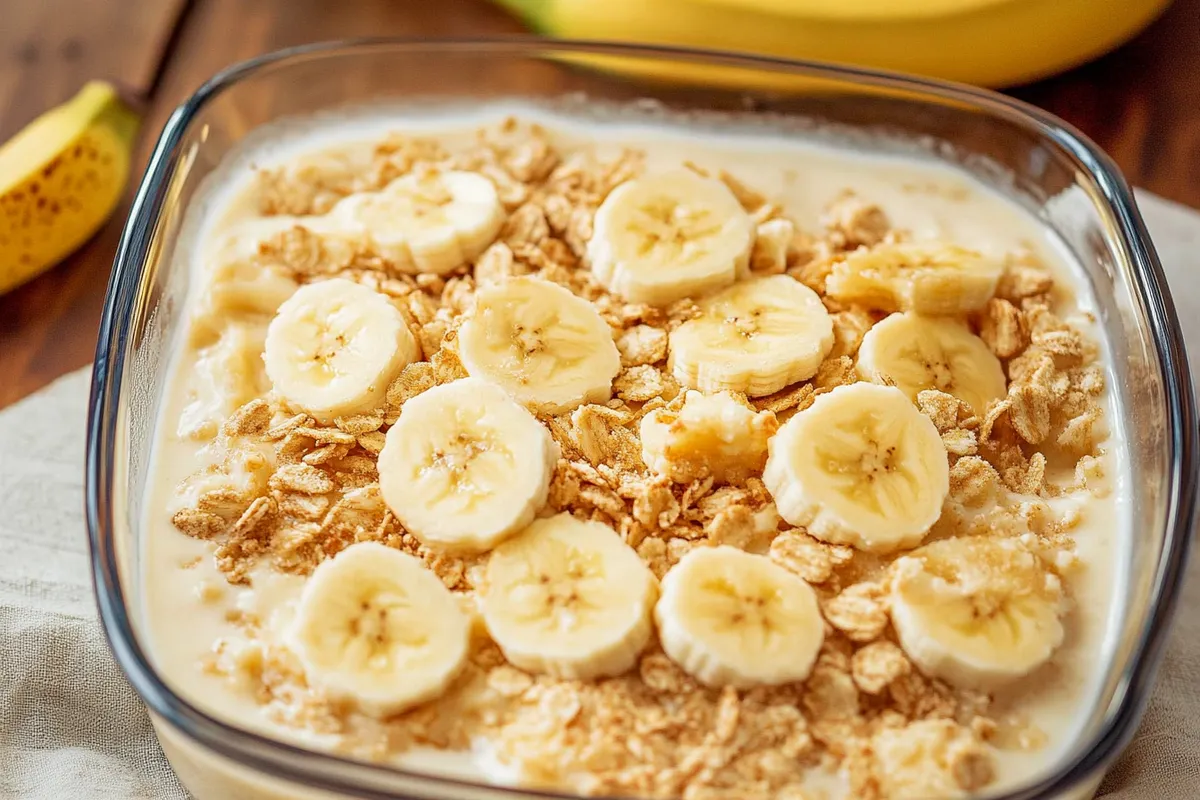
There’s something truly magical about the creamy layers of Old-Fashioned Homemade Banana Pudding. This classic dessert is not just a treat; it’s a nostalgic experience that takes you back to family gatherings and sunny afternoons. With its rich custard, fresh bananas, and crunchy vanilla wafers, this delightful dish captivates the senses with every spoonful.
While the traditional version delights in its simplicity, the possibilities for variations are endless! Consider adding a dollop of whipped cream for extra fluffiness or incorporating a splash of rum for an adult twist. You can even experiment with flavored puddings or swap in different cookies to personalize your dessert. To achieve that perfectly silky texture, remember to stir your custard consistently and allow it to cool before assembling.
Whether you’re a seasoned home cook or a newcomer to the kitchen, making this beloved dessert is both satisfying and straightforward. Get ready to impress your family and friends with a bowl of nostalgia!
Ingredients for Old-Fashioned Homemade Banana Pudding:
To create a delightful serving of this classic dessert, gather the following fresh and pantry staples. This recipe yields a satisfying portion that serves 8 to 10 people, perfect for family gatherings or celebrations. Here’s what you’ll need:
Base Ingredients:
- 2 cups whole milk
- 1 cup heavy cream
- 3/4 cup granulated sugar
- 1/2 cup cornstarch
- 1/4 teaspoon salt
- 4 large eggs (separated into yolks and whites)
- 1 tablespoon pure vanilla extract
Layering Ingredients:
- 4 ripe bananas (sliced into thin rounds)
- 1 bag of vanilla wafers (about 12 ounces)
Topping Ingredients:
- 1/2 cup heavy whipping cream (for the topping)
- 2 tablespoons powdered sugar (for the whipped cream)
- 1/2 teaspoon vanilla extract (to flavor the topping)
Optional Variations:
If you’re looking to add a personal touch to your dessert, consider the following variations:
- Chocolate Banana Pudding: Mix in 1/2 cup of unsweetened cocoa powder into the pudding mixture. Melted chocolate can also be drizzled on top.
- Nutty Crunch: Sprinkle 1/2 cup of chopped pecans or walnuts between layers for added texture and flavor.
- Coconut Twist: Incorporate 1/2 cup of sweetened flaked coconut into the pudding or use coconut milk in place of half the whole milk for a tropical vibe.
Make sure to choose ripe bananas for the best flavor and texture, and using homemade whipped cream will elevate the overall dessert experience. This classic dish can easily be tailored to fit your preference or seasonal occasions!
How to prepare Old-Fashioned Homemade Banana Pudding:
Creating a delicious banana pudding from scratch is easier than you might think. Follow these detailed steps to make a delightful dessert that brings nostalgia to every bite.
Gather Your Ingredients
Start by collecting all the necessary ingredients. You will need:
- 4 ripe bananas
- 1 cup granulated sugar
- 1/3 cup all-purpose flour
- 1/4 teaspoon salt
- 4 cups whole milk
- 4 large egg yolks
- 1 teaspoon vanilla extract
- 1 tablespoon unsalted butter
- 1 box of vanilla wafers
- Whipped cream for topping (optional)
Step 1: Make the Pudding Base
In a medium saucepan, combine the sugar, flour, and salt. Whisk these dry ingredients together thoroughly.
Step 2: Combine with Milk
Gradually add the milk to the saucepan while continuing to whisk. Ensure no lumps remain in the mixture.
Step 3: Cook Over Medium Heat
Place the saucepan over medium heat. Stir continuously until the mixture thickens and begins to bubble.
Step 4: Temper the Egg Yolks
In a separate bowl, lightly beat the egg yolks. Slowly add a couple of spoonfuls of the hot pudding mixture to the yolks while whisking. This process is known as tempering.
Step 5: Mix the Egg Yolks into the Pudding
After tempering, pour the egg yolk mixture back into the saucepan and stir well. Cook for an additional 2-3 minutes, continuing to stir.
Step 6: Add Vanilla and Butter
Remove the saucepan from heat. Stir in vanilla extract and butter until fully melted and mixed into the pudding.
Step 7: Layer the Dessert
In a serving dish, layer vanilla wafers at the bottom. Slice 2 bananas and spread them over the wafers. Pour half of the pudding on top.
Step 8: Repeat the Layers
Add another layer of vanilla wafers, the remaining banana slices, and then top with the rest of the pudding. Cover the dish with plastic wrap.
Step 9: Chill and Serve
Refrigerate your banana pudding for at least 4 hours, or overnight for the best flavor. Once set, serve chilled, optionally topping with whipped cream.
Tips for the Perfect Old-Fashioned Homemade Banana Pudding
Making a delightful banana pudding requires attention to detail. Here are some expert tips to achieve that creamy, dreamy dessert that will impress every palate.
Maintain the Right Temperature
Temperature control is crucial for achieving the perfect pudding consistency. When cooking the custard, keep the heat on medium-low. This prevents the mixture from scorching or curdling. Stir constantly to ensure even cooking. Once the mixture thickens and reaches a creamy texture, remove it from the heat immediately to avoid overcooking.
Use Quality Ingredients
Invest in high-quality ingredients for the best flavor. Choose ripe, naturally sweet bananas, as they enhance the overall taste of your pudding. Fresh, whole milk provides a rich base. If possible, use homemade vanilla extract instead of artificial flavoring. The flavor difference can be significant and elevates the dish.
Suitable Substitutions for Dietary Restrictions
If you need alternative ingredients for dietary needs, there are manageable substitutions. For a dairy-free version, opt for almond milk or coconut milk instead of whole milk. These options still provide a delicious pudding texture but cater to lactose intolerance. For a lighter pudding, use low-fat milk or substitute some of the milk with Greek yogurt. This adds creaminess without as many calories.
Perfecting the Layering Technique
Layering is key to creating a visually appealing dessert. Start with a generous layer of custard at the bottom of your serving dish. Alternate layers of banana slices and wafers, then continue layering custard on top. Make sure the last layer is custard to keep the dessert moist. This method ensures every bite offers a balanced mix of flavors and textures.
Allow Ample Chilling Time
Patience is essential in this recipe. Once assembled, cover the pudding with plastic wrap and refrigerate it for at least 4 hours or overnight. The chilling time allows flavors to meld beautifully while the wafers soften. This step takes your dessert from good to unforgettable.
With these tips, you’re well-equipped to craft an exceptional banana pudding. Attention to temperature, quality ingredients, thoughtful substitutions, and ideal layering will bring out the best in this beloved classic.
Storage Tips for Old-Fashioned Homemade Banana Pudding:
Storing your delicious banana pudding properly can make a significant difference in its taste and texture. Follow these guidelines to keep your dessert fresh and delightful for as long as possible.
Maintain Freshness
To maintain freshness, always cover your banana pudding securely with plastic wrap or a lid. This helps prevent the pudding from absorbing odors from your fridge and protects it from drying out. If you notice browning on the banana slices, gently remove them and top with fresh, lemon juice-coated slices. This addition not only enhances flavor but also keeps the bananas looking their best.
Optimal Storage Conditions
Store your banana pudding in the refrigerator. Keeping it at a consistent temperature of 35-40°F (1-4°C) slows down spoilage. It’s best to refrigerate your pudding as soon as possible after preparation. The pudding will benefit from the cold, and chilling will help the flavors meld beautifully.
Shelf Life
You can safely enjoy your banana pudding for about 3-5 days in the refrigerator. After that, the texture may start to deteriorate, and the bananas may become mushy. If you need to store leftovers for up to a week, consider freezing portions. However, be aware that freezing can change the consistency, so it’s best reserved for emergency situations.
Freezing Banana Pudding
If you decide to freeze your dessert, portion it out into airtight containers. Leave some space at the top of the container for expansion. When ready to eat, thaw the pudding overnight in the fridge. Stir it gently after thawing to restore some texture. For the best quality, consume frozen portions within 1-2 months.
Final Thoughts
By following these storage tips, you can ensure that your homemade dessert remains enjoyable throughout its shelf life. Proper practices allow you to savor the rich flavors and creamy goodness without waste. Always remember, freshness adds joy to every bite.
Related Recipes to Old-Fashioned Homemade Banana Pudding
If you love the creamy, nostalgic taste of homemade banana pudding, you’ll enjoy these similar desserts that evoke the same comforting feelings. Each recipe brings a unique twist while maintaining that delightful simplicity we crave.
First up is Classic Chocolate Pudding. This dessert features a rich and velvety texture, making it a perfect companion on any dessert table. Just like banana pudding, chocolate pudding uses a simple cooking method and familiar ingredients. The smooth chocolate flavor complements the soft bananas, creating a delicious layering option if you decide to mix them together.
Next, consider Vanilla Custard. Custard shares a creamy base that enhances the silky texture you find in our original pudding. This versatile dessert can stand alone or be used to create a layered parfait with fruits. The subtle vanilla flavor allows for enhancement with sliced bananas, making it a delightful addition to your dessert rotation.
Finally, don’t overlook Strawberry Shortcake. While different in presentation, this dessert features layers of cake, whipped cream, and fresh strawberries. It embodies a similar homemade charm and allows you to play with textures, similar to the layers in banana pudding. You can even make a fun variation by adding banana slices to the shortcake for a fruity twist.
These recipes all echo the essence of nostalgia and simplicity found in that beloved banana pudding. Each one brings its charm while complementing the comforting feel of your culinary favorites. Try them out for a sweet journey that celebrates classic flavors!
Frequently Asked Questions:
What ingredients are needed to make old-fashioned banana pudding?
To create a delightful, traditional banana pudding, you will require ripe bananas, vanilla wafers, milk, sugar, egg yolks, vanilla extract, and a pinch of salt. Some variations might call for whipped cream or meringue to top off the pudding, giving it that classic finish.
How long does it take to prepare old-fashioned banana pudding?
Making this timeless treat is relatively quick, with preparation taking about 30 minutes. However, after assembly, it’s essential to let the pudding chill in the refrigerator for at least two to four hours, or ideally overnight, to allow the flavors to meld and achieve the perfect texture.
Can I make banana pudding ahead of time?
Yes, this classic dessert is perfect for making ahead. Ideally, it should be prepared the day before you plan to serve it, allowing for the flavors to develop. Just be sure to add any meringue or whipped cream right before serving for the best presentation.
Is it necessary to use ripe bananas?
Absolutely! Ripe bananas not only add natural sweetness but also a creamier texture to the pudding. Choose bananas that have a few brown spots on the skin, as they are ideal for achieving that rich flavor you expect in a homemade banana dessert.
Can old-fashioned banana pudding be frozen?
While you can freeze banana pudding, it’s not recommended due to the texture changes that occur once thawed. The bananas will turn mushy, and the creamy custard may separate. If you have leftovers, it’s best to refrigerate them and consume within a few days for optimal freshness.
What can I use as a substitute for vanilla wafers?
If you’d like to switch up the traditional flavor, you can substitute vanilla wafers with graham crackers, ladyfingers, or even sponge cake. Each of these options will provide a different but equally delightful twist to your nostalgic banana pudding.
Conclusion:
In summary, creating your own Old-Fashioned Homemade Banana Pudding is a delightful journey that emphasizes simplicity and a personal touch. This classic dessert offers flexible customization options, allowing you to adjust the sweetness or add a hint of flavor with vanilla or nutmeg. The recipe’s structure ensures that both novice and experienced cooks can produce a creamy, rich pudding that evokes nostalgia. The layering of ripe bananas, velvety custard, and whipped cream delivers a beautiful presentation, perfect for family gatherings or casual get-togethers. Moreover, don’t hesitate to experiment with various toppings like crushed cookies or a sprinkle of cocoa to elevate your dessert. With these tips and the foundational recipe, you can enjoy a timeless treat that will impress your guests while satisfying your dessert cravings.
Print
Old-Fashioned Homemade Banana Pudding Recipe You’ll Love
- Total Time: 25 minutes
- Yield: 8 servings 1x
Description
Creamy, dreamy, and packed with layers of vanilla pudding, fresh bananas, and Nilla wafers, this homemade banana pudding is a nostalgic dessert that never goes out of style! Topped with fluffy whipped cream or meringue, it’s the perfect treat for any occasion.
Ingredients
For the Pudding:
- 2 cups whole milk
- 1 cup heavy cream
- ¾ cup granulated sugar
- 3 tbsp cornstarch
- ¼ tsp salt
- 4 large egg yolks
- 2 tsp vanilla extract
- 2 tbsp butter
- For Assembly:
- 4 ripe bananas, sliced
- 1 box (11 oz) Nilla wafers or butter cookies
- 2 cups whipped cream (or meringue)
Instructions
1️⃣ Make the Pudding – In a saucepan over medium heat, whisk together milk, cream, sugar, cornstarch, and salt. Cook until thickened, about 5-7 minutes.
2️⃣ Temper the Eggs – In a separate bowl, whisk egg yolks. Slowly add ½ cup of the hot milk mixture, whisking constantly. Then, pour the egg mixture back into the saucepan.
3️⃣ Finish the Pudding – Cook for 2-3 minutes, stirring constantly until thick. Remove from heat, add butter and vanilla, and mix until smooth. Let it cool slightly.
4️⃣ Assemble the Layers – In a serving dish, layer Nilla wafers, banana slices, and pudding. Repeat until all ingredients are used.
5️⃣ Top & Chill – Spread whipped cream (or meringue) on top and refrigerate for at least 4 hours (overnight is best) to let the flavors meld.
6️⃣ Serve & Enjoy! – Garnish with crushed wafers and extra banana slices before serving.
Notes
✔ For a deeper flavor, use toasted Nilla wafers for a crunchy texture.
✔ Want extra richness? Add a splash of banana liqueur to the pudding.
✔ Keep bananas from browning by tossing them in lemon juice before layering.
- Prep Time: 15 minutes
- Cook Time: 10 minutes
Nutrition
- Calories: 350
- Fat: 14g
- Carbohydrates: 50g
- Protein: 6g