
Refrigerator Dill Pickles: Quick & Easy Recipe

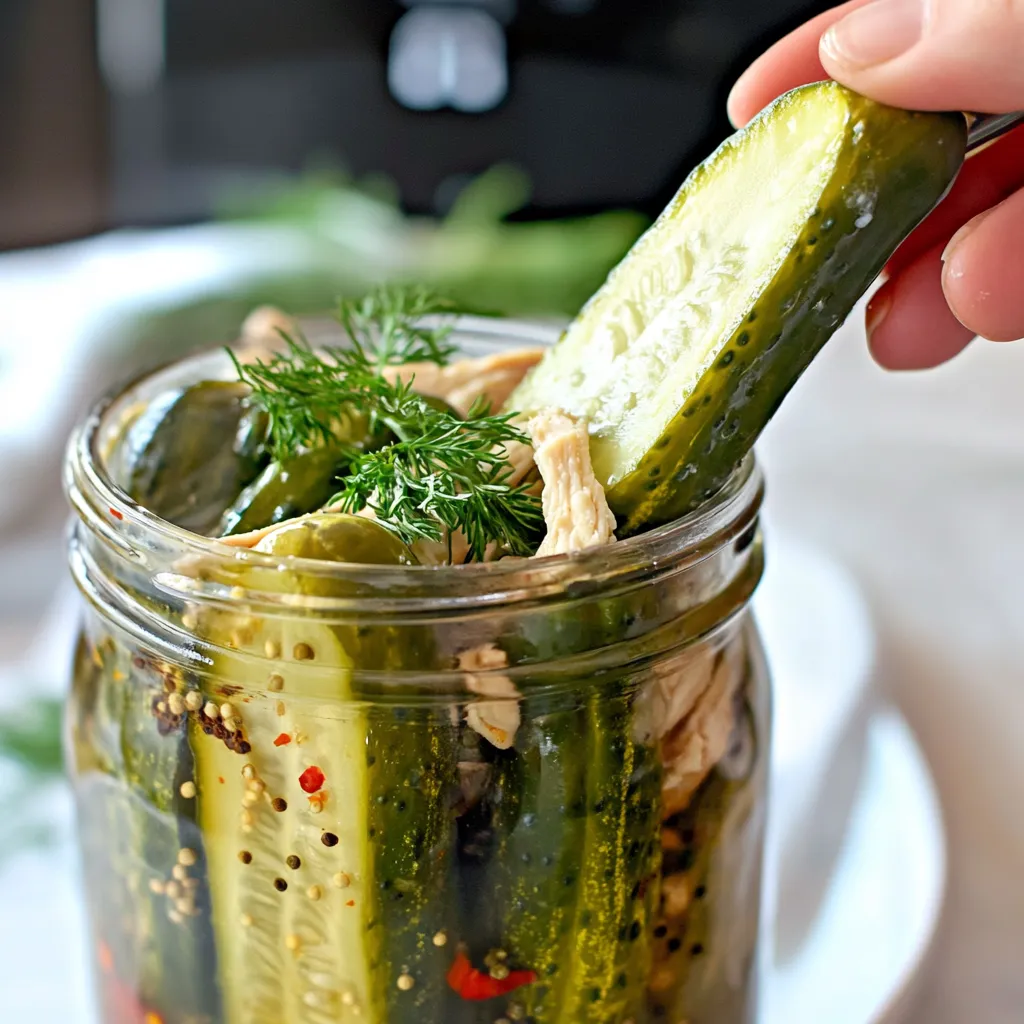
If you’re looking for a zesty bite that captures the essence of summer, look no further than homemade pickles! Refrigerator Dill Pickles, in particular, are a delightful and quick way to enjoy this garden-fresh treat without the hassle of canning. With the crunch of cucumbers balanced against splashy vinegar and fragrant dill, these pickles make the perfect companion for sandwiches, burgers, or simply as a snack on their own.
Customization is a key component of the pickle-making process. Whether you prefer them spicy with chili flakes or infused with garlic for an extra punch, there are countless variations to suit your palate. Incorporating additional herbs and spices can create a unique flavor profile that will impress your friends and family. For best results, opt for firm cucumbers and allow them to marinate long enough for the flavors to meld. Dive into this refreshing recipe and discover how easy it can be to make delicious, tangy pickles right in your own fridge!
Ingredients for Refrigerator Dill Pickles:
These delightful crunchers are simple to prepare and make a refreshing addition to your meals. Here’s what you will need for serving 8 to 10 people:
Basic Ingredients:
- 2 pounds of pickling cucumbers (small to medium size, approximately 4-6 cucumbers)
- 1 cup distilled white vinegar
- 1 cup water (preferably filtered or bottled for best taste)
- 1/4 cup granulated sugar
- 2 tablespoons kosher salt (preferably coarse for brining)
Flavor Enhancers:
- 4 cloves of garlic (smashed or halved for a more pronounced flavor)
- 1 tablespoon dill seeds (or substitute with 1/4 cup fresh dill sprigs)
- 1 teaspoon mustard seeds (adds depth to the flavor)
- 1/2 teaspoon red pepper flakes (adjust for desired level of heat)
Optional Additions:
- 1 tablespoon black peppercorns (for a spicier kick)
- 1 small onion (sliced thinly; adds a sweet bite)
- 1 bay leaf (for a hint of aromatic flavor)
- 1 teaspoon smoked paprika (for a slightly smoky essence)
Feel free to customize the brine to suit your taste buds. You can experiment with additional herbs such as:
- Tarragon (for a unique flavor profile)
- Cilantro (to add a fresh twist)
Finally, don’t forget about the container! Choosing the right glass jar or food-safe plastic container can enhance the flavor as well. A large mason jar works perfectly for this amount of pickles. Make sure your container is clean, as proper hygiene is key to ensuring your dill pickles stay crisp and delicious.
Ready to delve into the world of homemade pickling? Gather your ingredients and prepare to enjoy an easy and flavorful condiment that complements a variety of dishes!
How to prepare Refrigerator Dill Pickles:
Making delicious Refrigerator Dill Pickles is a straightforward process that delivers fresh, crunchy, and tangy flavors. Follow these steps to create your own pickles at home.
Gather Your Ingredients
First, procure the necessary ingredients. You will need about 4-6 small cucumbers, 2 cups of water, 1 cup of distilled white vinegar, ¼ cup of kosher salt, 1 tablespoon of sugar, 3 cloves of garlic, and fresh dill. Also, have some whole black peppercorns and red pepper flakes handy for additional spice.
Prepare the Cucumbers
Begin by washing the cucumbers thoroughly. This removes any dirt or wax on their skin. For a unique texture, you can slice them into spears or rounds, depending on your preference.
Make the Brine
In a medium saucepan, combine the water, distilled vinegar, kosher salt, and sugar. Place this mixture over medium heat. Stir until the salt and sugar dissolve completely. Once dissolved, remove the pan from heat and let the brine cool to room temperature.
Add Flavor to Your Pickles
While the brine cools, prepare the flavor additions. Peel the garlic cloves and lightly crush them with the flat side of a knife. Next, wash the fresh dill and set it aside. This herb imparts that distinct dill flavor that you associate with classic pickles.
Layer the Ingredients
In one or more clean glass jars, start layering your cucumbers. Between layers, add the crushed garlic, dill sprigs, a few whole peppercorns, and a pinch of red pepper flakes for heat. Continue until the jars are filled, leaving some room at the top.
Combine Everything
Once the brine has cooled, pour it over the layered ingredients in the jars. Ensure that the cucumbers are fully submerged, which helps prevent spoilage.
Seal and Refrigerate
Seal the jars tightly with lid caps. Place the jars in the refrigerator. Allow the pickles to marinate for at least 24 hours for optimal flavor, although waiting a week can enhance the taste even more.
Enjoy your homemade Refrigerator Dill Pickles as a zesty snack or a crunchy side dish!
Tips for the Perfect Refrigerator Dill Pickles
Creating the ideal batch of refrigerator dill pickles involves a few essential tips and thoughtful ingredient choices. Here’s a guide to help elevate your pickling game.
Maintain the Correct Temperature
Temperature plays a key role in the pickling process. Keep your cucumbers and the brine cold before combining them. This helps the cucumbers maintain their crisp texture. Store your jars in the refrigerator for the best results. Allow the pickles to marinate for at least 24 hours before tasting, but for the optimum flavor, aim for 2 to 3 days. This waiting time lets the flavors meld beautifully.
Use Quality Ingredients
Choosing the best ingredients ensures that your pickles taste delicious. Opt for fresh, firm cucumbers, preferably pickling cucumbers, as they have fewer seeds and a better crunch. Use fresh dill, garlic, and spices to infuse robust flavors into the brine. Always choose kosher salt or pickling salt for an authentic taste, as table salt can cause cloudiness in your brine.
Explore Suitable Substitutions
Dietary restrictions shouldn’t stop you from enjoying flavorful pickles. If you’re looking for a low-sodium option, consider using a salt substitute or reducing the quantity of salt in your brine. For a sugar-free version, swap regular sugar with stevia or erythritol. If you want an extra kick, add red pepper flakes or crushed dill seeds to spice up the flavor. Also, look for alternative vinegars, like apple cider or rice vinegar, to experiment with different taste profiles.
Avoid Common Mistakes
When making refrigerator dill pickles, avoid overpacking your jars. Leave some space to allow the brine to circulate properly. Ensure that the cucumbers are fully submerged in the brine to prevent spoilage. If your brine doesn’t cover the cucumbers entirely, add a bit more vinegar solution to make sure each piece gets that pickle flavor.
With these tips, you’re well on your way to making delicious and crisp refrigerator dill pickles that everyone will love. Happy pickling!
Storage Tips for Refrigerator Dill Pickles:
Maintaining freshness and flavor in your homemade refrigerator dill pickles is key to enjoying them longer. Proper storage techniques will help you achieve this goal. Follow these practical tips for optimal conditions.
Optimal Temperature for Storage
Store your dill pickles in the coldest part of the refrigerator. A temperature of 34-38°F (1-3°C) works best. This cool environment slows down any spoilage processes and maintains that crunchiness you love. Avoid storing them in the refrigerator door, as this area tends to have higher temperatures and fluctuates more.
Containers Matter
Use a clean, airtight container to store your pickles. Glass jars with tight-fitting lids are ideal. They prevent air from entering, which can lead to spoilage. If you don’t have a suitable glass jar, consider using plastic containers designed for food storage, ensuring they also have secure lids. Avoid using metal containers, as they can react with the acidity of pickles.
Check for Freshness Regularly
Inspect your pickles regularly. Look for changes in color, texture, or an off smell. These signs could indicate spoilage. If you notice any signs, discard the affected pickles immediately to prevent contamination. Keeping the jar tightly sealed also helps extend their lifespan.
Shelf Life Guidelines
Your homemade pickles should last up to two months when stored correctly. However, for the best taste and texture, consume them within two to three weeks. After this time, they may still be safe to eat but might not deliver the same quality. Keep a date label on the jar to track freshness.
Refrigeration Is Key
Always return the pickles to the refrigerator after use. Leaving them out can promote bacterial growth. Remember to use a clean spoon or tongs when removing pickles to avoid introducing any contaminants.
Following these storage tips ensures you can savor your refrigerator dill pickles at their peak flavor and crunch. Enjoy them as a snack or as a delightful addition to your meals. Happy pickling!
Related Recipes
If you love making refrigerator dill pickles, you might enjoy these similar recipes that share vibrant flavors, easy preparation, and a focus on fresh ingredients. Each of these dishes offers a delightful twist on classic pickling techniques or enhances your meal with zingy, crunchy components.
1. Bread and Butter Pickles: These sweet and tangy pickles balance perfectly between sugar and vinegar. Their flavor adds a distinct sweetness that contrasts well with savory meals. Use them on sandwiches or as a simple snack alongside cheese and crackers. Making bread and butter pickles is as easy as refrigerator dill pickles but allows for a different taste profile.
2. Spicy Pickled Carrots: If you like a kick, these spicy pickled carrots will excite your palate. The fiery heat combined with the crunchiness of the carrots makes them an excellent addition to tacos, salads, or a snack on their own. The bright colors and bold flavors complement a wide array of dishes.
3. Gherkin Mustard Pickles: These tiny delights pack a punch! Gherkins pickled with mustard add a unique tanginess to your appetizers. They serve as a wonderful accompaniment to charcuterie boards or as a zesty addition to potato salads. Their compact size and intense flavor offer variety akin to that of refrigerator dill pickles.
4. Quick Pickled Red Onions: These onions add a charming zing to salads, tacos, or burgers. Their sharp taste and vibrant color can elevate any dish, much like the dill pickles do. Quick pickling is simple and aligns perfectly with the ease of making refrigerator dill pickles.
Exploring these related recipes allows you to experiment with flavors while enjoying the benefits of quick and straightforward preparation methods. Each recipe can stand alone but together, they create a delicious and colorful spread at any meal.
Frequently Asked Questions:
What are the main ingredients in refrigerator dill pickles?
Refrigerator dill pickles primarily consist of cucumbers, vinegar, water, salt, sugar, garlic, and dill. These ingredients combine to create a tangy and refreshing flavor profile. The cucumbers can be whole, sliced, or speared, depending on your preference. The vinegar provides the acidity that acts as a preservative, while sugar balances the saltiness, giving the pickles a distinctive taste.
How long do refrigerator dill pickles last?
Once prepared and placed in the refrigerator, these pickles can last for about 2 to 4 weeks. However, the flavor may become stronger over time as the cucumbers continue to soak in the brine. It’s important to store them in an airtight container to maintain their freshness and avoid contamination.
Can I use different types of cucumbers for making these pickles?
Yes, you can use various types of cucumbers to create your refrigerator pickles. While Kirby cucumbers are commonly recommended for their crunch, you can also experiment with English cucumbers or even Persian cucumbers. Each variety offers its own texture and flavor, so feel free to choose your favorite.
What is the difference between refrigerator pickles and traditional canned pickles?
The primary difference lies in the preservation method. Refrigerator dill pickles are made using a quick brine and stored in the fridge, while traditional canned pickles are processed and sterilized in jars for long-term shelf stability. The former is usually fresher and crisper, whereas canned varieties have a more robust flavor due to the cooking process.
Can I add spices or other ingredients to customize my pickles?
Absolutely! One of the great aspects of refrigerator dill pickles is their versatility. You can add spices like mustard seeds, red pepper flakes, or even sliced jalapeños for an extra kick. You could also incorporate vegetables like carrots or bell peppers for added texture and flavor.
Is it necessary to heat the brine when making refrigerator dill pickles?
No, heating the brine is not necessary for refrigerator dill pickles. In fact, many recipes call for a cold brine solution. This allows for a quicker preparation process while still achieving deliciously flavored pickles. The cold brine helps maintain the crunchiness of the cucumbers and allows the flavors to meld beautifully over time.
Conclusion:
In summary, making delicious Refrigerator Dill Pickles is a straightforward process that rewards you with fresh, tangy bites right from your fridge. This recipe showcases the beauty of simplicity, allowing you to whip up a batch with minimal ingredients and effort. The flexibility of this pickle creation means you can easily tailor flavors by experimenting with herbs like dill or spices such as garlic and red pepper flakes, making each batch uniquely yours. Moreover, you can customize the level of sweetness or acidity to suit your palate perfectly. So, grab your cucumbers and start picking! With just a little bit of preparation, you’ll have refreshing Refrigerator Dill Pickles that elevate your sandwiches, salads, or charcuterie boards, ensuring a crisp crunch anytime you need it. Embrace this fun culinary adventure, and let your creativity shine!
Print
Refrigerator Dill Pickles: Quick & Easy Recipe
- Total Time: 15 minutes + chill time
- Yield: 1 quart jar (6 servings) 1x
- Diet: Vegan
Description
These crisp and tangy refrigerator dill pickles come together in just minutes and need no canning. Perfect for snacking or serving alongside sandwiches and burgers!
Ingredients
6 small cucumbers, sliced into spears or rounds
3 cloves garlic, peeled and smashed
1 1/2 cups water
1 cup white vinegar
1 tablespoon kosher salt
1 tablespoon sugar
1 teaspoon black peppercorns
1/2 teaspoon mustard seeds (optional)
1/4 teaspoon red pepper flakes (optional)
Fresh dill sprigs
Instructions
1. In a small saucepan, combine water, vinegar, salt, and sugar.
2. Bring to a simmer and stir until salt and sugar dissolve.
3. Remove from heat and let cool to room temperature.
4. Place cucumbers, garlic, dill, peppercorns, and other spices into a clean quart-sized jar.
5. Pour the cooled brine over the cucumbers, making sure they are fully submerged.
6. Seal the jar and refrigerate for at least 24 hours.
7. Enjoy after one day—best after 2–3 days.
Notes
Use pickling cucumbers for best texture.
Adjust garlic and spice levels to your taste.
Pickles stay fresh in the fridge for up to 3 weeks.
- Prep Time: 10 minutes
- Cook Time: 5 minutes
- Category: Condiment
- Method: No Cook (after simmering brine)
- Cuisine: American
Nutrition
- Serving Size: 4–5 pickle spears
- Calories: 10
- Sugar: 1g
- Sodium: 280mg
- Fat: 0g
- Saturated Fat: 0g
- Unsaturated Fat: 0g
- Trans Fat: 0g
- Carbohydrates: 2g
- Fiber: 0g
- Protein: 0g
- Cholesterol: 0mg
Keywords: quick pickles, refrigerator pickles, dill pickles, no canning pickles