
Delicious Spooky Spider Cake Pops A Fun Halloween Treat
There’s something magical about the fall season, isn’t there? The crisp air, the crunch of leaves underfoot, and, of course, the thrill of Halloween creeping upon us. As a child, I can still remember the delightful anticipation that came with preparing for this spooky holiday—everything from carving pumpkins to baking delicious treats. One of my favorites has to be cake pops, but not just any cake pops; I’m talking about the exciting and adorable SPOOKY SPIDER CAKE POPS. These little delights take the cake pop imagination to a new level, transforming them into enchanting little spiders that are both cute and a bit creepy!
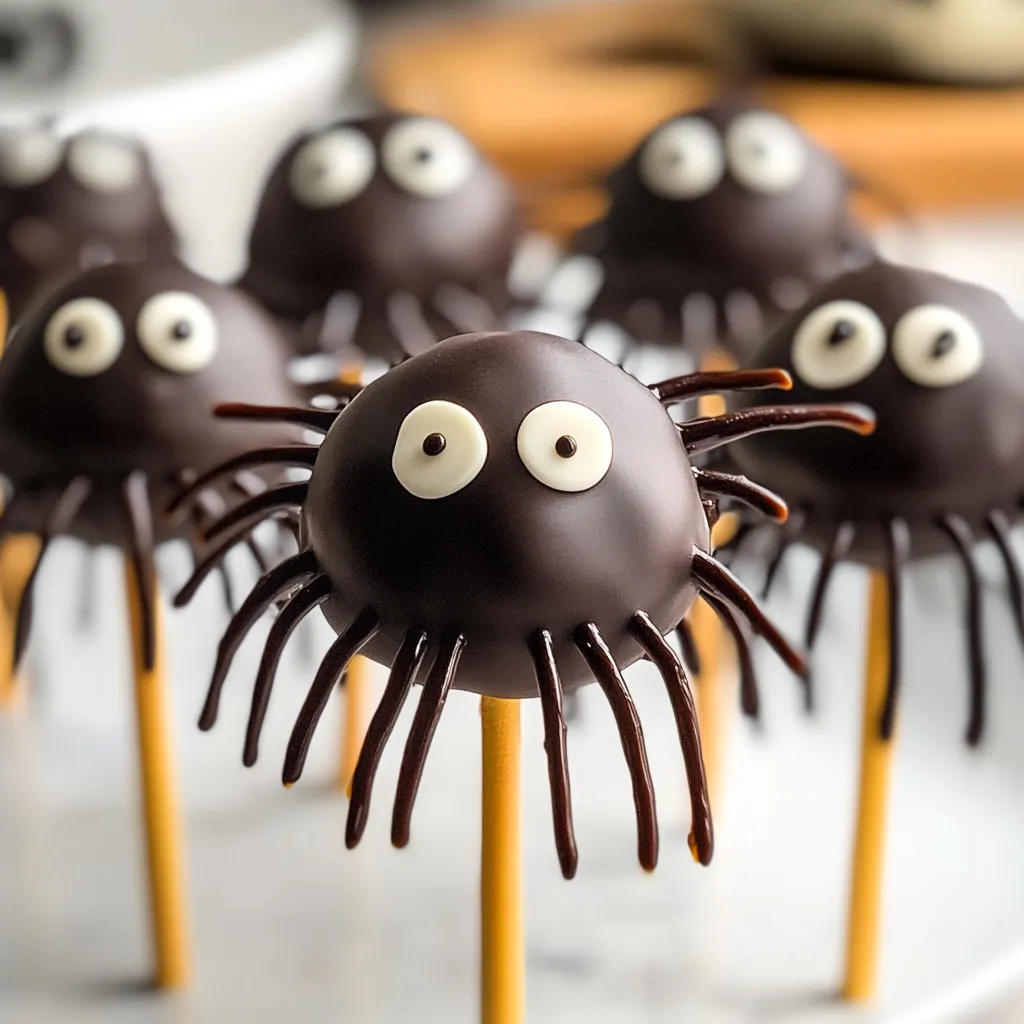
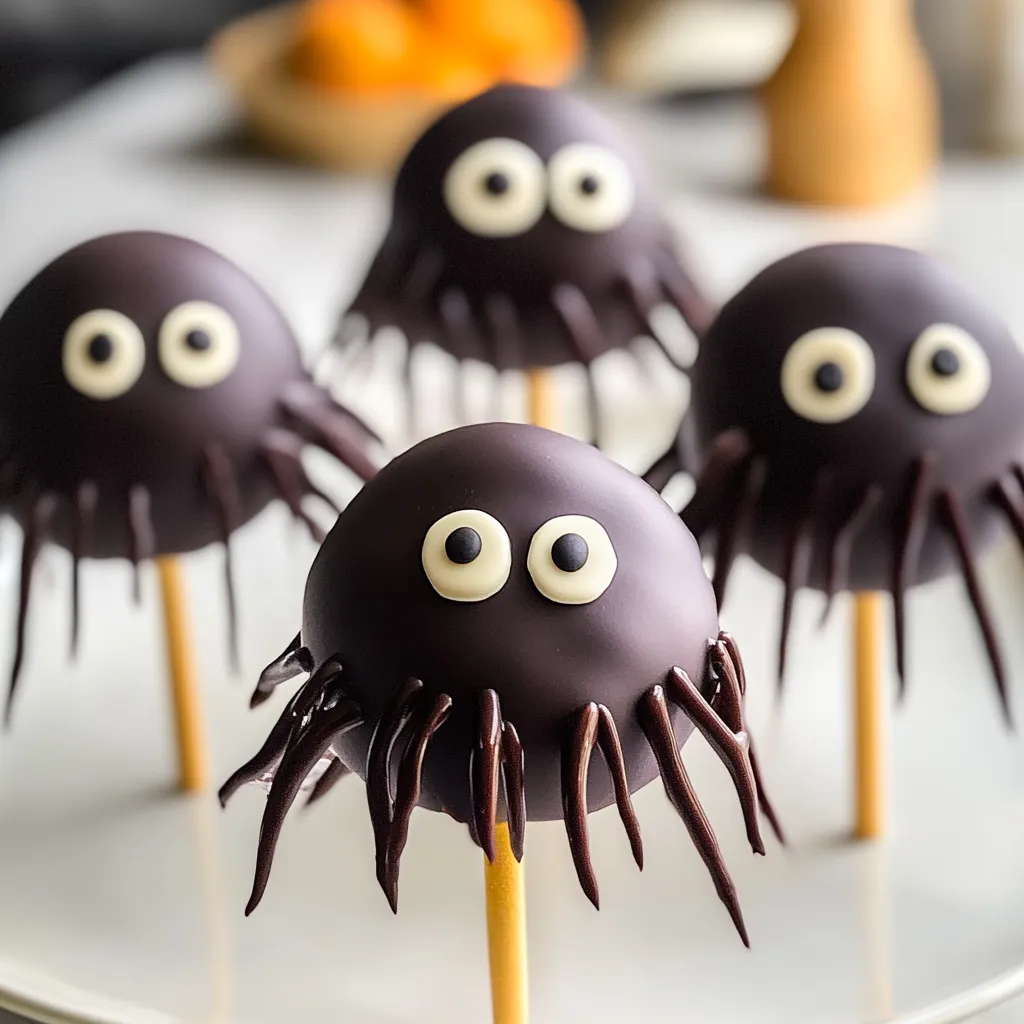
Picture this: a rich and moist cake center, coated in smooth, velvety chocolate, with licorice legs that add a playful twist. The blend of texture and flavor makes these bites a hit at parties, and let’s be honest, they make your dessert table look so much more festive! So, roll up your sleeves and let’s get started on making these delightful treats. They’re the perfect blend of delicious and decorative — just what we need this Halloween season!
Why You’ll Love This Recipe
- Fun and festive—perfect for Halloween gatherings!
- Quick and simple to make, even with kids in the kitchen.
- Versatile—mix up the flavors to suit your taste!
- Great for parties; they’re bite-sized and easy to share.
Ingredients
Here’s what you’ll need to create these delightful SPOOKY SPIDER CAKE POPS:
- 1 box of chocolate cake mix (plus ingredients that the box calls for—usually eggs, oil, and water)
- 1 can of frosting (chocolate is a winner, but buttercream works too!)
- 1 bag of chocolate melting wafers (usually found in the baking aisle)
- 8-10 candy eyes (you can find these at most grocery stores or online)
- Black licorice sticks (for the legs—cut to about 3-4 inches long)
- Cake pop sticks (or candy sticks—whichever you have on hand)
- Sprinkles or edible glitter (optional, but fun for a little extra spookiness!)
Note: For a healthier twist, you can use a carrot or pumpkin cake mix, which still will taste delicious with those chocolate coatings!
Step-by-Step Instructions
Let’s get those mixing bowls ready and gather our ingredients for these fun little creations!
- Bake the Cake: Prepare your chocolate cake mix following the instructions on the box. Bake it in a 9×13 inch pan and let it cool completely.
- Crumble the Cake: Once cooled, crumble the cake into a large mixing bowl using your hands or a fork. You want it to be nice and crumbly, with no large chunks left behind.
- Add Frosting: Now, here’s the fun part! Add about three-quarters of the can of frosting to the crumbled cake. Mix well until it holds together but isn’t overly soggy. You want it to be moldable like playdough—add more frosting if needed!
- Form the Balls: Use your hands to roll the mixture into small balls, about 1 inch in diameter. Place them on a lined baking sheet and pop them in the freezer for about 30 minutes. This will help them hold their shape better while you’re decorating!
- Prepare the Chocolate Coating: While those are chilling, melt your chocolate wafers. You can do this in the microwave in 30-second bursts, stirring between each session, until smooth. Alternatively, use a double boiler if you prefer that method.
- Dip the Sticks: Take your cake balls out of the freezer. Dip the tip of each cake pop stick into the melted chocolate, then gently insert it into a cake ball—this helps to hold everything together when you dip!
- Coat the Pops: Now for the fun part! Dip each cake ball into the melted chocolate, making sure it’s fully coated. Allow any excess to drip off before placing it back on the baking sheet.
- Add the Eyes: While the chocolate is still wet, place two candy eyes on the top of each cake pop.
- Create the Legs: Cut your licorice into 3-4 inch pieces. Insert four pieces on each side of the cake pop to create spider legs.
- Chill Again: Finally, put the cake pops back in the refrigerator to set, about 30 minutes. This helps the chocolate firm up nicely!
Pro Tips & Variations
Now that you’ve got your SPOOKY SPIDER CAKE POPS all set, let’s talk about how you can have even more fun with them!
- Flavor Twists: Feel free to experiment with different cake flavors! Red velvet for a more Halloween vibe or even vanilla with sprinkles could work wonders.
- Decorating Fun: You can decorate them with white chocolate drizzles to make them look even spookier or festive sprinkles for added flair.
- Use Different Candy: Instead of licorice for legs, consider using pretzel sticks for a crunchier texture!
- Make Them Gluten-Free: Swap out the chocolate cake mix for a gluten-free alternative, and you’re all set!
Serving Suggestions
These cake pops are not just about looks; they’re also delicious! Here are some ideas on how to serve them:
- Serve them on a spooky platter adorned with Halloween-themed decorations—think mini pumpkins or spooky tablecloths!
- They pair wonderfully with hot cocoa or apple cider — perfect for a chilly evening with friends!
- These little guys also make a great addition to lunch boxes for a sweet treat that puts a smile on kids’ faces!

Storage Tips
In case you have any left over (which I doubt because they’re so good), here’s how to store them:
- Refrigerate: Place the cake pops in an airtight container and keep them in the fridge for up to a week.
- Freeze: These cake pops can be frozen too! Just wrap them in plastic wrap and place them in a freezer-safe container. They’ll be good for about 2-3 months.
- Reheat: If they’ve been frozen, just let them sit at room temperature for about 15 minutes before serving. This way, the chocolate will soften back up a little.
FAQs
Can I use a cake mix from scratch instead of a box mix?
Absolutely! If you have a favorite cake recipe, feel free to use that. Just ensure it has a similar texture to a box cake for best results when crumbling.
What can I use if I can’t find licorice?
No worries! Pretzel sticks make great legs, or you can even use chocolate-covered pretzel rods for a sweet and salty combo!
How do I prevent my cake balls from falling apart?
Great question! Ensure they’re adequately chilled in the freezer before inserting the sticks, and don’t skimp on the frosting—this helps them bind together beautifully. If it’s still a bit crumbly, add a tad more frosting and re-chill!
Can I make these ahead of time?
Definitely! You can make them a few days in advance and store them in the fridge, or you can freeze them for longer storage. Just make sure they’re well-wrapped to prevent freezer burn.
Conclusion
I hope you’re as excited as I am to whip up these SPOOKY SPIDER CAKE POPS! They’re such a whimsical treat that brings a bit of Halloween charm into your kitchen. Whether you’re enjoying them at a party, with family, or keeping them all to yourself (I won’t tell!), they are sure to bring smiles and a bit of spooky delight. I’d love to hear how yours turn out! Don’t forget to comment below or share your creations. Happy haunting and baking!
Print
Delicious Spooky Spider Cake Pops A Fun Halloween Treat
- Total Time: 1 hour
- Yield: 24 cake pops 1x
Description
Enjoy fun Halloween cake pops with spooky spider decor Perfect for parties these treats are sure to impress Get your baking adventure started
Ingredients
Instructions
- Prep Time: 30 minutes
- Cook Time: 30 minutes
- Category: Dessert
- Cuisine: American
Nutrition
- Calories: 150 calories
- Sugar: 15 grams
- Fat: 7 grams
- Saturated Fat: 7 grams
- Carbohydrates: 22 grams
- Fiber: 1 gram
- Protein: 2 grams
Keywords: Halloween, cake pops, dessert, spooky treats, spider cake pops