
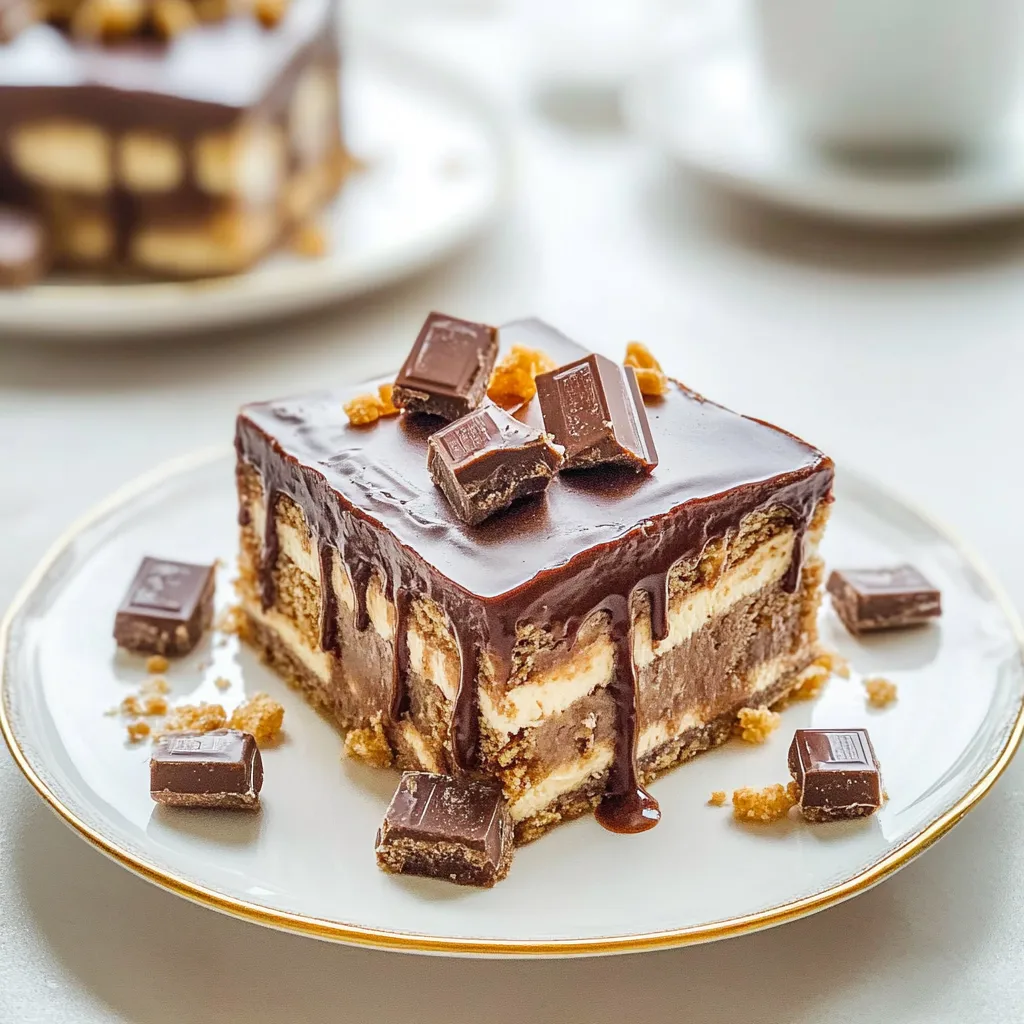
Chocolate Candy Bar Icebox Cake: A No-Bake Delight
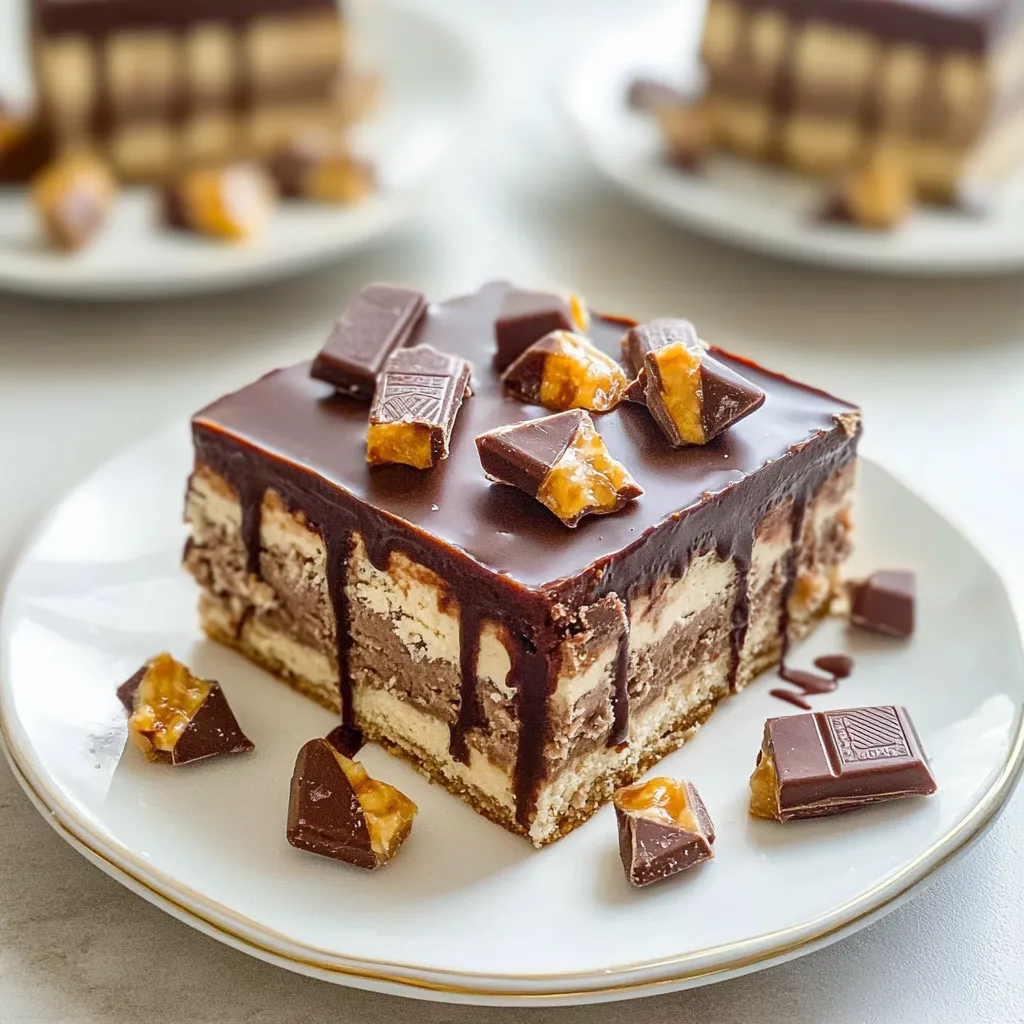
Indulging in a delightful dessert doesn’t have to be a complicated affair, and that’s where the Chocolate Candy Bar Icebox Cake comes into play. This no-bake marvel is the perfect solution for those warm days when you crave something sweet without the hassle of turning on the oven. Its layers of creamy goodness and crunchy candy create a sensational fusion that is sure to please everyone’s palate.
What makes this treat even more exciting are the endless variations you can explore! Swap out the chocolate bars for your favorite confections, incorporate different flavored cream cheeses, or add fresh fruits between the layers for a refreshing twist. To ensure your cake achieves that mouthwatering texture, consider chilling it overnight; this allows the flavors to meld beautifully. With just a few simple ingredients, you can create a dessert that not only looks impressive but tastes divine. Grab your apron and let’s dive into this easy, yet extraordinary recipe!
Ingredients for Chocolate Candy Bar Icebox Cake:
Cream Layers
- 2 cups heavy whipping cream
- 1 cup powdered sugar
- 1 teaspoon vanilla extract
Chocolate Cookie Base
- 1 package (14.3 ounces) chocolate wafer cookies
- 1/4 cup unsweetened cocoa powder
Chocolate Candy Additions
- 1 cup chopped chocolate candy bars (such as Snickers, Milky Way, or your favorite chocolates)
- 1/2 cup mini chocolate chips (for added texture and sweetness)
Assembly Ingredients
- 1/2 cup chocolate syrup (for drizzling on top)
- Fresh chocolate shavings or additional chopped candy bars (for garnishing)
Optional Flavor Variations
- 1 tablespoon instant coffee granules (for a mocha-flavored cake)
- 1 teaspoon peppermint extract (for a mint chocolate experience)
- 1 cup chopped nuts (such as almonds or pecans, for added crunch)
- Substitute chocolate wafer cookies with vanilla or other flavored cookies for a unique twist.
Alternative Ingredients
- Use dairy-free whipping cream for a vegan-friendly option.
- Replace powdered sugar with coconut sugar for a healthier dessert.
- For a gluten-free version, ensure that all ingredients, especially the chocolate cookie base and candy bars, are certified gluten-free.
The combination of rich chocolate, creamy layers, and crunchy candy in this dessert will surely delight any chocolate lover. Whether you stick to the classic version or experiment with some of the suggested variations, this recipe is bound to impress and satisfy your sweet tooth!
How to prepare Chocolate Candy Bar Icebox Cake:
Making a delicious Chocolate Candy Bar Icebox Cake requires careful layering and chilling. Follow these steps to achieve the best results.
Gather Your Ingredients
Start by collecting all the necessary ingredients. You will need heavy whipping cream, powdered sugar, vanilla extract, your favorite chocolate candy bars, and chocolate wafer cookies. Ensure everything is measured correctly for the best consistency.
Prepare the Cream Mixture
In a large mixing bowl, pour in 2 cups of heavy whipping cream. This will serve as the base for your cake’s filling.
Then, add ½ cup of powdered sugar to the cream. This sugar will provide sweetness and help stabilize the whipping cream.
Next, pour in 1 teaspoon of vanilla extract. This enhances the flavor profile of your mixture.
Using an electric mixer, beat the cream mixture on medium-high speed until soft peaks form. Be careful not to overwhip, as this can turn your cream grainy.
Chop the Candy Bars
While the cream is being whipped, take 3 to 4 chocolate candy bars and chop them into small, bite-sized pieces. Make sure to keep some pieces for decoration later.
Layer the Cake
Begin your cake assembly with a layer of chocolate wafer cookies. Place them in a single layer at the bottom of a 9×13-inch dish. This will form the foundation of your icebox cake.
Spoon a generous layer of the whipped cream mixture over the first layer of cookies. Ensure even coverage for effective layering.
Sprinkle a portion of the chopped candy bars on top of the whipped cream. Distribute them evenly for consistent flavor in every bite.
Repeat this layering process: add another layer of cookies, followed by whipped cream, and more chocolate pieces. Continue until all ingredients are used, finishing with a layer of cream on top.
Chill the Cake
Once layered, cover the dish with plastic wrap. Refrigerate the cake for at least 4 hours, or overnight if possible. This chilling time allows the flavors to meld and the cookies to soften, creating a delightful texture.
Serve and Enjoy
After chilling, uncover the cake and add any remaining chopped candy on top for decoration. Slice into squares, serve, and enjoy each chocolatey bite of this dessert!
Tips for the Perfect Chocolate Candy Bar Icebox Cake
Maintain the Right Temperature
Keeping your ingredients at the right temperature is crucial for achieving the perfect texture in this dessert. Start by ensuring that your cream cheese and whipped cream are well-chilled before mixing. This will help them whip up to a light, fluffy consistency. If your kitchen is warm, consider chilling your mixing bowl and whisk or beaters. A cold environment allows for better aeration.
Once your cake is assembled, cover it tightly and refrigerate it for at least four hours—or even overnight. During this time, allow the layers to meld together, leading to a more cohesive and flavorful dessert.
Quality Ingredients Matter
Using high-quality ingredients significantly impacts the final taste of the dessert. Opt for real chocolate, fresh cream, and good-quality candy bars for the best results. Whether you prefer milk chocolate, dark chocolate, or a mix, choose brands that you usually enjoy eating.
Consider using organic sugar and pure vanilla extract to enhance the flavor profile. Remember that every ingredient contributes to the overall taste, so select ones that you truly love.
Dietary Substitutions
If you’re preparing this dessert for guests with dietary restrictions, several substitutions can make it more inclusive. For a gluten-free version, ensure that the graham crackers are certified gluten-free or explore alternatives like crushed gluten-free cookies or oat-based products.
To create a dairy-free option, swap traditional sour cream and whipped cream with coconut cream or a dairy-free yogurt alternative. For those avoiding refined sugar, consider using natural sweeteners like honey or maple syrup. Just keep in mind that these alternatives may alter the overall flavor and texture slightly.
Creative Variations
Feel free to customize your icebox cake with different flavors and fillings. Instead of traditional candy bars, try incorporating crushed nuts, fruit preserves, or flavored chocolate. If you love layers, think about adding fresh strawberries or banana slices between the layers for a fruity twist.
Experimenting with spices can also create unique flavors. Adding a pinch of cinnamon or espresso powder will give depth to your dessert. Get creative and have fun making this recipe your own while still honoring the spirit of the original cake.
Storage Tips for Chocolate Candy Bar Icebox Cake:
Properly storing your delectable dessert helps maintain its flavor and texture. Follow these tips to keep your creation as fresh as possible.
Cool It Down
Let the cake cool completely at room temperature before storing it. This step prevents condensation from forming inside the storage container. Moisture can ruin the texture and taste, making the cake less enjoyable to eat.
Use the Right Container
Choose an airtight container for storage. An airtight container keeps out air, which could dry out the cake. It also prevents your dessert from absorbing any unwanted odors from the refrigerator. If you don’t have a container, wrap the cake tightly in plastic wrap and aluminum foil for optimal protection.
Refrigerate for Freshness
Store your icebox cake in the refrigerator if you plan to eat it within a week. The cold temperature helps maintain its structure and flavor. Ensure that the cake stays covered to avoid drying out. If you would like to keep the cake longer, consider freezing it.
Freezing for Longevity
To freeze your treat, ensure it is well wrapped. Use plastic wrap followed by aluminum foil, or place it in a freezer-safe container. This double wrapping protects against freezer burn and other off-flavors. Frozen cake can last for up to three months. To thaw, place the cake in the refrigerator overnight before serving.
Check for Freshness
Before enjoying your stored dessert, check for any signs of spoilage. If you spot any off smells, discoloration, or mold, it’s best to discard the cake. Freshness is key to a delightful eating experience.
Serving Tips
After storing the cake, serve it chilled for an ideal texture. You can also let it sit at room temperature for a few minutes to soften slightly. This gives the cake a creamy mouthfeel, enhancing the overall experience.
By following these storage tips, you ensure that your chocolate indulgence remains flavorful and enjoyable for days to come.
Related Recipes to Chocolate Candy Bar Icebox Cake
If you enjoy the rich and creamy layers of a chocolate candy bar icebox cake, you might find delight in these similar recipes. Each brings a unique twist but shares the same essence of indulgence and simplicity.
First, consider a no-bake cheesecake. Like the icebox cake, this dessert requires minimal effort and no oven time. You can layer the cheesecake with chocolate ganache or fruit preserves, creating a rich, smooth texture that echoes the delightful layers of the icebox creation. The cream cheese base offers a creamy mouthfeel similar to the frosting used in the cake, making it a fantastic option for cheesecake lovers.
Next, try a layered trifle. This dessert often features cake, fruit, and custard, but you can easily swap in chocolate pudding, whipped cream, and crushed candy bars. The visual appeal and the mix of textures, from creamy layers to crunchy bits, mirror the experience of enjoying a chocolate candy bar icebox cake. Plus, you can customize the ingredients based on what you have on hand, allowing for endless variations.
Lastly, consider a chocolate mousse. Its airy and thick texture provides a luxurious chocolate experience without needing to bake. Just like the icebox cake, it’s rich, decadent, and perfect for a special occasion. You can also layer it in jars for an elegant presentation, just as you do with the icebox cake.
These recipes complement the original dessert with their ease of preparation and similar flavors, ensuring your dessert table shines with sweet options.
Frequently Asked Questions:
What is a Chocolate Candy Bar Icebox Cake made of?
A Chocolate Candy Bar Icebox Cake typically features layers of chocolate-flavored goodness, often incorporating crushed candy bars or chocolate cookies interspersed with whipped cream or a sweet cream cheese mixture. The ingredients come together to create a luscious, no-bake dessert that hardens in the fridge, allowing the flavors to meld beautifully over time.
How long does a Chocolate Candy Bar Icebox Cake need to chill?
For optimal results, it’s recommended to chill a Chocolate Candy Bar Icebox Cake for at least four to six hours. This resting period allows the layers to set, making for a firmer texture that is easy to slice and serve. Many enthusiasts advise refrigerating it overnight to enhance the flavor and consistency, providing a truly indulgent treat.
Can I customize the ingredients in my icebox cake?
Absolutely! One of the great things about a Chocolate Candy Bar Icebox Cake is its versatility. You can substitute different types of candy bars, use cookie varieties, or even incorporate fresh fruits or nuts for a unique twist. Feel free to experiment with flavors to create your personalized dessert masterpiece.
Is a Chocolate Candy Bar Icebox Cake gluten-free?
The traditional version of this dessert may not be gluten-free, as it often contains cookies or other baked goods. However, by using gluten-free cookies and specific candy bars, you can create a delightful gluten-free version. Always check the labels on your ingredients to ensure they meet gluten-free standards.
How should I store leftover icebox cake?
Leftover Chocolate Candy Bar Icebox Cake should be kept covered in the refrigerator. It is best consumed within three to five days for optimal freshness and taste. Make sure to use an airtight container to preserve its fluffy and creamy texture, preventing it from drying out.
Can I freeze a Chocolate Candy Bar Icebox Cake?
Yes, you can freeze this decadent dessert! To do so, wrap it tightly in plastic wrap and then in aluminum foil before placing it in the freezer. It can be kept for up to two months. To enjoy after freezing, simply defrost it in the refrigerator for several hours prior to serving, ensuring it retains its delicious taste and texture.
Conclusion:
The Chocolate Candy Bar Icebox Cake is a delightful dessert that showcases both simplicity and flexibility, making it perfect for any occasion. With just a few ingredients, you can whip up this indulgent treat in no time. This recipe allows for easy customization; feel free to mix and match your favorite candy bars, cookies, and creams to create a cake that suits your taste preferences. Whether you’re hosting a party or enjoying a cozy night in, this cake offers a satisfying blend of flavors and textures without the need for baking. Remember to give it ample chilling time for the layers to meld beautifully, enhancing the overall taste. This simple yet impressive dessert will surely become a go-to recipe in your collection, inviting endless variations and leaving your guests eager for more. Dive into the creation of this unforgettable cake and enjoy your culinary adventure!
Print
Chocolate Candy Bar Icebox Cake: A No-Bake Delight
- Total Time: 4 hours 15 minutes
- Yield: 12 servings 1x
- Diet: Vegetarian
Description
This Chocolate Candy Bar Icebox Cake layers crushed candy bars and whipped cream for a rich, no-bake dessert that’s easy to make and perfect for any occasion.
Ingredients
4 cups heavy whipping cream
1/2 cup powdered sugar
1 teaspoon vanilla extract
6 chocolate candy bars, chopped (such as Snickers, Milky Way, or Twix)
1 package chocolate wafer cookies (about 9 ounces)
Instructions
1. In a large bowl, whip heavy cream, powdered sugar, and vanilla extract until stiff peaks form.
2. Spread a thin layer of whipped cream on the bottom of a 9×13-inch dish.
3. Layer chocolate wafer cookies evenly over the whipped cream.
4. Sprinkle chopped candy bars over the cookies.
5. Repeat layers, ending with a whipped cream layer on top.
6. Cover and refrigerate for at least 4 hours or overnight to allow cookies to soften.
7. Slice and serve chilled.
Notes
Use a mix of candy bars for varied texture and flavor.
Press layers gently but do not crush the cookies.
Store leftovers covered in the refrigerator for up to 3 days.
- Prep Time: 15 minutes
- Cook Time: 0 minutes
- Category: Dessert
- Method: No-Bake
- Cuisine: American
Nutrition
- Serving Size: 1 slice
- Calories: 420
- Sugar: 30g
- Sodium: 210mg
- Fat: 28g
- Saturated Fat: 18g
- Unsaturated Fat: 8g
- Trans Fat: 0g
- Carbohydrates: 35g
- Fiber: 2g
- Protein: 5g
- Cholesterol: 110mg
Keywords: icebox cake, chocolate candy bar dessert, no bake cake, easy dessert