
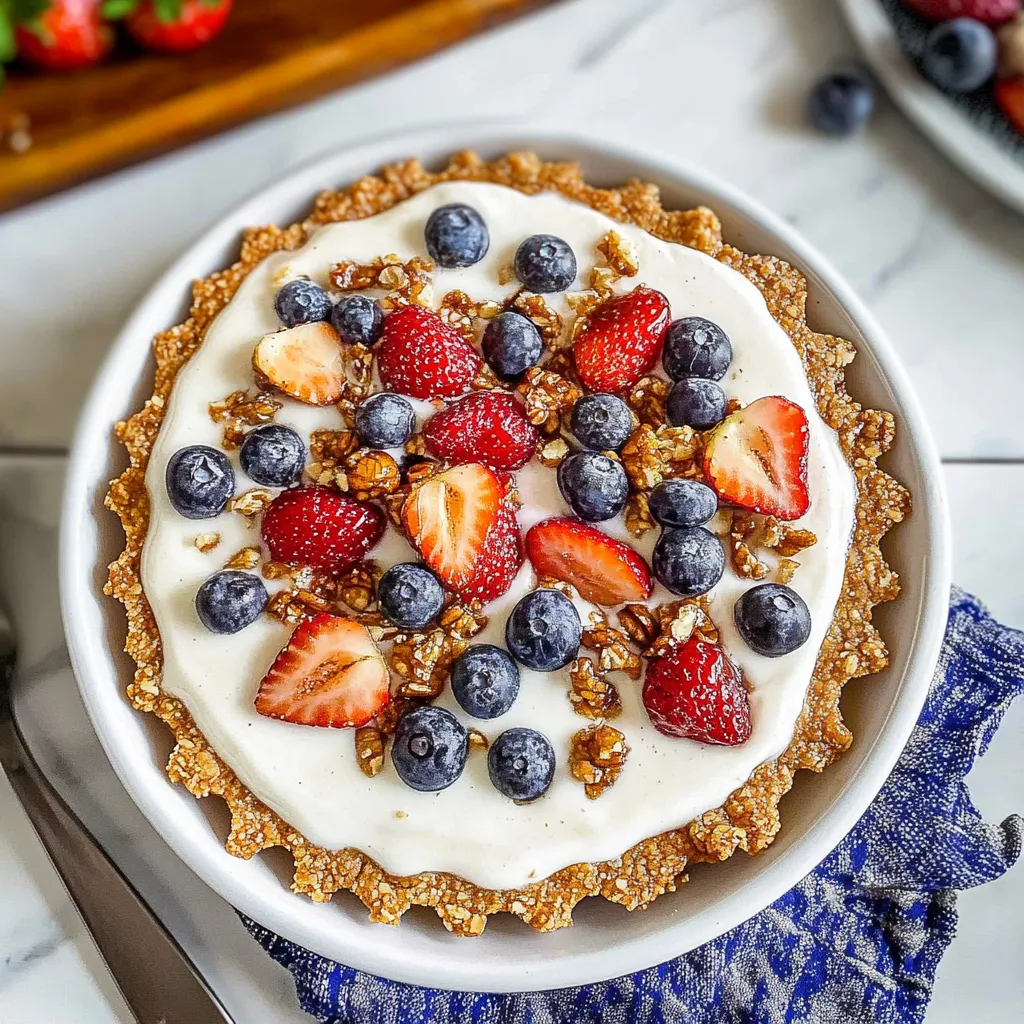
No-Bake Yogurt Pie with Date-Nut Crust: Easy & Delicious
Are you craving a dessert that’s both delicious and uncomplicated? Look no further than this delightful creation, the No-Bake Yogurt Pie with Date-Nut Crust. This refreshing dessert bursts with flavor while remaining light on the palate—a perfect treat for warm days or when you need something sweet without turning on the oven. The creamy yogurt filling pairs wonderfully with the nutty, naturally sweet date crust, making each bite a harmonious blend of textures.
What’s even more exciting is the versatility of this pie! Feel free to experiment with different yogurt flavors like berry, vanilla, or even tangy citrus for a twist. You can also add seasonal fruits or a splash of your favorite liqueur to elevate the experience. For those looking to perfect their skills, an expert tip is to ensure your yogurt is thoroughly chilled for the creamiest filling. With just a few simple steps, you’ll have a stunning dessert that impresses guests and satisfies any sweet tooth—without the need for baking!
Ingredients for No-Bake Yogurt Pie with Date-Nut Crust:
For the Date-Nut Crust:
- 1 cup Medjool dates, pitted and packed
- 1 cup raw almonds (or walnuts for a different flavor)
- ½ cup rolled oats (these add texture; gluten-free oats can be used if needed)
- 1/4 tsp sea salt (enhances sweetness and flavor)
- 2 tbsp unsweetened cocoa powder (optional, for a chocolatey twist)
- 2-3 tbsp water (to help blend the crust ingredients)
For the Yogurt Filling:
- 3 cups plain Greek yogurt (for creaminess; vanilla yogurt can be used for added sweetness)
- 1/2 cup honey or maple syrup (for sweetness; adjust to taste)
- 1 tsp pure vanilla extract (adds depth of flavor)
- 2 cups fresh fruit (such as strawberries, blueberries, or peaches; helps balance creaminess)
- 1-2 tbsp fresh lemon juice (adds brightness; adjust for your palate)
- 1 envelope unflavored gelatin (alternatively, agar-agar can be used for a vegan option)
- 1/4 cup water (to dissolve the gelatin)
Optional Toppings:
- Fresh fruit slices (kiwi, raspberries, or mandarin slices to enhance presentation)
- Chopped nuts (toasted almonds or pecans for added crunch)
- Drizzle of honey or chocolate sauce (for extra sweetness and visual appeal)
- Whipped cream (for a decadent finish; can substitute whipped coconut cream for a dairy-free option)
Suggestions for Variations:
- Add a tablespoon of almond or peanut butter to the filling for added richness.
- Swap out the Greek yogurt for dairy-free yogurt alternatives if a vegan version is desired.
- Incorporate citrus zest (like lemon or orange) into the yogurt filling for a refreshing twist.
- Consider folding in mini chocolate chips or dried fruits for added texture and flavor in the filling.
How to prepare No-Bake Yogurt Pie with Date-Nut Crust:
To create a delightful No-Bake Yogurt Pie with Date-Nut Crust, begin by making the crust. This crust will provide a flavorful base for your pie.
Create the Date-Nut Crust
Start by gathering 1 cup of pitted dates and 1 cup of mixed nuts, such as walnuts or almonds.
Place the dates and nuts into a food processor.
Pulse the mixture until it forms a sticky, crumbly texture. Ensure you stop periodically to scrape down the sides of the bowl.
Once the mixture holds together when pressed, transfer it into an 8-inch pie dish.
Using your fingers, press the mixture firmly into the bottom and up the sides of the dish.
Use a spatula to smooth out the surface evenly.
Refrigerate the crust for about 30 minutes to firm it up while you prepare the yogurt filling.
Prepare the Yogurt Filling
In a large mixing bowl, combine 3 cups of your favorite yogurt. Greek yogurt works especially well.
Add in 1/2 cup of honey or maple syrup for sweetness. Stir gently to combine.
In a separate bowl, mix 1/2 cup of heavy whipping cream with 1 teaspoon of vanilla extract.
Whip the cream until soft peaks form. This step will add lightness to the yogurt pie.
Gently fold the whipped cream into the yogurt mixture. Do this carefully to maintain the fluffiness.
Assemble the Pie
Once the crust is set, take it out of the refrigerator. Pour the yogurt filling into the chilled crust.
Spread the filling evenly with a spatula, ensuring it reaches all edges.
Cover the pie with plastic wrap and return it to the refrigerator.
Let the No-Bake Yogurt Pie chill for at least 2 hours or until firm.
Serve and Enjoy
After chilling, remove the pie from the refrigerator. Slice it into wedges and serve chilled.
For added presentation, top each slice with fresh fruit or a drizzle of honey if desired.
Your delicious No-Bake Yogurt Pie with Date-Nut Crust is now ready to enjoy!
Tips for the Perfect No-Bake Yogurt Pie with Date-Nut Crust
Maintain Ideal Temperature
Keeping ingredients at the right temperature is key to ensuring your pie has a smooth texture. Start by chilling your mixing bowl and beaters in the refrigerator. This helps the yogurt maintain its creamy consistency when whipped. Additionally, if you’re using cream cheese, let it soften slightly at room temperature for about 20 minutes before mixing. This will prevent lumps and create a velvety filling.
Select Quality Ingredients
Using high-quality yogurt makes a noticeable difference in flavor. Choose full-fat Greek yogurt for a rich and creamy pie. If you’re opting for a dairy-free version, look for options made from coconut or almond milk that contain added probiotics. When it comes to nuts and dates, fresh, unprocessed options yield the best results. Check for any preservatives or added sugars that may impact the taste.
Substitutions for Dietary Restrictions
If you have dietary restrictions, there are plenty of substitutes for this recipe. To make it vegan, swap regular yogurt with plant-based yogurt and use maple syrup or agave for sweetness. For a gluten-free option, ensure you use certified gluten-free oats in your crust.
If you prefer a nut-free version, replace the nuts in the crust with sunflower seeds or pumpkin seeds, which can provide a similar texture. You may need to adjust the quantity slightly and add some additional dates for binding.
Variations for Flavor
Experimenting with flavors can make each pie unique. Incorporate citrus zest, such as lemon or lime, into the yogurt layer for a refreshing twist. You can also mix in fresh fruit purees for added sweetness and natural color. Alternatively, try adding spices like cinnamon or vanilla extract to enhance the flavor profile further.
Chill and Set the Right Way
After assembling your dessert, allow it to chill in the refrigerator for at least four hours, but overnight is best. This time helps the pie set properly, making it easier to slice and serve. If you plan to serve the pie later, consider making it a day ahead to save time and ensure it achieves the perfect texture.
By following these tips, you can create a delicious and visually appealing dessert that satisfies your cravings while meeting dietary needs.
Storage Tips for No-Bake Yogurt Pie with Date-Nut Crust:
Maintaining the freshness of your no-bake dessert is crucial for enjoying its delightful flavors. Follow these storage tips to keep your yogurt pie with a date-nut crust in top shape.
Optimal Storage Conditions
After preparing your no-bake yogurt pie, refrigerate it promptly. Cover the pie with plastic wrap or place it in an airtight container to prevent it from absorbing odors or moisture in the fridge. A tight seal also helps prevent the crust from becoming soggy. The ideal refrigerator temperature for storing such desserts is 34°F to 40°F (1°C to 4°C).
Avoid placing the pie close to the door of the refrigerator, where temperatures fluctuate more frequently. Instead, store it on a middle shelf for consistent cold storage.
Maintaining Freshness
Your pie will taste best when consumed within 3 to 5 days of preparation. As time passes, the texture and flavor might start to degrade. If you plan to enjoy your pie later, consider slicing only the portion you will eat immediately. This keeps the remaining pie fresher for a longer time.
For added freshness, consider pouring a thin layer of yogurt on top of the pie before sealing it. This layer acts as a protective barrier, further preserving its quality.
Shelf Life and Freezing Options
If you need to store your no-bake yogurt pie for more than a week, freezing is a viable option. Slice the pie into individual portions to make thawing easier later. Wrap each piece tightly in plastic wrap and then in aluminum foil. This extra layer prevents freezer burn and preserves flavors.
Label the container with the date so that you can track its freezer life. While it remains safe to eat for up to 2 months, the flavor and texture are best within the first month after freezing.
When ready to enjoy a frozen slice, transfer it to the refrigerator for several hours or overnight to thaw. Avoid microwaving the pie, as it can alter the consistency and taste.
With proper storage techniques, you can savor your no-bake yogurt pie with date-nut crust, keeping its delightful taste intact for days to come.
Related Recipes
If you enjoyed the light and creamy texture of the no-bake yogurt pie with a date-nut crust, you will likely appreciate these similar recipes. Each one offers a unique twist while maintaining a focus on fresh flavors and healthy ingredients.
First, consider trying a Frozen Berry Yogurt Bark. This recipe combines creamy yogurt with assorted berries and a drizzle of honey. Like the yogurt pie, it offers a refreshing taste and is light on the palate. It also requires no baking and is perfect for warm days. You can customize the toppings to match your preferences, making it a versatile choice.
Next up is a Coconut Chia Pudding. This dish uses coconut milk and chia seeds, resulting in a creamy treat that’s rich in nutrients. Chia seeds thicken the pudding much like the yogurt sets the pie. You can top it with fruits or nuts, mimicking the flavors found in the pie’s crust, creating a harmonious dessert option.
Another delightful option is a Banana-Oat Energy Bites recipe. These energy bites use oats and bananas, offering a wholesome snack that’s easy to eat on the go. They share the same wholesome spirit as the date-nut crust, delivering a satisfying taste while packing in nutrients.
Lastly, consider making a Fruit Salad with Honey-Lime Dressing. This light dish pairs perfectly with any dessert. The honey-lime dressing brightens the flavors much like the yogurt does in the pie. It provides a fresh contrast to the sweet and nutty elements of the crust, making your meal both flavorful and balanced.
All these recipes complement the yogurt pie well, creating a feast that highlights health and taste in equal measure.
Frequently Asked Questions:
What are the key ingredients in a No-Bake Yogurt Pie with Date-Nut Crust?
The primary components of a No-Bake Yogurt Pie with Date-Nut Crust include creamy yogurt, which offers a smooth texture and tangy flavor, as well as a crust made from blended dates and nuts. This crust not only adds a natural sweetness but also provides a delightful crunch that complements the creamy filling. Additional ingredients may include honey or maple syrup for extra sweetness, vanilla extract for flavor enhancement, and sometimes a splash of lemon juice to balance the richness of the yogurt.
How do I make the crust for this pie?
Creating the crust for this delightful dessert involves processing dates and nuts in a food processor until a sticky mixture forms. You typically mix ingredients such as walnuts or almonds with pitted dates, pressing the mixture into the bottom of a pie dish or tart pan. The crust should be firm yet pliable, providing a sturdy foundation for the yogurt filling. Once pressed in place, it sets in the refrigerator, allowing the flavors to meld beautifully before adding the topping.
Can I substitute ingredients in the pie filling?
Absolutely! The beauty of a No-Bake Yogurt Pie with Date-Nut Crust is its versatility. You can substitute regular yogurt with Greek yogurt for a thicker texture, or opt for dairy-free alternatives like coconut yogurt if you prefer a vegan option. Sweeteners can also be adjusted; feel free to use agave nectar, stevia, or whatever suits your dietary needs while preserving the sweetness of the pie.
How long does this pie last in the refrigerator?
When properly stored in an airtight container, a No-Bake Yogurt Pie typically lasts about 3 to 5 days in the refrigerator. However, for optimal freshness and texture, it’s best enjoyed within the first couple of days. The crust may soften over time, so serving it sooner enhances the overall experience and keeps that delightful crunch intact.
Can I freeze the No-Bake Yogurt Pie?
Yes, you can freeze this delectable dessert! To freeze, be sure to wrap it tightly in plastic wrap or aluminum foil, or store it in a freezer-safe container. The pie can usually be frozen for up to three months. When you’re ready to enjoy it, simply let it thaw in the refrigerator overnight for the best results.
What toppings pair well with this yogurt pie?
There are countless toppings that can elevate your No-Bake Yogurt Pie with Date-Nut Crust. Fresh fruits such as berries, sliced bananas, or kiwi add a burst of flavor and color. You could also drizzle honey or chocolate sauce for added sweetness or sprinkle nuts, seeds, or granola on top for more texture. Whipped cream or a dollop of nut butter are also excellent choices to finish off your dessert beautifully.
Conclusion:
In summary, the No-Bake Yogurt Pie with Date-Nut Crust is a delightful and straightforward dessert that everyone can enjoy. This recipe shines with its simplicity, requiring no baking while allowing for easy preparation. The crust, crafted from dates and nuts, adds a natural sweetness and a satisfying crunch, making it a great alternative to traditional pie crusts. Moreover, the filling is incredibly flexible—feel free to substitute different yogurts or add fruits and flavorings to tailor it to your taste. With such customization options, you can create a version that suits any occasion. Whether you’re entertaining guests or simply treating yourself, this delightful pie is sure to impress. Embrace creativity with this versatile recipe and enjoy a guilt-free dessert that satisfies your sweet tooth while being wholesome and delicious.
Print
No-Bake Yogurt Pie with Date-Nut Crust: Easy & Delicious
- Total Time: 15 minutes
- Yield: Serves 8
Description
This refreshing, no-bake yogurt pie is the perfect fuss-free dessert. It features a naturally sweet date-nut crust and a creamy, tangy yogurt filling—light, wholesome, and totally satisfying.
Ingredients
For the crust:
-
1 cup pitted dates
-
1 cup raw almonds (or walnuts)
-
1 tbsp coconut oil (optional)
For the filling:
-
2 cups Greek yogurt (plain or flavored)
-
¼ cup honey or maple syrup
-
1 tsp vanilla extract
-
1 tbsp lemon juice
-
Fresh berries (optional, for topping)
Instructions
-
Make the crust: Blend dates and nuts in a food processor until crumbly. Press mixture into a pie dish to form a crust. Chill in fridge.
-
Prepare filling: In a bowl, mix yogurt, honey/maple syrup, vanilla, and lemon juice until smooth.
-
Assemble: Pour yogurt mixture into chilled crust. Smooth the top.
-
Chill: Refrigerate for at least 2–4 hours or until firm.
-
Serve: Top with fresh berries before serving.
Notes
-
Use flavored yogurt for variety (like vanilla, strawberry, or lemon).
-
For a firmer texture, stir in 1 tsp unflavored gelatin (bloomed and dissolved).
-
Store leftovers in the fridge for up to 3 days.
- Prep Time: 15 minutes
- Cook Time: 0 minutes
Nutrition
- Calories: 210
- Sugar: 17g
- Sodium: 40mg
- Fat: 11g
- Carbohydrates: 22g
- Fiber: 3g
- Protein: 8g