
Walking Desserts: Sweet Treats You Can Enjoy Anywhere
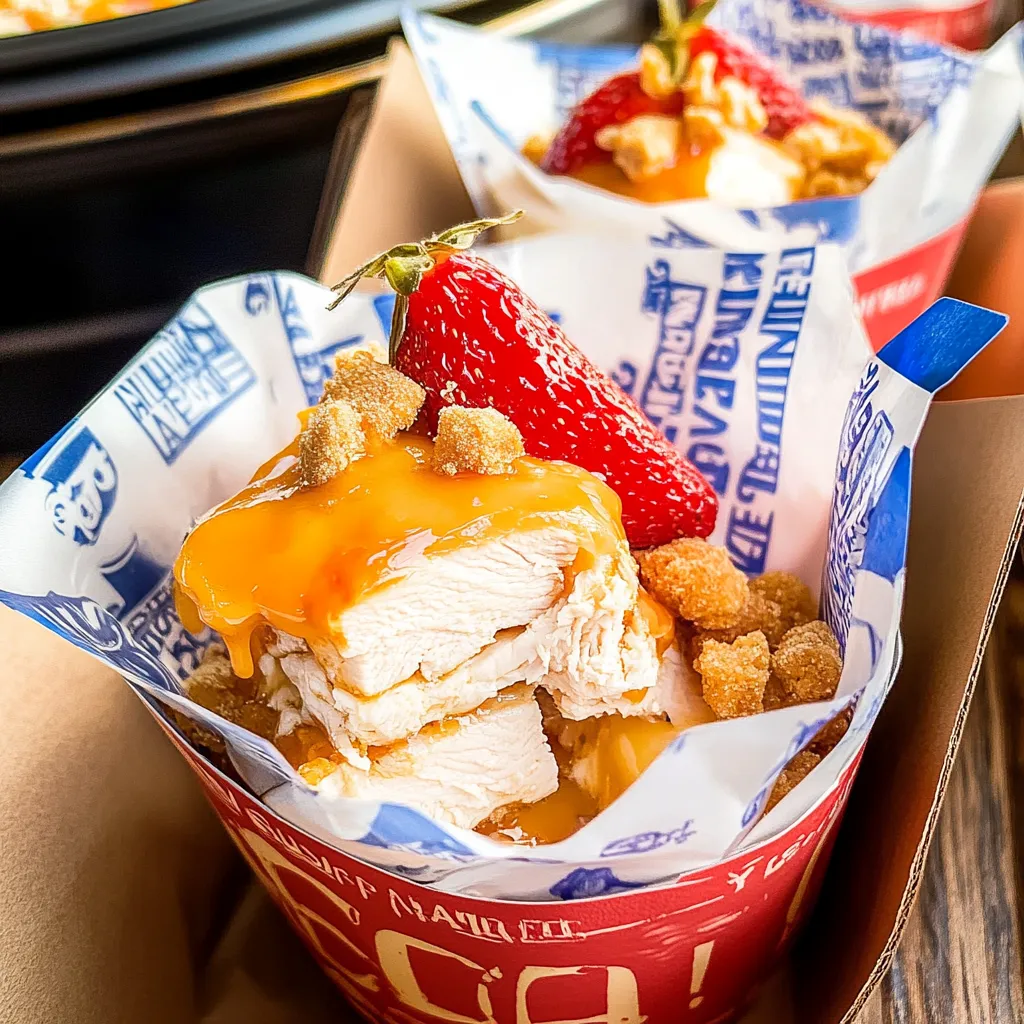
Imagine indulging your sweet tooth while on the go! Enter the delightful world of Walking Desserts, the ultimate fusion of convenience and decadence. Whether you’re at a bustling fair, hosting a backyard barbecue, or simply craving a portable treat, these innovative desserts make it easy to satisfy your cravings without interrupting your day. Picture mini pies bursting with flavor, cookies on a stick, or layered parfaits in charming cups—all designed for easy enjoyment.
The beauty of Walking Desserts lies in their versatility. You can experiment with flavors, textures, and shapes to suit any occasion. Want to create a colorful fruit medley? Try skewering assorted fruits with a drizzle of chocolate. Or, if you’re feeling adventurous, whip up bite-size cheesecakes that can be elegantly enjoyed anywhere. Remember, the key to achieving the best results is in the balance of flavors and maintaining the right temperature for serving. Get ready to take your dessert game to the next level, all while keeping it fun and functional!
Ingredients for Walking Desserts:
This recipe for walking desserts serves 8 to 10 people and combines a variety of delightful flavors and textures. Each ingredient is chosen to deliver an exquisite taste experience that is easy to prepare and serve. Let’s gather everything needed!
Base Ingredients:
- 2 cups of graham cracker crumbs
- 1/2 cup of unsweetened cocoa powder
- 1/2 cup of granulated sugar
- 1/2 cup of unsalted butter, melted
- 2 cups of mini marshmallows (or regular marshmallows cut into small pieces)
Layers and Fillings:
- 1 cup of creamy peanut butter (or almond butter for a nut-free alternative)
- 1/2 cup of powdered sugar
- 1 teaspoon of vanilla extract
- 1 cup of chopped fresh strawberries (or any seasonal fruit like bananas or peaches)
- 1 cup of homemade whipped cream or store-bought for convenience
Decorative Toppings:
- 1/2 cup of dark chocolate chips (or white chocolate for a sweeter twist)
- 1/4 cup of crushed nuts for crunch (such as walnuts or pecans, optional)
- 1/4 cup of colorful sprinkles (to add a festive touch)
Alternative Ingredients and Variations:
- Try using flavored yogurt instead of whipped cream for a tangy twist; vanilla or Greek yogurt works well.
- Add a layer of caramel sauce between the layers to enhance sweetness and add a rich flavor.
- For a tropical version, incorporate coconut flakes and pineapple chunks into the filling.
- If gluten-free, substitute graham cracker crumbs with gluten-free options like crushed gluten-free cookies.
Gather these ingredients, and you’re ready to create a delectable and fun dessert that’s perfect for gatherings, parties, or casual family dinners. Stay tuned for the preparation steps for creating unforgettable walking desserts!

How to prepare Walking Desserts:
Creating delicious walking desserts is simpler than you think. Follow these easy steps to assemble fun and tasty treats perfect for parties or gatherings.
Step 1: Gather Your Ingredients
Begin by collecting all necessary ingredients. You will need cake pops, mini donuts, fresh fruit, and whipped cream. Feel free to mix in other favorites like brownies or cookies.
Step 2: Choose Your Base
Select a sturdy base for your desserts. Options include cake pops or mini donut holes. Ensure they are firm enough to be easily held while walking.
Step 3: Prepare the Fruit
Wash and cut your fresh fruit into bite-sized pieces. Strawberries, bananas, and blueberries work exceptionally well.
Step 4: Skewer the Ingredients
Take wooden skewers or cocktail sticks. Begin by threading a cake pop or mini donut onto the skewer. This will serve as the first layer of your walking dessert.
Step 5: Add Fruit Layers
After the base, add a piece of prepared fruit onto the skewer. Alternate between the cake pop or donut and the fruit. This creates a balance of flavors.
Step 6: Offer Variety
Mix and match different fruits and bases on your skewers to provide different flavors in every bite. Consider various fruits to elevate the taste.
Step 7: Drizzle with Toppings
Once your skewers are ready, drizzle with your choice of toppings. Flavored sauces or melted chocolate enhance the dessert and add sweetness.
Step 8: Add a Creamy Finish
Top your walking desserts with whipped cream. You can either pipe it along the skewer or serve it in a small cup for dipping.
Step 9: Chill and Serve
If time allows, chill assembled desserts in the fridge for about 30 minutes. This step adds a refreshing touch, especially on warm days.
Step 10: Presentation is Key
Arrange your walking desserts on a platter for a stunning presentation. Use colorful skewers or fun paper wraps for added flair.
Once prepared, these delightful desserts are ready to impress your guests as they enjoy delicious bites on the go!
Tips for the Perfect Walking Desserts
Creating delicious walking desserts can be a delightful challenge. With a few helpful tips, you can ensure your treats shine and impress your party guests. Here’s how to master them!
Maintain the Right Temperature
Temperature plays a crucial role in serving desserts that are both delicious and safe to eat. For creamy or custardy desserts, keep them chilled until serving time. Use insulated containers or ice packs to maintain coolness. If your recipe involves chocolate, remember that the ideal serving temperature is slightly warmer than room temperature to ensure a smooth texture. For baked goods, allow them to cool completely before serving to avoid a messy experience.
Use Quality Ingredients
Quality ingredients can make a world of difference in your desserts. Opt for fresh fruits, pure vanilla extract, and high-quality chocolate. Fresh ingredients elevate flavors and enhance the overall experience. When baking, use unsalted butter so you can better control the saltiness of your dessert. Freshly whipped cream adds an airy texture that store-bought varieties can’t match, so whip your own if you can.
Make Suitable Substitutions
Dietary restrictions should not hinder the enjoyment of delicious walking desserts. If you have guests with gluten intolerance, use gluten-free flour blends or almond flour. You can substitute dairy ingredients with almond milk or coconut cream for a non-dairy option. For those avoiding sugar, try natural sweeteners like honey or maple syrup. Make sure to adjust the quantities, as these substitutes may have varying sweetness levels compared to traditional sugar.
Portion Control for Easy Handling
When designing your walking desserts, keep portion size in mind. Smaller, bite-sized portions offer guests the joy of sampling multiple desserts without overwhelming them. Use cookie cutters or molds to shape mini treats, making them easy to grab and enjoy. Consider using colorful paper liners to keep individual portions tidy and appealing.
Presentation Matters
Even simple desserts need a touch of visual appeal. Use decorative plates or tiered stands to display your treats, and add garnishes like fresh mint, edible flowers, or a drizzle of sauce. A well-presented dessert not only tastes better but also enhances the entire dining experience. Invest time in making your walking desserts visually inviting, and your guests will appreciate the effort!
By adhering to these tips, you’ll ensure that your walking desserts are not only delightful but also a hit at any gathering!
Storage Tips for Walking Desserts:
Storing walking desserts properly ensures they remain tasty and fresh. These portable treats can be sensitive to temperature and moisture, so follow these guidelines for optimal storage.
Maintain Freshness of Your Treats
To keep walking desserts fresh, store them in airtight containers. This prevents exposure to air, which can lead to drying out or becoming stale. You can use resealable bags as an alternative if you want to save space. Before sealing, remove as much air as possible to enhance freshness.
Optimal Storage Conditions for Walking Desserts
Temperature significantly impacts the shelf life of your desserts. Store them in a cool, dry place away from direct sunlight and heat sources. Ideally, keep them at room temperature. However, if your walking desserts contain perishable ingredients like dairy or fruit, refrigerate them to prevent spoilage. Always wrap these desserts well in plastic wrap or foil before placing them in the refrigerator.
Shelf Life of Walking Desserts
The shelf life varies depending on the ingredients. Most walking desserts maintain their quality for 2-3 days at room temperature. If you store them in the refrigerator, they can last up to a week. Check for signs of spoilage, such as a change in smell or texture, before consuming. Freezing is also an option for extending shelf life. Wrap desserts tightly in cling film and place in an airtight container. They can typically be frozen for up to three months. Just make sure to defrost them properly at room temperature before enjoying.
Additional Tips for Best Results
For added flavor, consider adding a slice of bread or an apple in the storage container. These add moisture and help keep your treats soft. Avoid stacking the desserts too tightly in the container, as this can cause them to squish or lose their shape. When you transport these desserts, use sturdy packaging to prevent breakage. If you plan to serve them later, consider just taking out what you need to maintain the others’ freshness.
By following these storage tips, you can enjoy your walking desserts fresh and delicious, no matter when you choose to indulge!
Related Recipes for Your Sweet Adventure
Walking desserts are delightful treats that you can easily enjoy on the go. To enhance your dessert experience, consider trying these related recipes. Each offers a unique twist while keeping the hand-held concept alive.
First, think about Mini Cheesecake Bites. These tiny desserts feature a creamy cheesecake filling within a crunchy graham cracker crust. Much like walking desserts, you can pick them up and savor them without a fork. Their small size makes them perfect for gatherings, where guests can enjoy them while mingling.
Next, consider making Fruit Kabobs with Yogurt Dip. These colorful skewers combine fresh fruits like strawberries, melons, and grapes. They provide a refreshing counterpoint to the rich flavors of walking desserts. The yogurt dip offers a creamy balance, satisfying cravings for both sweetness and tang. This fun presentation not only mirrors the convenience of walking desserts but also encourages snacking.
Lastly, explore Chocolate-Dipped Pretzel Rods. These treats blend sweet and salty flavors. They are easy to carry, allowing you to indulge while on the move. Decorating them with sprinkles or nuts adds a personalized touch, making them ideal for parties or casual gatherings.
In summary, all these recipes complement walking desserts by combining portability with inviting flavors. They allow for creativity and fun, making them perfect additions to any dessert spread. Enjoy these recipes and keep the sweet adventure going!
Frequently Asked Questions:
What are walking desserts?
Walking desserts refer to portable sweet treats that can easily be enjoyed on the go. These delightful confections often come in handy as bite-sized snacks, allowing you to indulge in sweet flavors without needing a formal sit-down setting. Examples include cupcakes on a stick, dessert taco cups, or mini parfaits served in jars, all designed for easy handling and consumption.
How do I serve walking desserts at a party?
When it comes to serving portable treats at a gathering, presentation is key. Arrange your walking desserts on tiered stands or decorative platters for an eye-catching display. You can also utilize petite cups or individual jars for guests to easily grab and enjoy. Don’t forget to include napkins and perhaps a small sign showcasing the dessert’s name or ingredients, enhancing both ease and enjoyment.
Can I make walking desserts ahead of time?
Absolutely! Many portable desserts can be prepared in advance, which enhances convenience for your event. Consider making mini cakes, cookie dough bites, or even frozen treats, and store them in airtight containers. Just ensure to follow safe food storage practices to maintain freshness, allowing you to relax and enjoy the occasion without last-minute prep.
Are walking desserts suitable for special diets?
Yes! It’s entirely possible to create walking sweets that cater to various dietary needs. For those who prefer gluten-free options, consider utilizing almond flour for cupcakes, or substitute typical ingredients with vegan-friendly alternatives for lactose-free versions. Always check the preferences of your guests and clearly label your treats to avoid any dietary mishaps.
What type of flavors are popular in portable sweets?
When it comes to flavors, walking desserts can be as varied as your imagination allows. Classic favorites like chocolate, vanilla, and strawberry often shine, while more adventurous combinations like salted caramel or matcha-infused goodies can surprise your guests. Seasonal flavors like pumpkin spice or berry medleys also add a creative twist, making your treats even more appealing.
How can I customize my walking desserts for an event?
Customizing portable treats for an occasion involves incorporating themes or flavors that resonate with your event. You could decorate them with seasonal toppings, edible glitter, or themed colors. Personalized tags, such as names or fun messages, can also be attached to each dessert for a special touch. Creativity truly knows no bounds when it comes to making these delightful confections memorable.
Conclusion:
Walking desserts offer a delightful and versatile way to enjoy sweet treats on-the-go. This recipe showcases the simplicity of creating these handheld delights, allowing you to mix and match your favorite flavors and textures. Whether you prefer the classic combination of fruits and chocolate or the more adventurous twists with spices and zests, the customization options are endless. Additionally, these delightful treats are perfect for parties, picnics, or casual gatherings, making them a hit for any occasion. Remember, use fresh ingredients and be creative with your presentations to elevate your walking desserts. By following the tips provided, you’ll be set to impress your guests with a fun and delicious dessert experience. So roll up your sleeves and get started on making these irresistible bites that are sure to satisfy any sweet tooth!
Print
Walking Desserts: Sweet Treats You Can Enjoy Anywhere
- Total Time: 20 minutes
- Yield: 8 walking desserts 1x
- Diet: Vegetarian
Description
Walking Desserts are portable, no-mess treats served in cups or bags—perfect for parties, picnics, and on-the-go cravings. Just layer sweet ingredients and enjoy with a spoon while you walk!
Ingredients
— Choose a Base —
Crushed cookies (Oreos, graham crackers, vanilla wafers)
Mini brownies or cake cubes
Churro bites or donut holes
— Fillings & Layers —
Pudding (vanilla, chocolate, or banana)
Whipped cream or Cool Whip
Fresh fruit (berries, bananas, diced apples)
Chocolate chips, sprinkles, or crushed candy bars
Mini marshmallows or caramel drizzle
— Containers —
8 clear plastic cups or small resealable bags
Plastic spoons
Instructions
1. Prepare all your ingredients and lay them out in a topping bar or assembly station.
2. Choose a base (cookies, brownies, cake) and add 2–3 spoonfuls to the bottom of each cup or bag.
3. Layer with pudding, whipped cream, and fruits.
4. Add a second layer of base and more toppings.
5. Finish with sprinkles, chocolate chips, or a drizzle of caramel.
6. Insert spoon into each and serve immediately or chill until ready.
Notes
Customize with any sweet combo you love—s’mores, banana pudding, or red velvet.
Perfect for kids’ parties, outdoor events, or DIY dessert bars.
Keep chilled if using dairy-based fillings.
- Prep Time: 20 minutes
- Cook Time: 0 minutes
- Category: Dessert
- Method: No-Bake
- Cuisine: American
Nutrition
- Serving Size: 1 cup
- Calories: 220
- Sugar: 18g
- Sodium: 120mg
- Fat: 10g
- Saturated Fat: 6g
- Unsaturated Fat: 3g
- Trans Fat: 0g
- Carbohydrates: 30g
- Fiber: 1g
- Protein: 3g
- Cholesterol: 20mg
Keywords: walking desserts, portable treats, layered sweets, dessert cups, party snacks